2001: A Space Shuttle
Building the large Orion III model from 2001: A Space Odyssey
At over 30 inches long, this model kit from Moebius is quite a table or shelf dominator and about 3/4 the size as the studio miniature built for the film which was reportedly about 42 inches in length.
REMEMBER: You can click on the pictures for higher resolution views that show more detail.
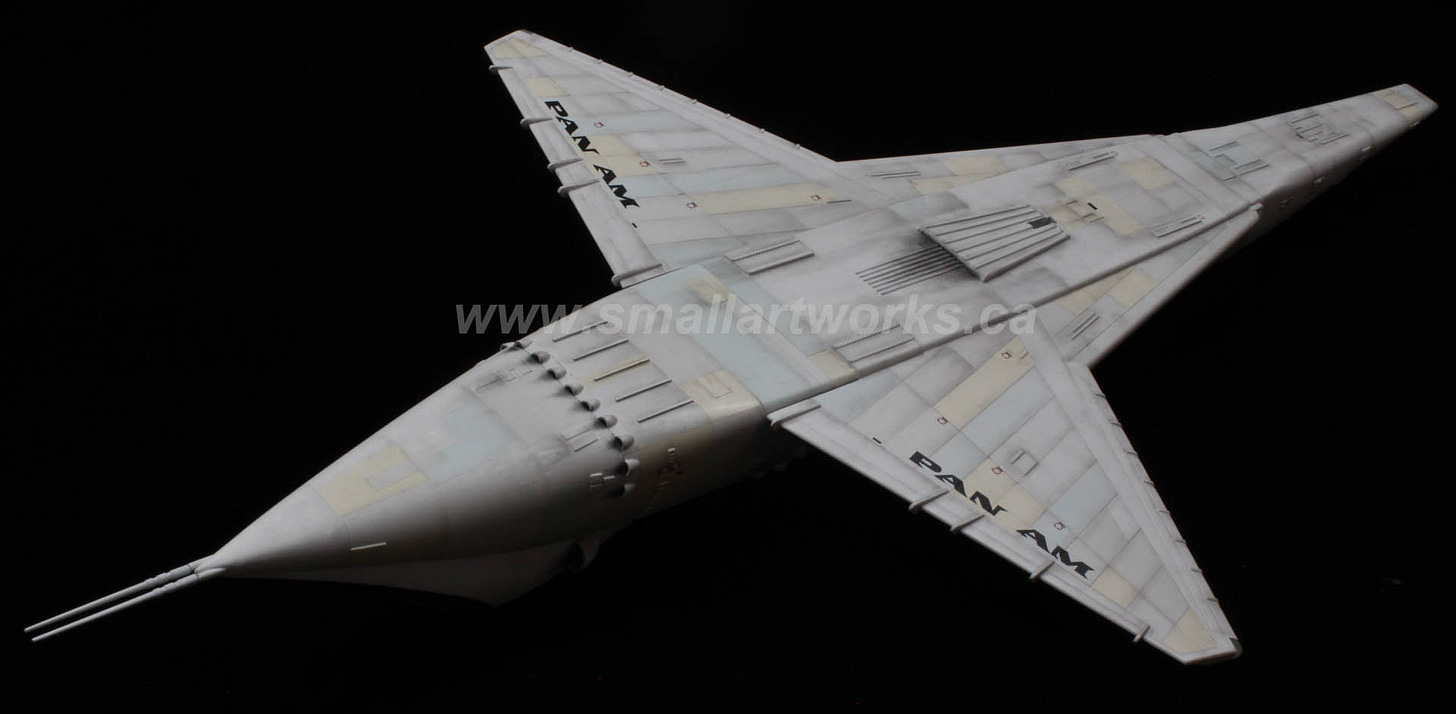
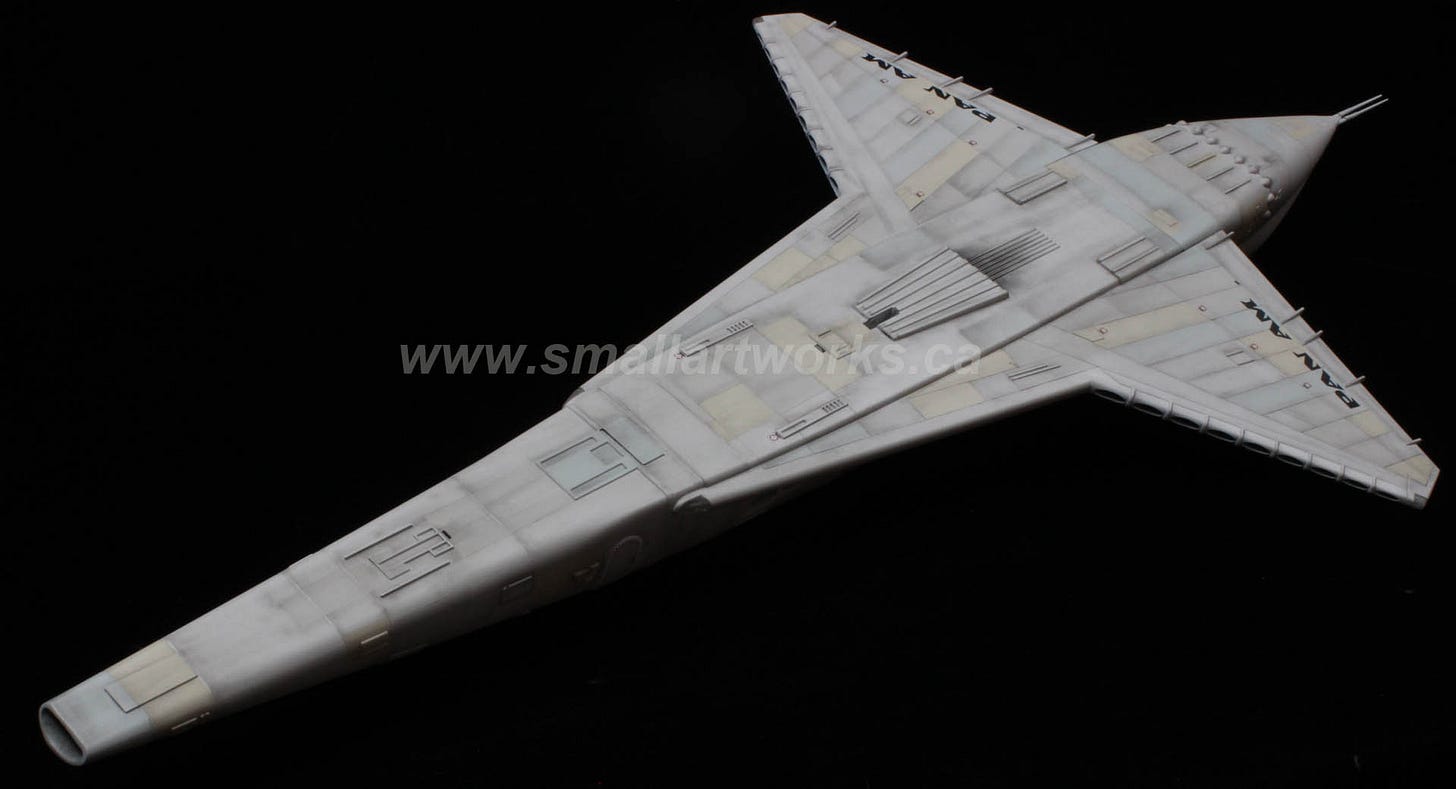
Although the studio miniature used for the film was seen in just five shots, only two or three clearly, it was on screen long enough to make an impression. The picture above is a photo of the finished Moebius kit lit and shot to somewhat match the model as seen in the film at its best here:
All the scenes of the model shown in the first four shots of it in the film were actually still photographs of the miniature animated with camera moves (I believe using an animation stand or similar the way cartoons are photographed) and composited over the background. The only time we see the ship actually moving were the final two shots of it spinning to match the rotation of Space Station V as it docks. The same techniques used in the film were later adapted to television’s “Space: 1999” by VFX maestro Brian Johnson (who also worked on “2001”) about 5 years later for many outer space visual effects shots.
One main deviation I took from the original filming miniature at the request of the client was to install lights which were not seen in the movie, but nevertheless assumed to be a part of the “real” ship’s operation. So I added exterior and interior lights to the model which Moebius thought to provide clear parts for in the kit. These included a battery of nine LEDs in total. Four in the passenger cabin, one in the cockpit, two wingtip navigation lights and two “headlights” at the leading edge root extension of the wings.
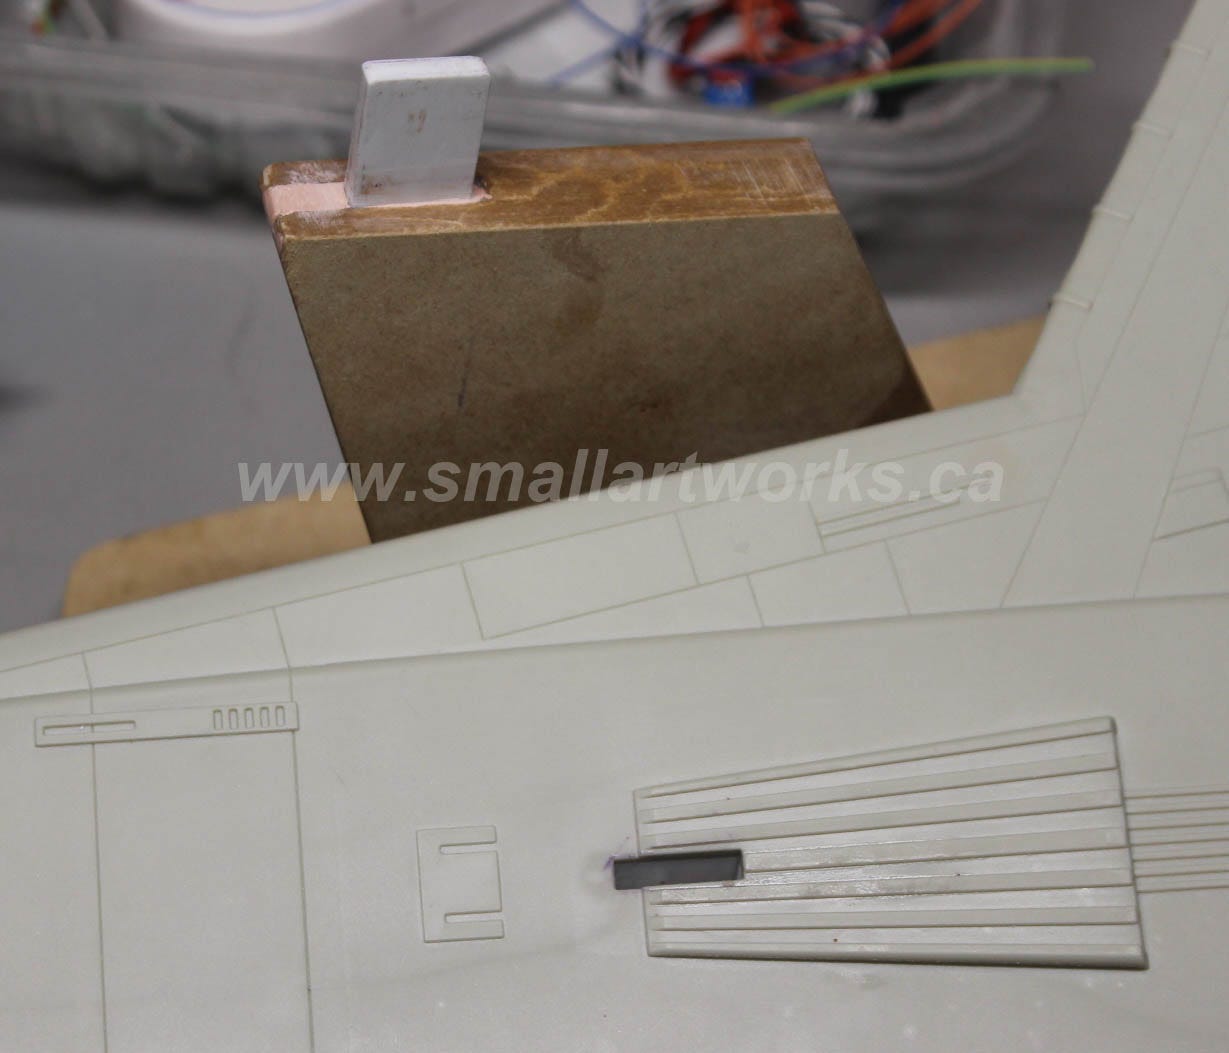
Construction began by planning the lighting and modifying the kit accordingly. One of the first things I did was toss the terrible display stand that came with the kit. Despite its size, the stand is typical of Moebius’ products which emulate the old Aurora style which I wish they would get rid of. Those are OK for a model weighing an ounce or two and six inches long, but no good for a model of this size. Too brittle and far too flimsy. I made a new stand from MDF with a heavy plastic “tongue” which adapted to the existing hole in the bottom of the fuselage…
…and also built a reinforced receptacle from 1/8th inch thick styrene sheet inside the model to make it much more sturdy. Measurements were carefully made to make sure these modifications would not impede the placement of the passenger cabin interior which would be installed over it.
The interior was put together and painted with a lot more care than really needed, as 95% of it would not be visible through the 1/4 inch plastic windows once the model was finished. A figure of Heywood Floyd and the stewardess from an aftermarket source were quickly painted and added to the interior. Four LEDs, three in the ceiling and one directly above Floyd via a mirrored surface, to match what was seen in the film, were added to illuminate the space. Despite all this illumination, the black seats and small windows render the lighting almost ineffective unless you view the model in near darkness. But actually this is realistic. Although all the lights are on in a typical modern airliner’s passenger cabin as you watch it taxiing out to the runway, you’d never know it unless it was very dark outside.
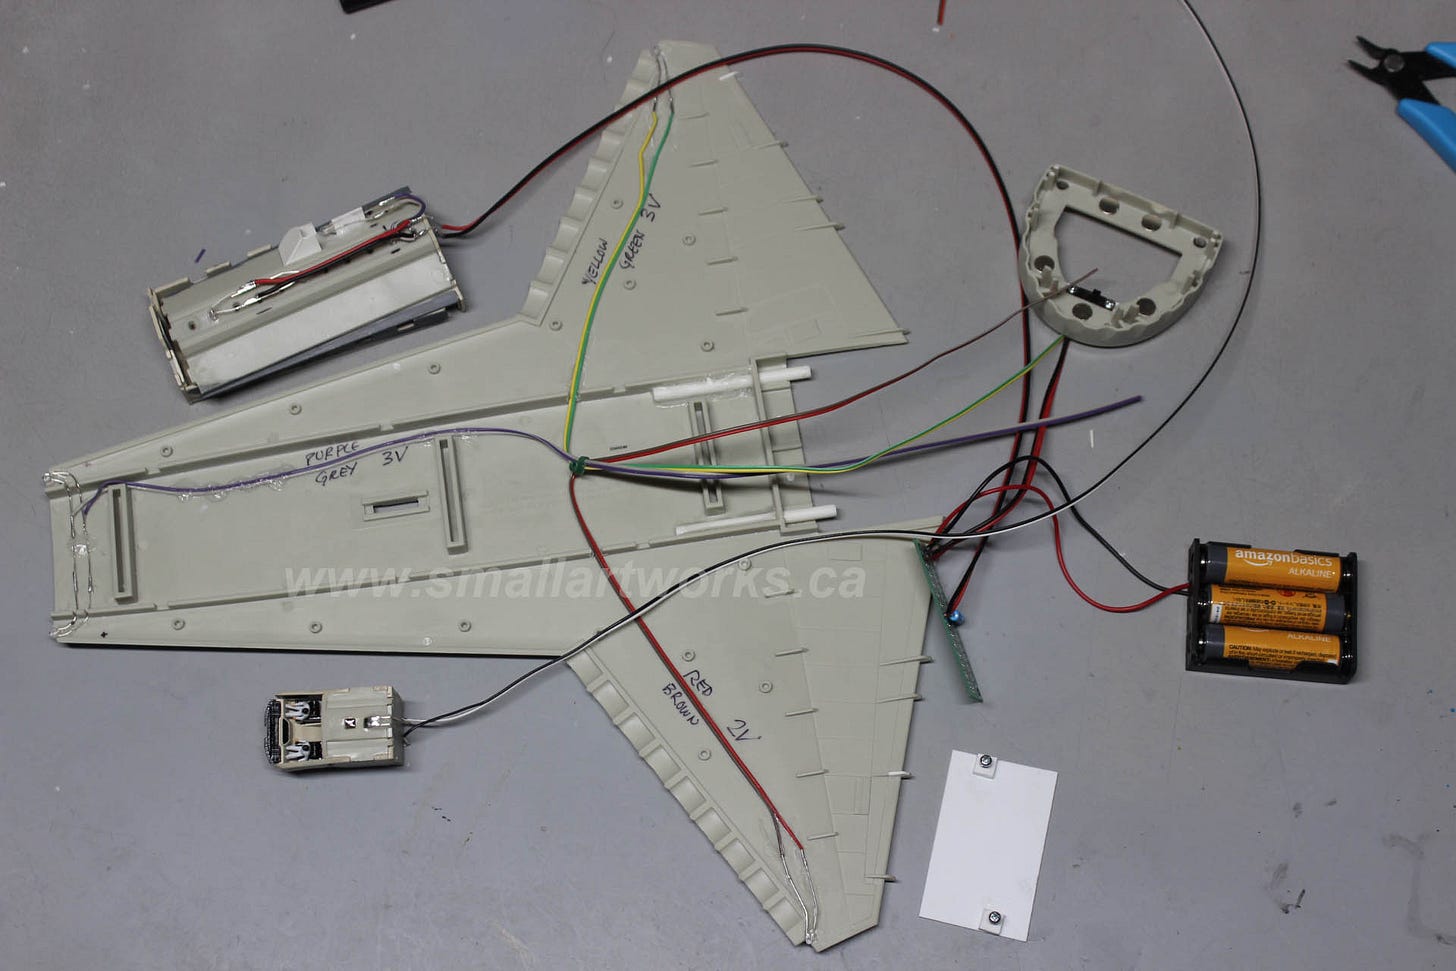
The rest of the wiring was completed as shown in the next photograph which utilized one of my printed circuit boards that I had custom made exclusively to suit the type of work I do when lighting a model. The lights were tested over and over again at all stages of construction, since once the model was all glued together, there was no way the LEDs could be replaced.
I installed stiff 1/8 inch steel “rails” inserted into tubes that allow the tail section to slide away from the main fuselage, taking advantage of a natural joint in the model. This allows batteries to be installed and replaced as well as allowing the switch to be completely hidden. magnets help to hold the tail section in place when slid shut. The switch can be seen positioned just above the battery pack which can slide out on its own set of “rails”, essentially a shelf which has captive sides.
The completed model, almost ready for painting. The cockpit window is the only thing remaining at his point…
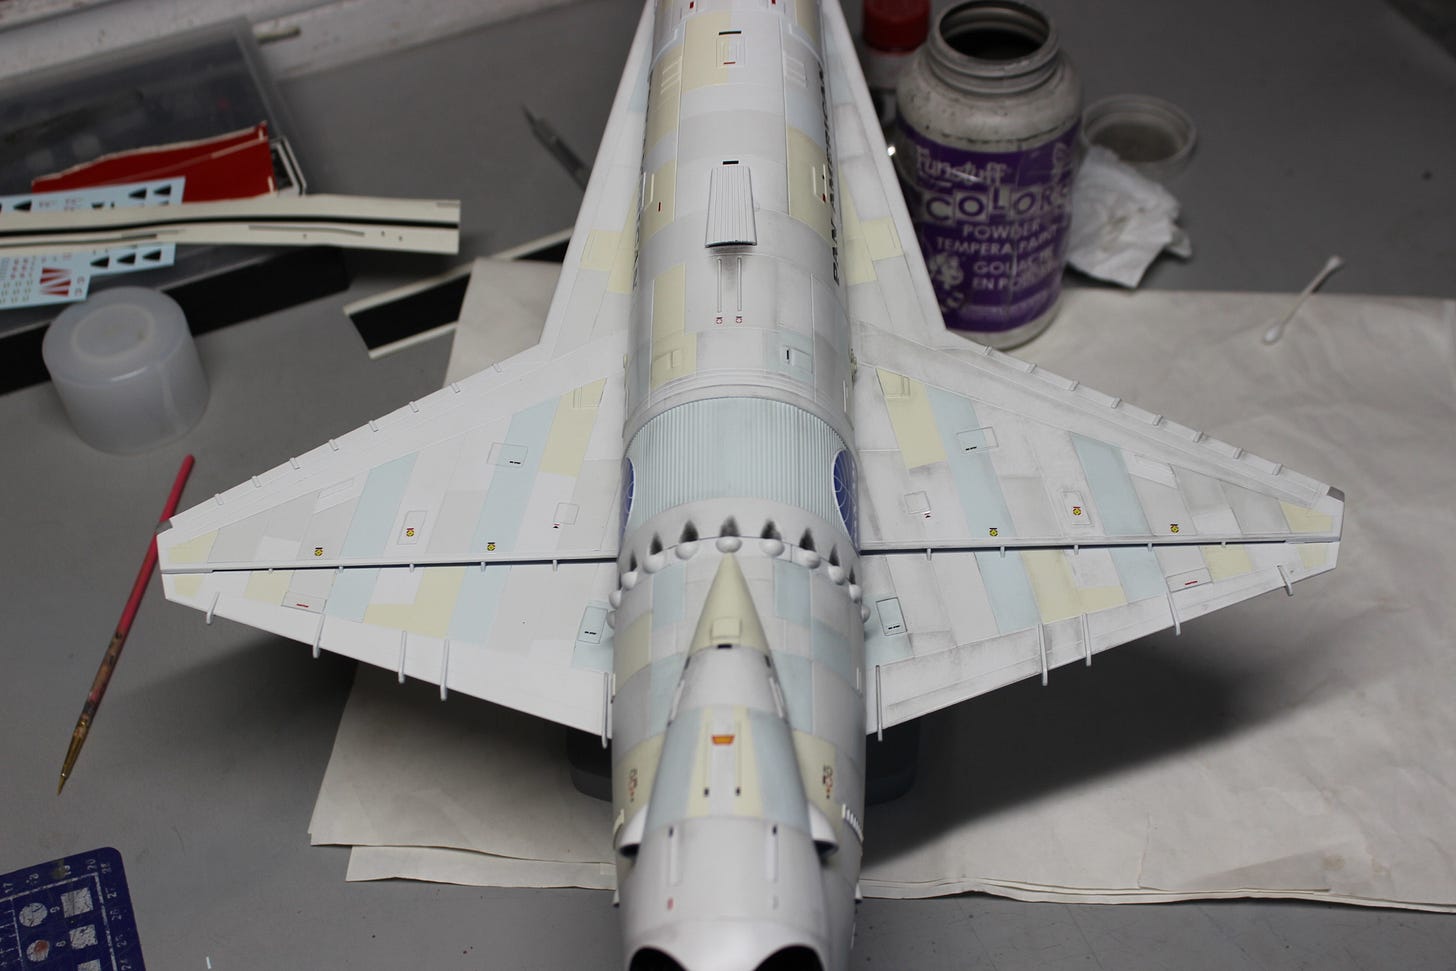
The windows were next masked off and the entire model painted with a cool, off white paint and then, following a diagram which someone had done previously (my client ran across it somewhere on the Internet revealing the placement of the many coloured paneling details), the blue, gray and warm white panels were added. This was the most tedious job of the buildup and took a long time, as they all had to be masked and sprayed individually. Decals from an aftermarket source were then added, as the kit did not come with the correct “‘Pan Am” markings due to copyright reasons.
After all this was done, weathering was applied using gray powder paint with a small artist’s brush. This move may be controversial to some, as it appears that the original miniature was not weathered, relying only on harsh lighting for realism. But in my opinion, the model looked far too toylike and unfinished without it, especially since it was going to be displayed in a normal environment. In the photo below, you can see the difference. The right wing and part of the fuselage is weathered, the left wing shown here before weathering. It brings out details and appears more realistic.
After the weathering was done, the entire model was dusted with a matte finish and the stand was sprayed black, resulting in the model you see in the following pictures.
Enjoy, and please leave comments below. Please also SHARE this post at will and subscribe to the Small Art Works newsletter so that you can be informed of any new projects that come along!









That is One beutiful model. Great work (again) ;-) Love it !