


Anthony Altino's Awaited and Alluring "Altares" Adventure
The Day After Tomorrow is Here Now...

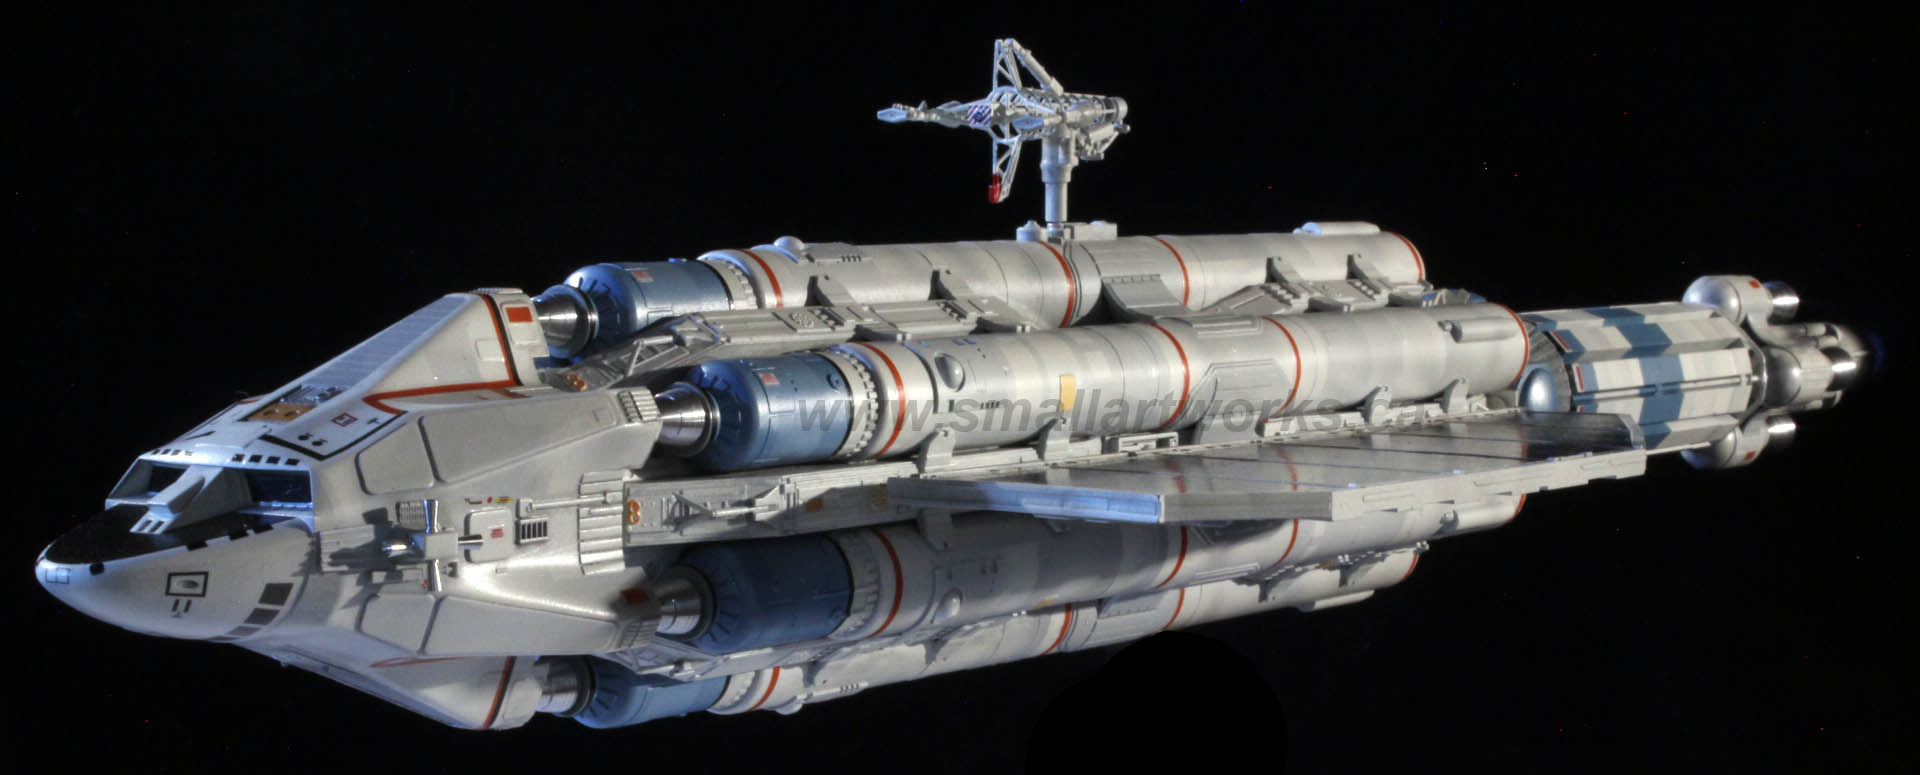
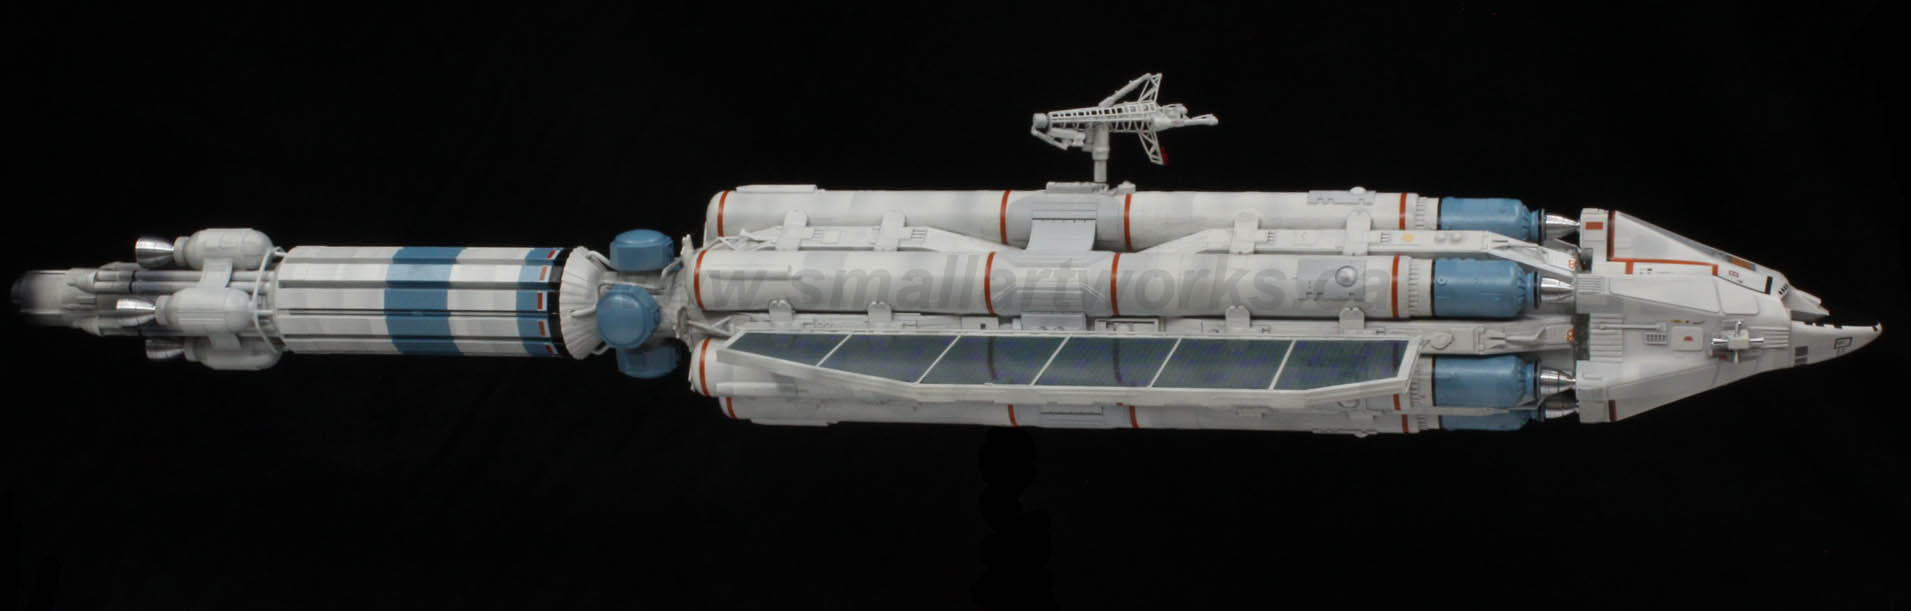
All alliterations aside (see what I did there?), this has been a project I have wanted to build for decades. The Day After Tomorrow was a one-off pilot episode for an educational TV program by Gerry Anderson, made between the first and second seasons of Space: 1999. The show featured the Lightship Altares spacecraft, built by Martin Bower in two sizes (a 6 foot and 3 foot model, plus a larger partial model for closeups of the engines) and was heavily influenced by the styles used in Space 1999, notably the Ultraprobe and the Metaprobe seen during the first season. The pilot episode went pretty much unnoticed by all but a few fans when it ran and no further episodes were made.
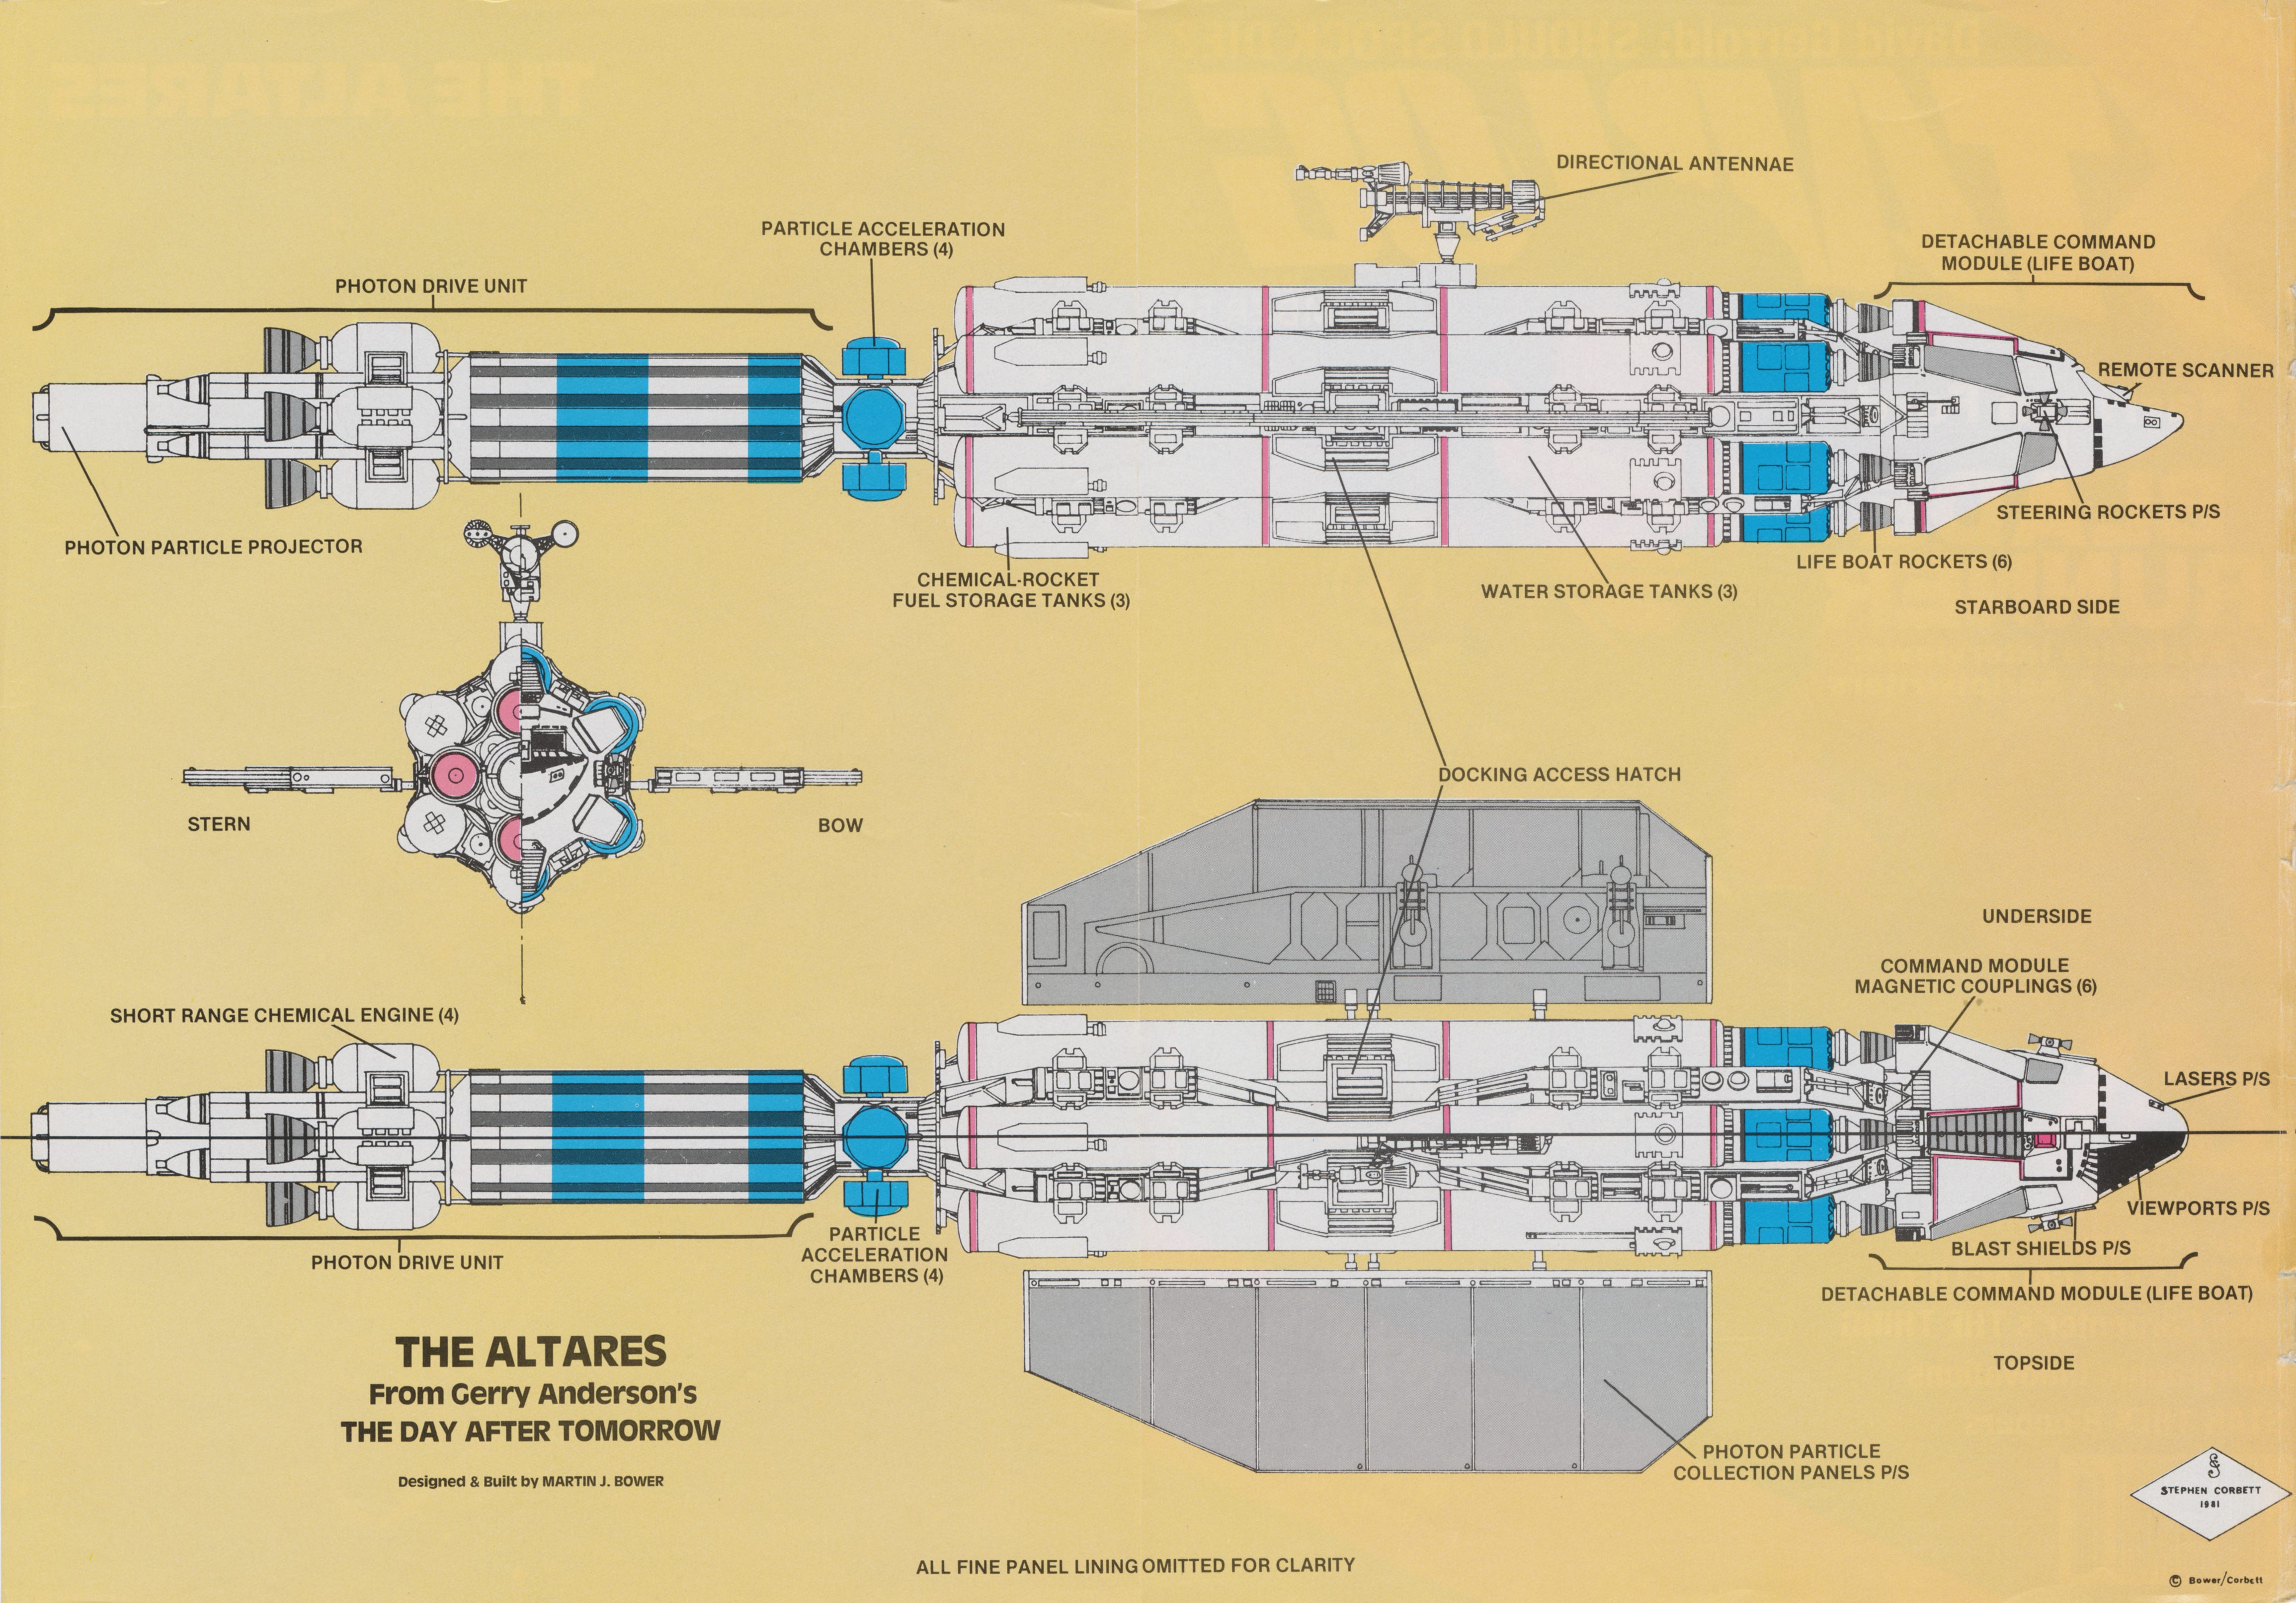
I had wanted to build a replica of this ship for many years and had begun acquiring as much data as I could in the form of photos and even a full orthographic drawing which was published in an ancient Starlog magazine to do so, but I never really had the time to scratch build one for myself.
Here is the drawing by that was published in Starlog magazine:
A client of mine, whom I have built dozens of models for over the years named Anthony Altino (“A” word alliterations abide abundantly!) came across a web site showing a 3-D printed model of the Altares produced by a fellow named Bill Altenburg. Anthony acquired Altenburg’s address (Yeesh!) and asked him if he could print a larger model than the one he had already produced. He said he could make one nearly 23 inches long, as 3-D printers are limited in the size of objects they can easily print without major re-purposing of the file, and Anthony had him print one. Anthony then had the model sent to me to build for him. I finally had the opportunity to build this model!
Full disclosure. I have previously been very wary of 3-D printing and despised most of the examples I had seen previously, as often the models were incompetently done with ugly “scan lines” that cover the whole thing which render the model essentially impossible to rectify or disguise. I see many examples online of people who seem proud of their creations, but the look of the model is completely destroyed by their low resolution prints with their looking like they had been made in layers of sandwiched carboard or some such thing. Bill’s work changed all that for me. I now realize that when a model is competently done by someone who not only understands how to build a virtual model correctly and can also print one with a very minimum of the scan line problem, an extremely detailed and presentable subject is indeed possible. Bill’s prints are so good that almost no clean up is needed… just a little sanding where the printing supports were attached is really about it. The minuscule amounts of scan-lines are easily dealt with by light sanding in just a few areas and the self-leveling properties of paint usually covers everything else. I was thoroughly impressed with the parts that had been sent to me and I had a lot of fun making this model. Frankly, because of the few parts, the “building” was almost nonexistent. The real work lay in the paint job, which was at least 90% of the work involved.
Upon receiving this... “kit” I was instantly impressed with the accuracy and attention to detail that Bill had put into this thing. He clearly did a LOT of research and as far as I’m concerned, it’s near perfect, with only very minor proportional errors in some areas which can be easily forgiven given the very limited data available on the original studio miniatures.
It’s also important to note that even though the model was exceptionally detailed, the 3-D printing process does mean that the model is not built conventionally. In fact it allows for complex parts to be made in one piece that would be impossible to cast using any other method, such as injection molding or resin casting. This is both a blessing and a curse, as I had wished, as I began planning the painting of the model, that some parts had been printed separately. Nevertheless I pressed on. It just meant a little more masking tape had to be used and a little more planning in the paint work.
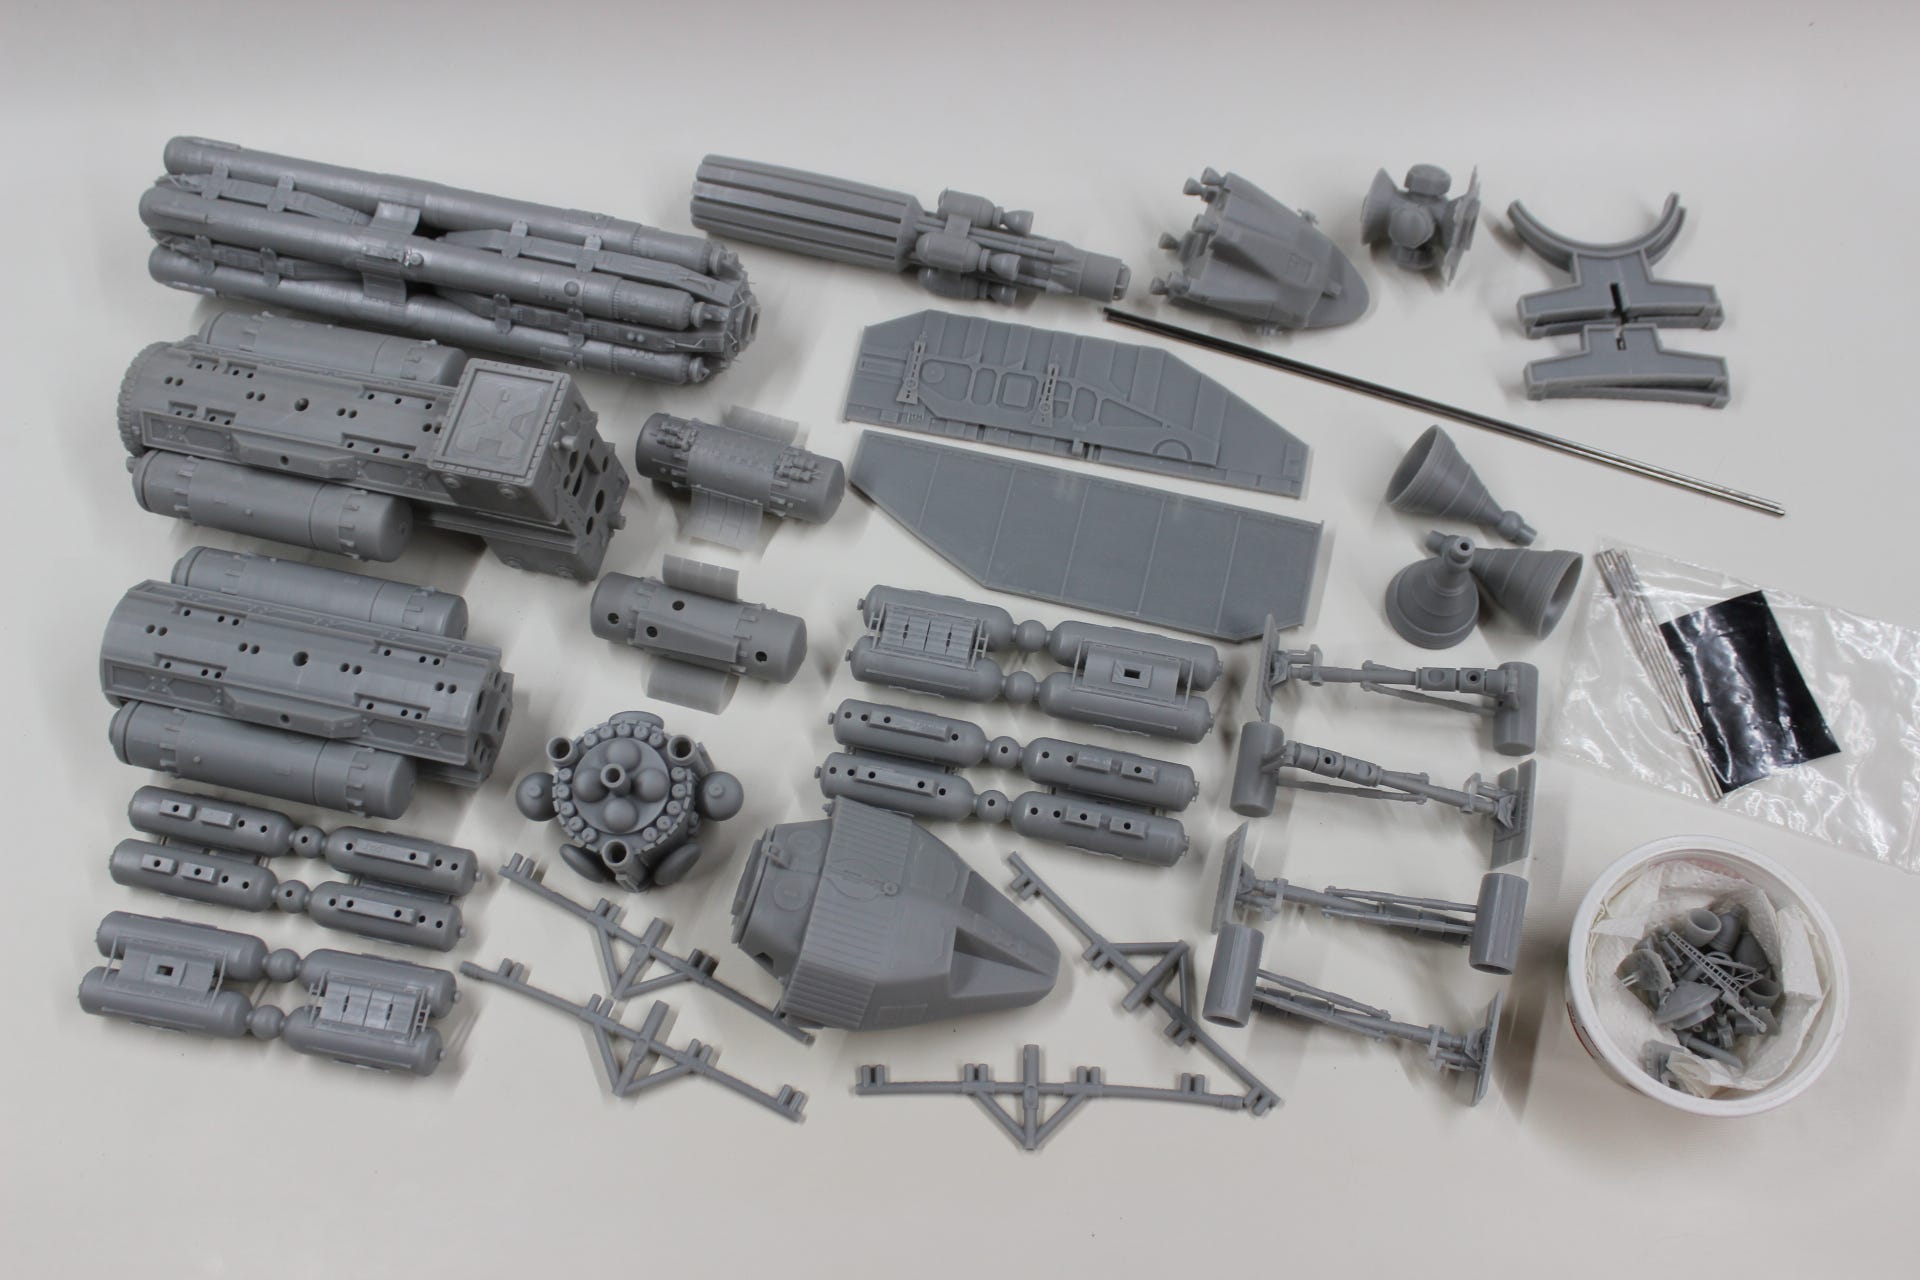
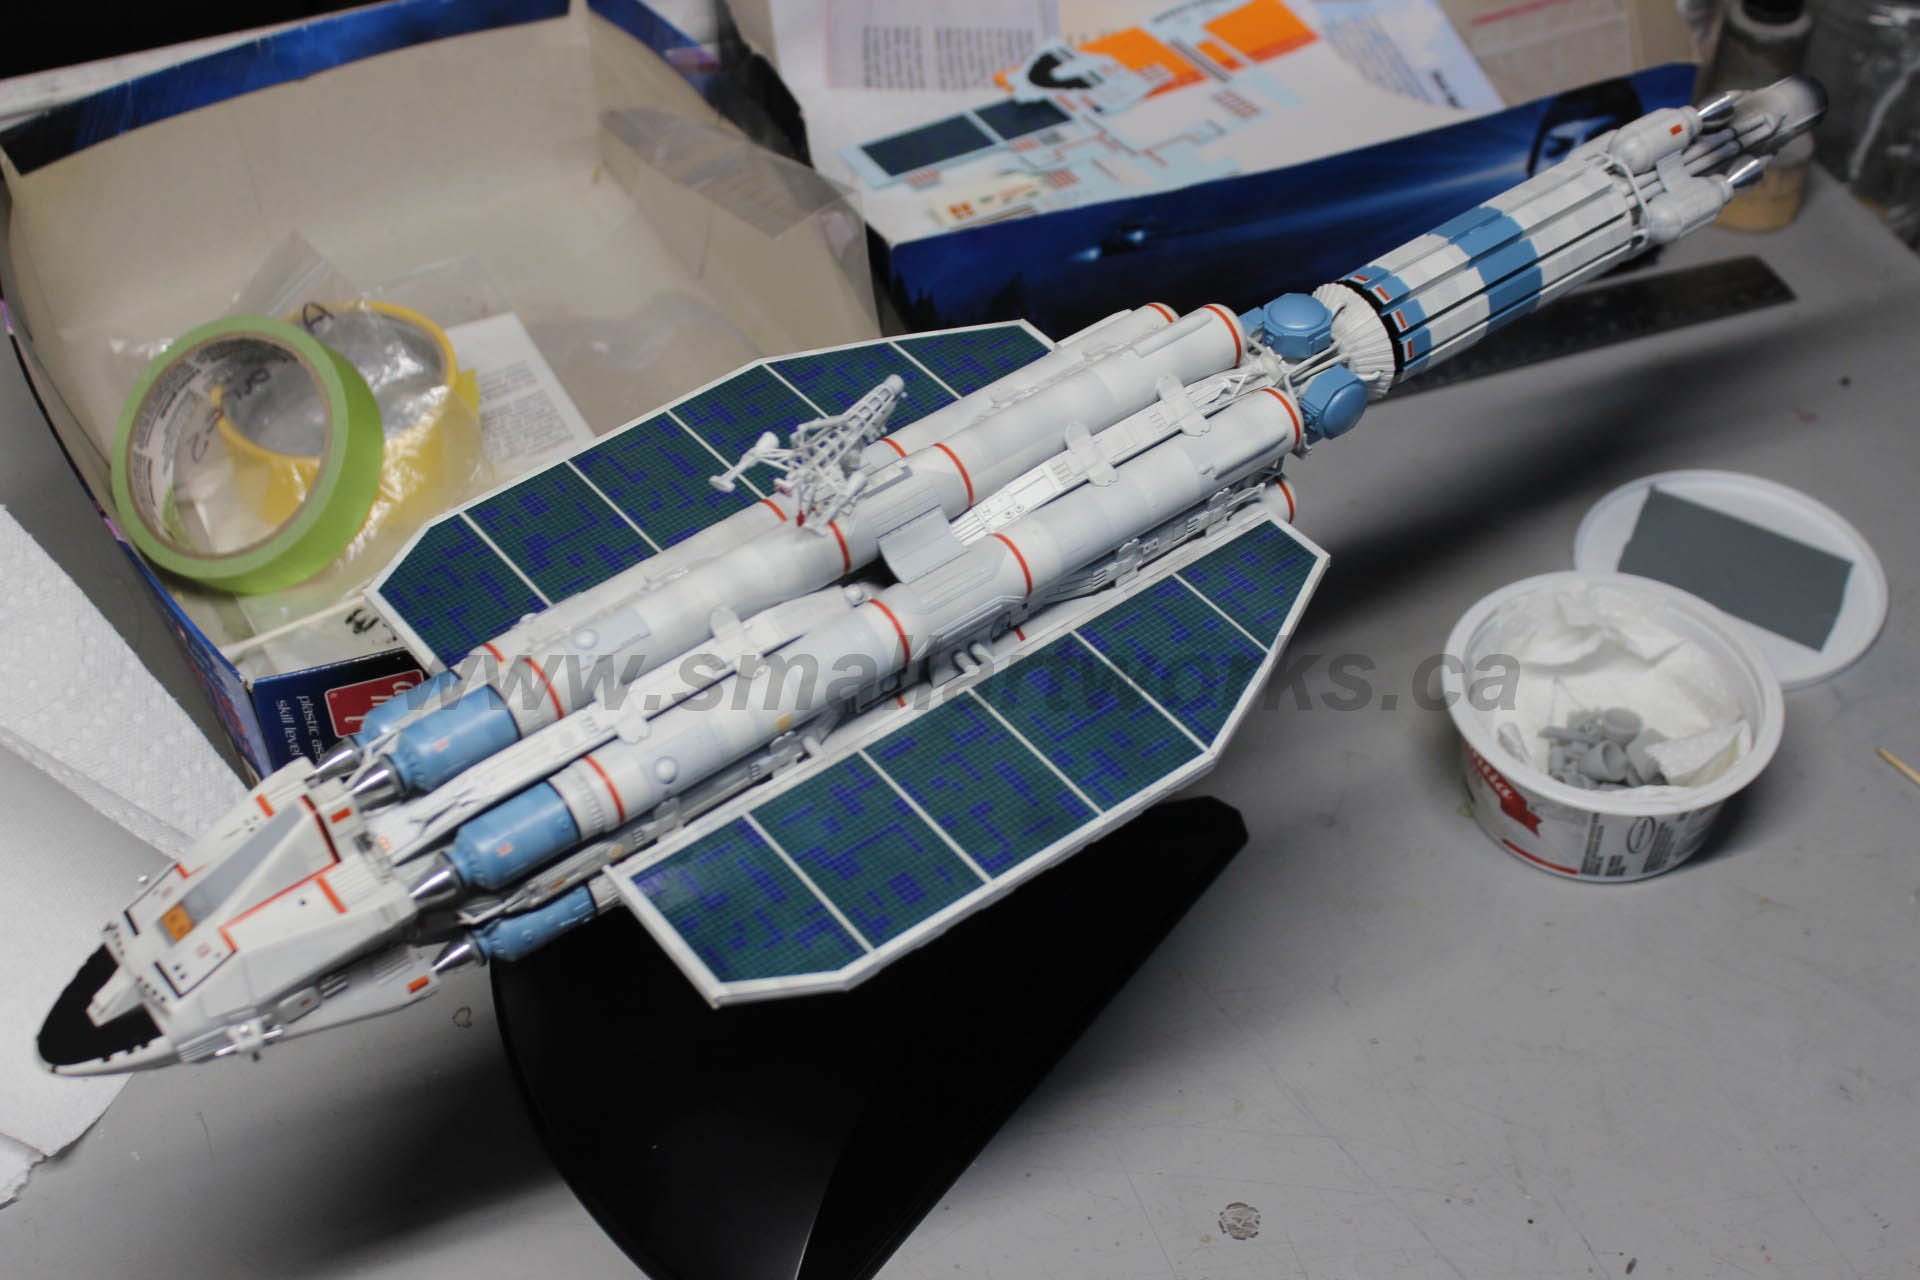
The photo below shows the Altares parts mixed in with a second model, also sent at the same time and printed by Altenburg that will be built next of all goes well. See if you can recognize the Altares parts and guess the name of the second model that will be built next! (Comment below of course! What do I have to do to get you people to leave more comments?)
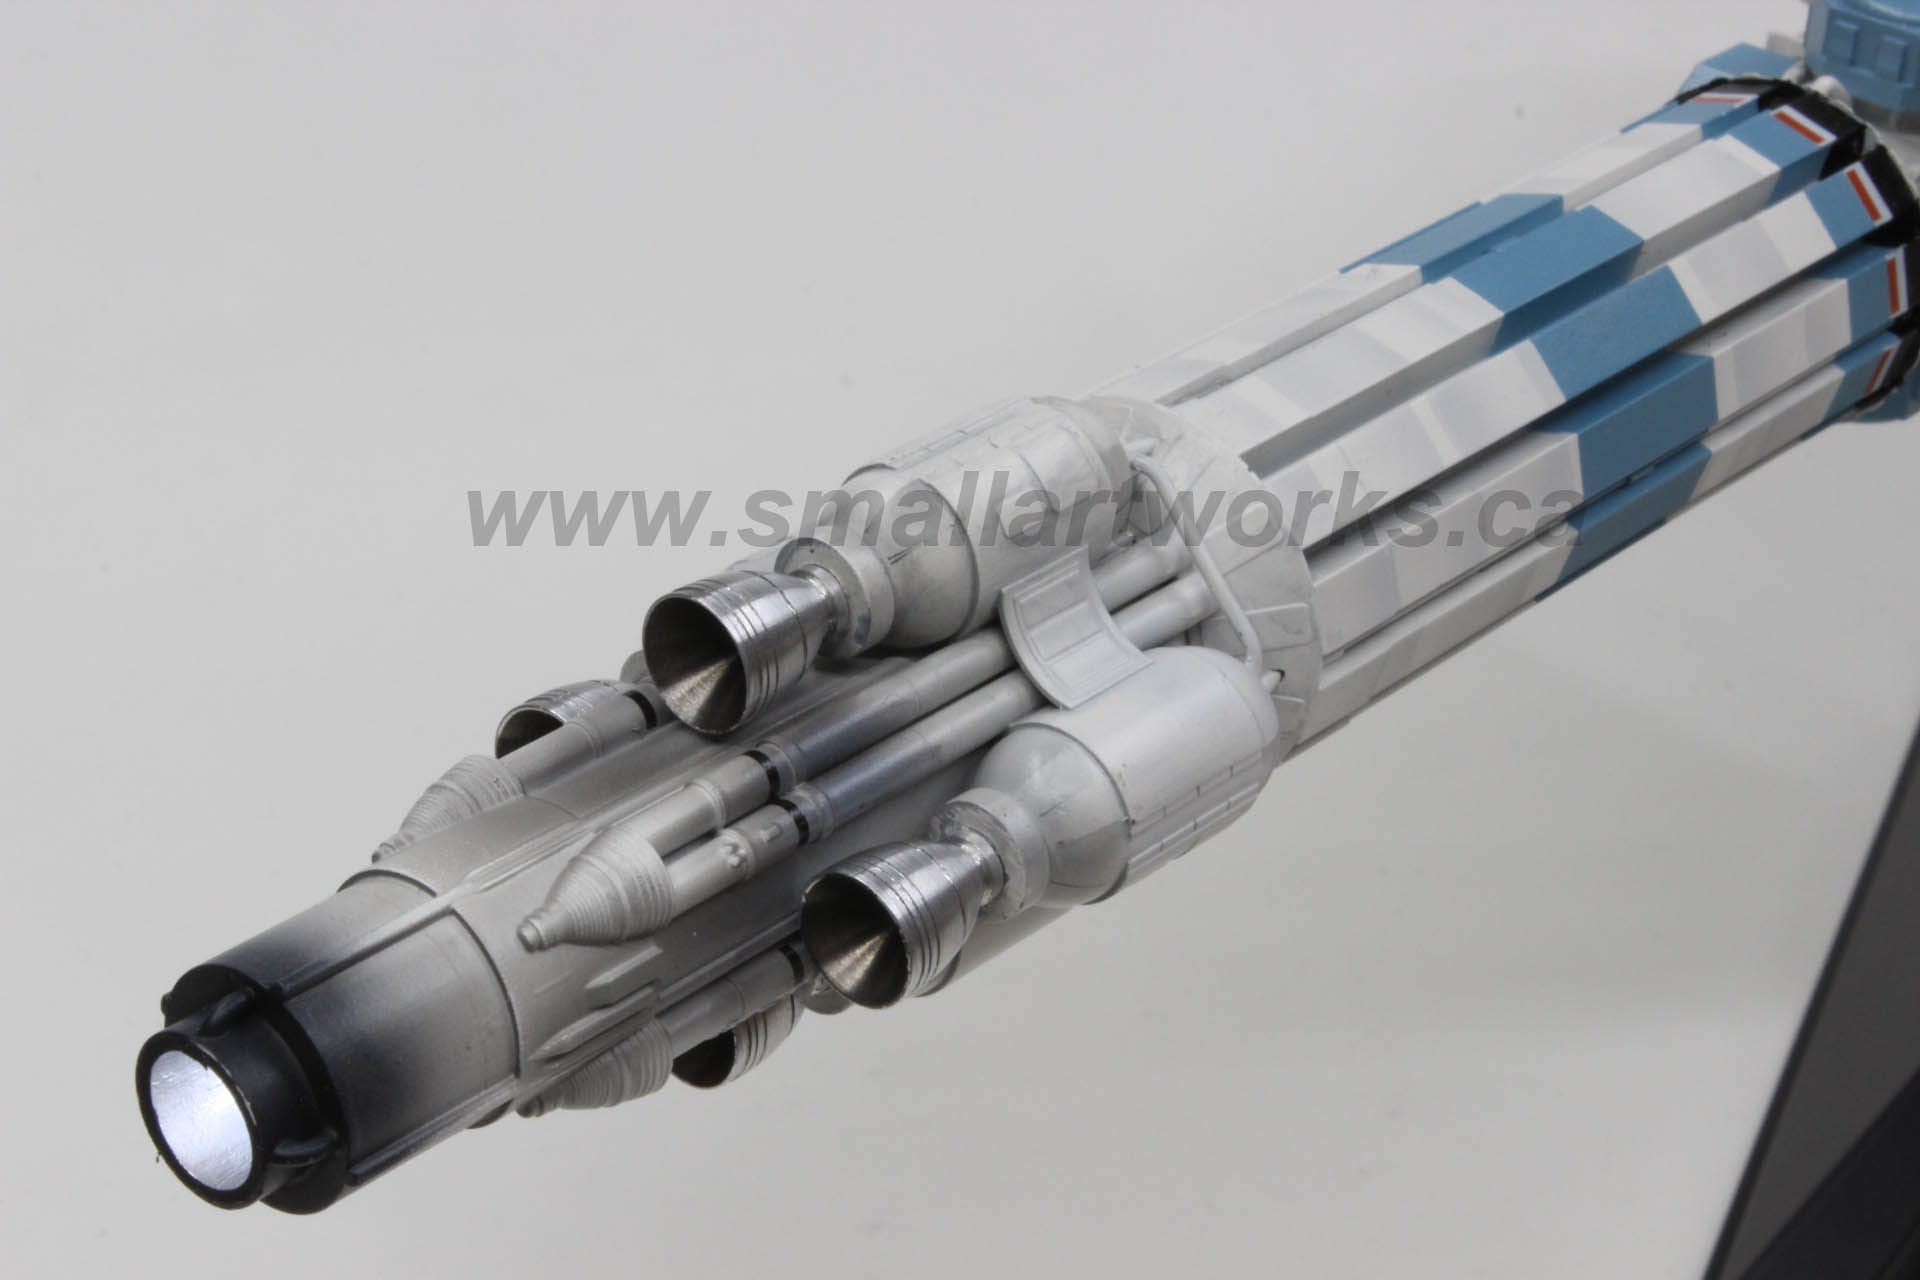
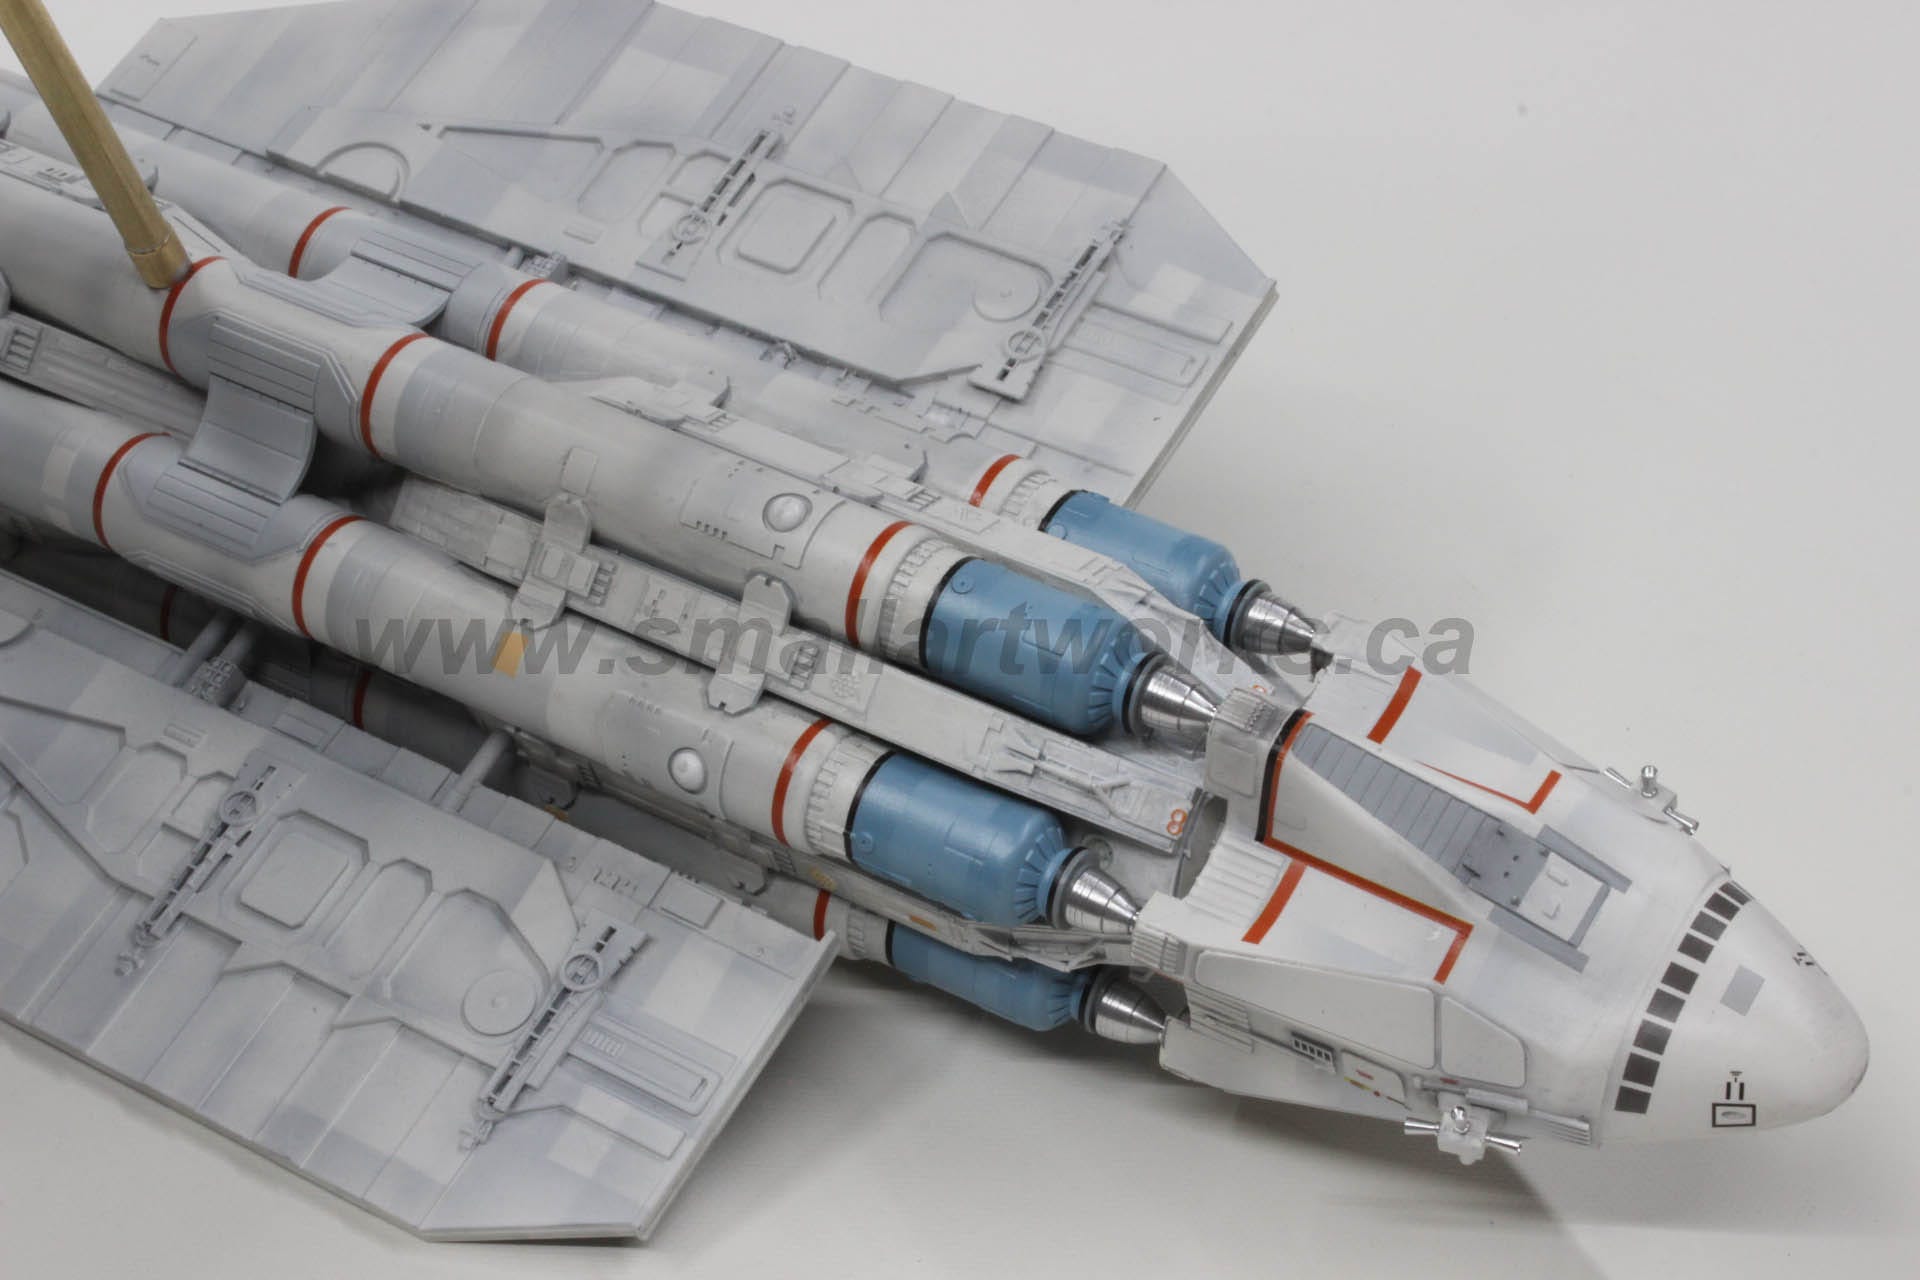
You will note that the bells on the rear engine section and command module of the ship were also printed entirely with their respective modules in one piece. Normally this would be a massive pain in the ass to paint, as these parts should be separate and painted individually, but this process was averted by the fact that Anthony hired Mike Reader to machine new engine bells from aluminum, thus averting that altercation (alliterations continue).
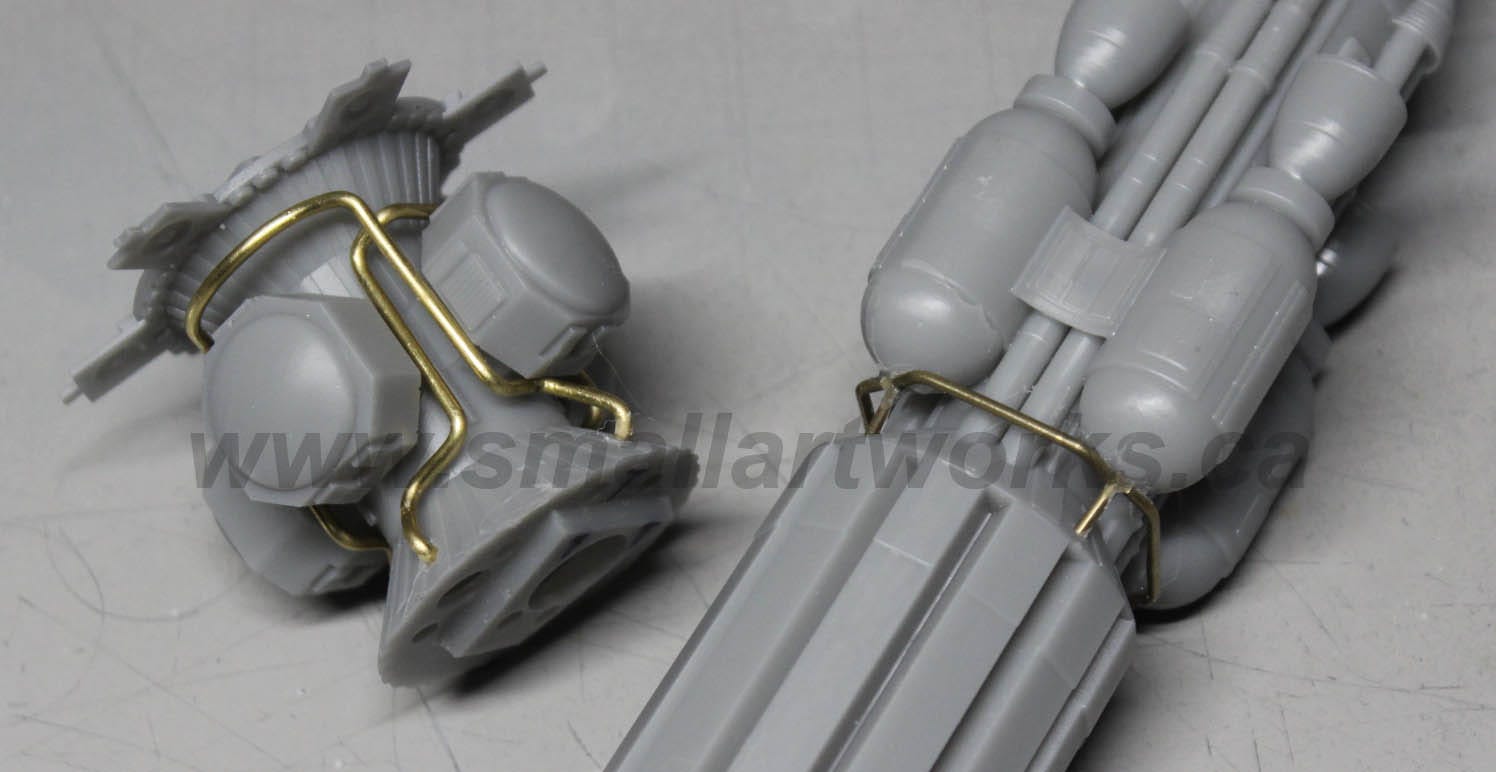
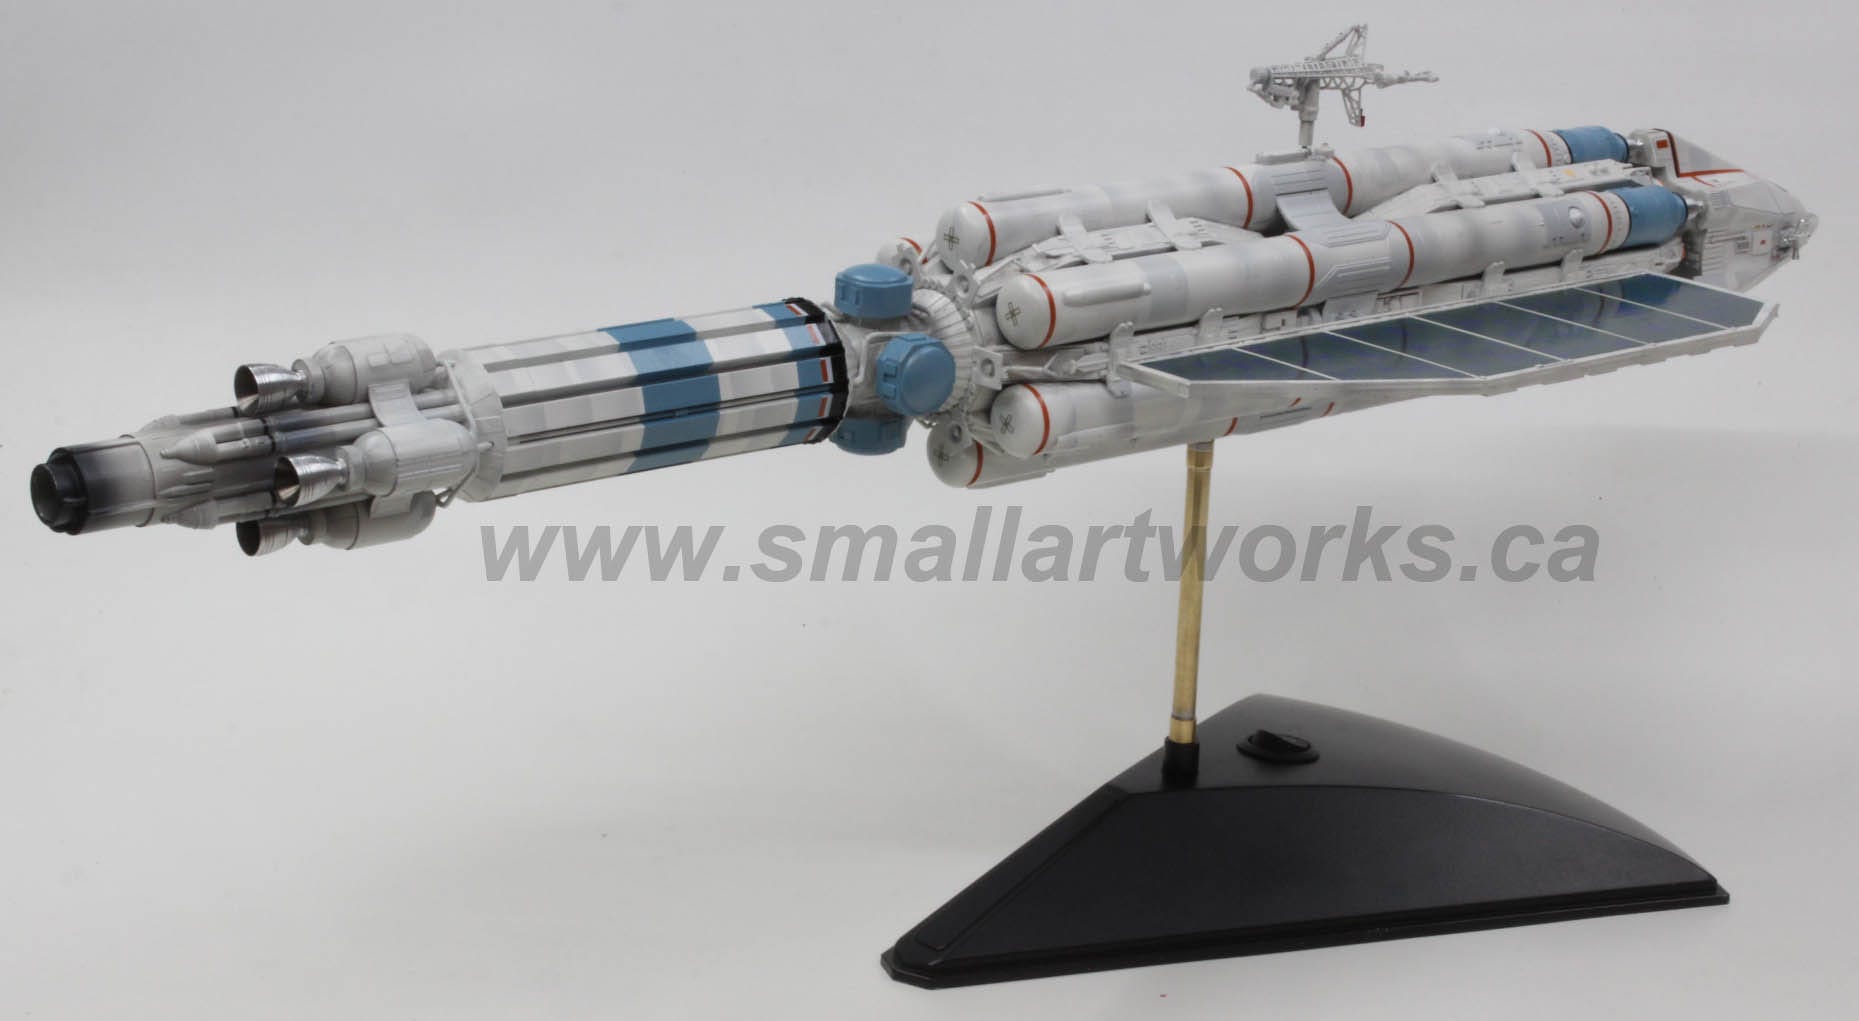
Missing from the print were some pipe work that are seen around the central section of the ship where the octagonal blue thingies were inhabiting as well as at the front of the engine “bottles” at rear, so I made those up using brass rod bent and glued into place. In reality, that pipework was added to the studio model so Freon gas could be pumped through the six foot miniature to show that the rocket motors would appear to be blasting off in closeup shots. It was very difficult to determine exactly how that piping worked with the few photos available, and the photos of the original model today in disrepair had a lot of missing parts, so I had to use a little artistic license.
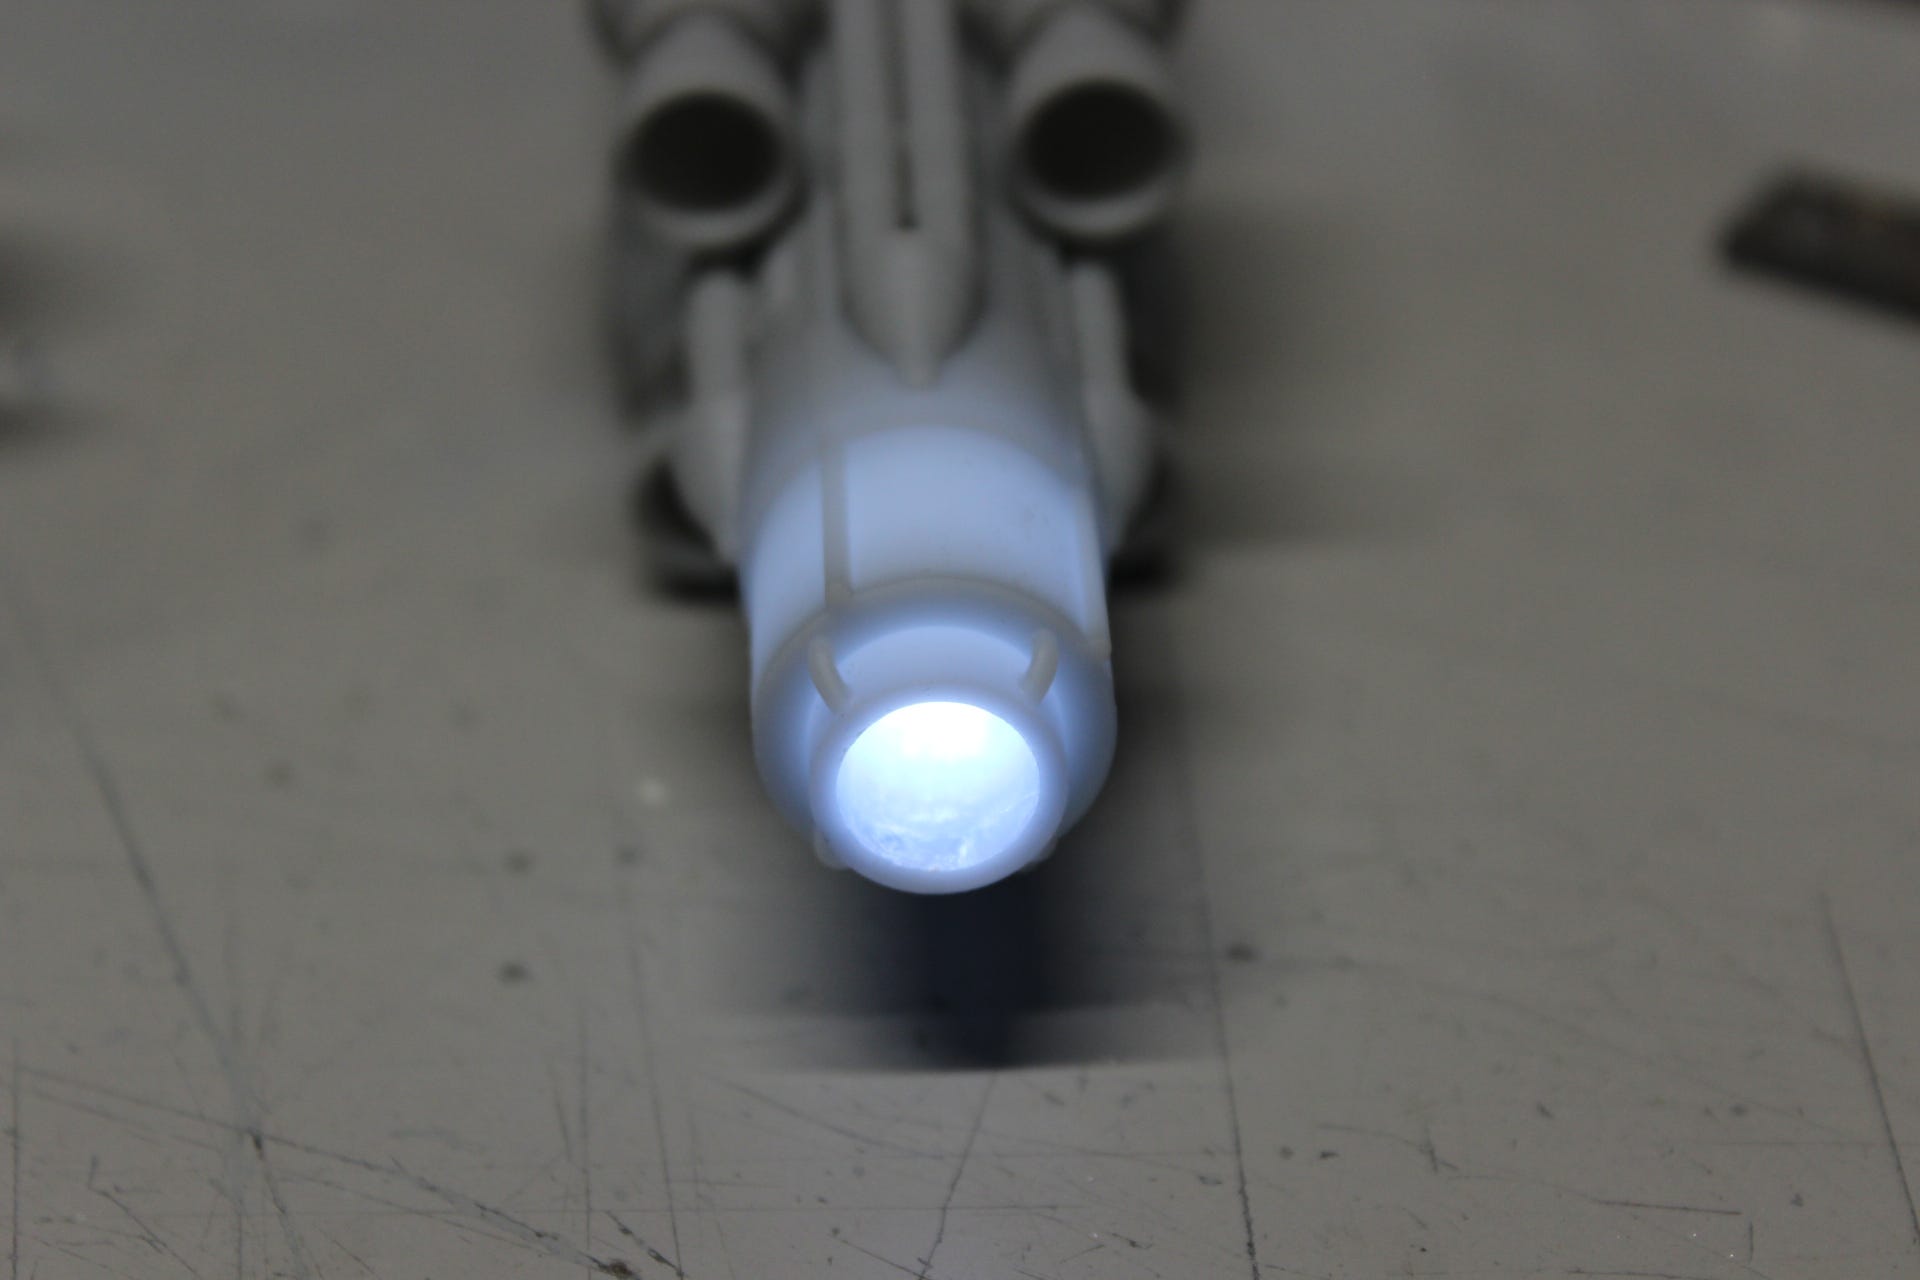
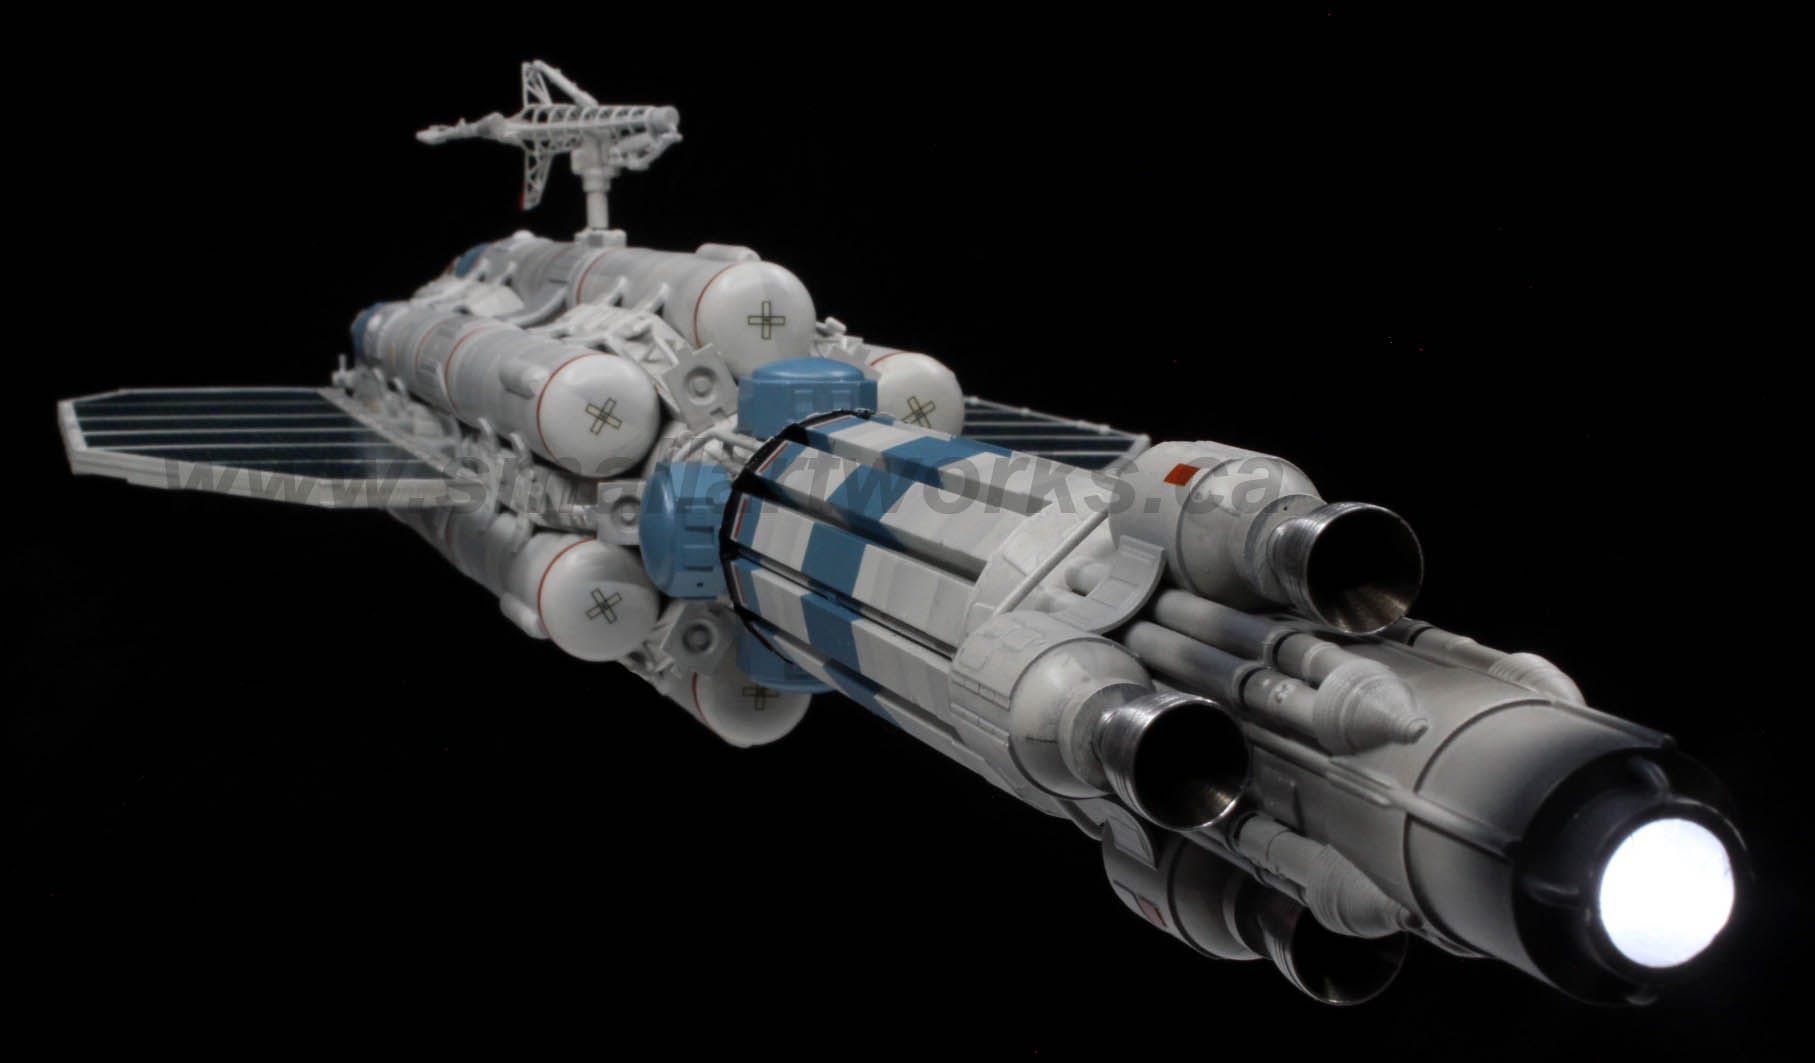
I decided, and Anthony agreed, that the rear “nuclear” engine should light up. So I machined down a 10mm LED to fit precisely into the rear cylinder of the ship to provide that lightspeed boost. Below is a picture of the engine before light blocking black paint was sprayed over the resin components and the reflective foil was applied to the interior of the exhaust.
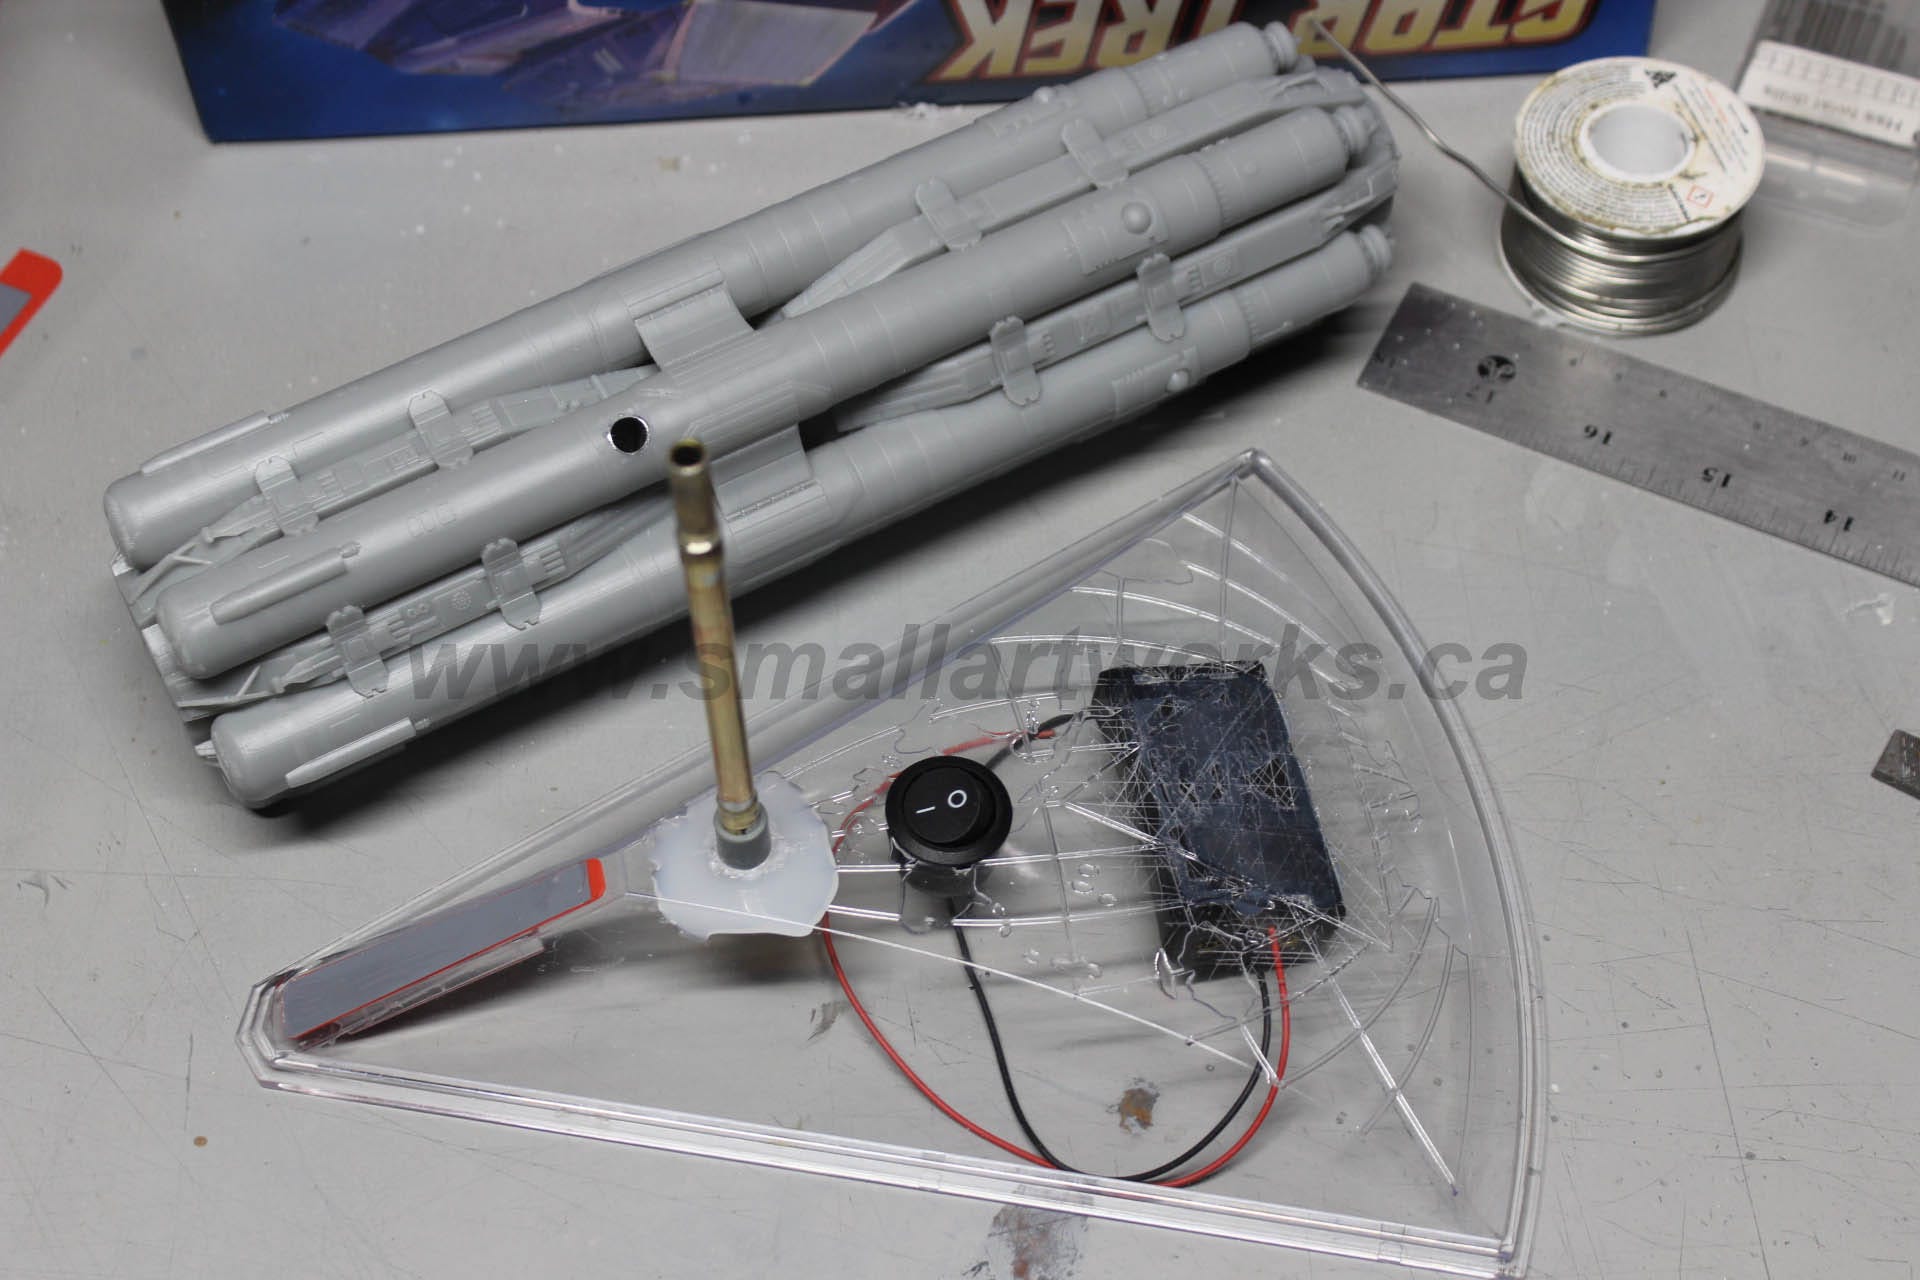
The stand, adapted from an old Moebius kit, wired for the lighting with a battery box and switch installed. The stand of course would be later painted black. The support is made from soldered brass tubing. A corresponding tube to fit is installed into the main body.
The model’s main parts were first sprayed with Krylon “Workday” industrial primer (best gray primer I’ve ever used, which means the buggers will stop production any day now…!) and then airbrushed with off-white, decanted from Dupli-Color acrylic lacquer rattle cans for its main coat. Dupli Color is the best paint I’ve ever found for this type of work, but it’s BLOODY EXPENSIVE! It dries fast, goes on like silk (when properly thinned) and is tough as nails when dry. Beats the hell out of the alkyd based garbage that passes for spray paint in the consumer market nowadays thanks to insane regulations that destroyed the Krylon consumer colour line which was once excellent.
Weathering was done using the gray primer again with an airbrush and carefully placed masks and then (this is a step almost all modelers miss), given a light dusting of heavily diluted base coat to tone down the harsh gray panelling giving it a more blended look.
For the decals, I planned and then drew up the artwork in Adobe Illustrator myself and had them printed by V-1 Decals in Victoria BC whom I now use for all my decal printing projects. A couple of unrelated decals were also printed for another project. Can you discover and guess what those are? Hint: The finished model is shown in this Small Art Works Substack collection! Comment below if you know the answer!

I had duplicates of most made in case I screwed any of them up. As it happens, I didn’t screw any of them up. But as you well know, if I had NOT had duplicates made, I most certainly would have had many screw ups. This is called “insurance” which means you pay so that you hope you never need it.
However, I did find out later that I had missed a few minor designs and then had to go through my stash of thousands of decals I had acquired over the years to find some that would work instead. As it turns out, a lot of the decals I had made in the past for the Space 1999 Eagle were well suited. Go figure, eh?
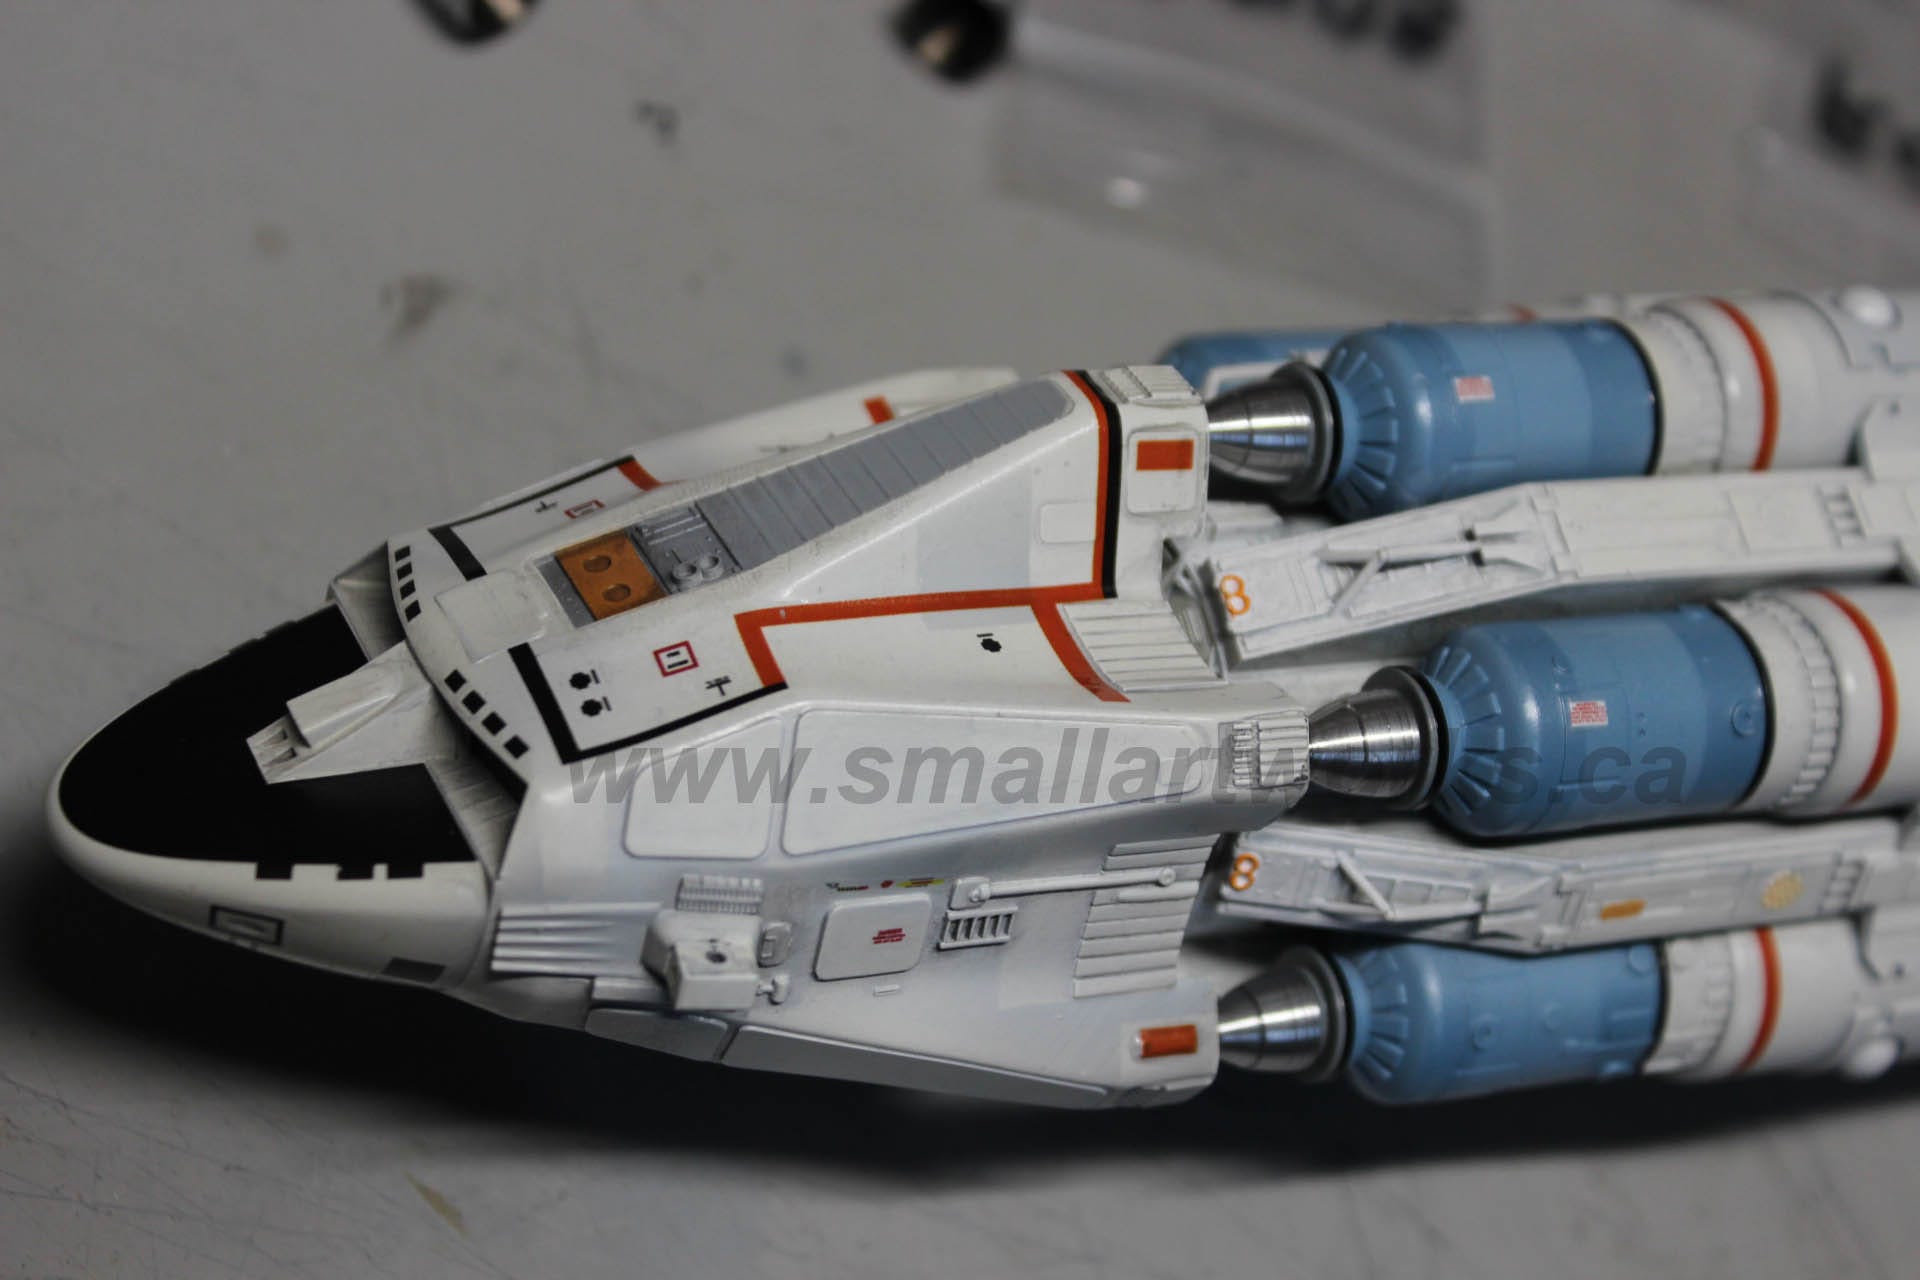
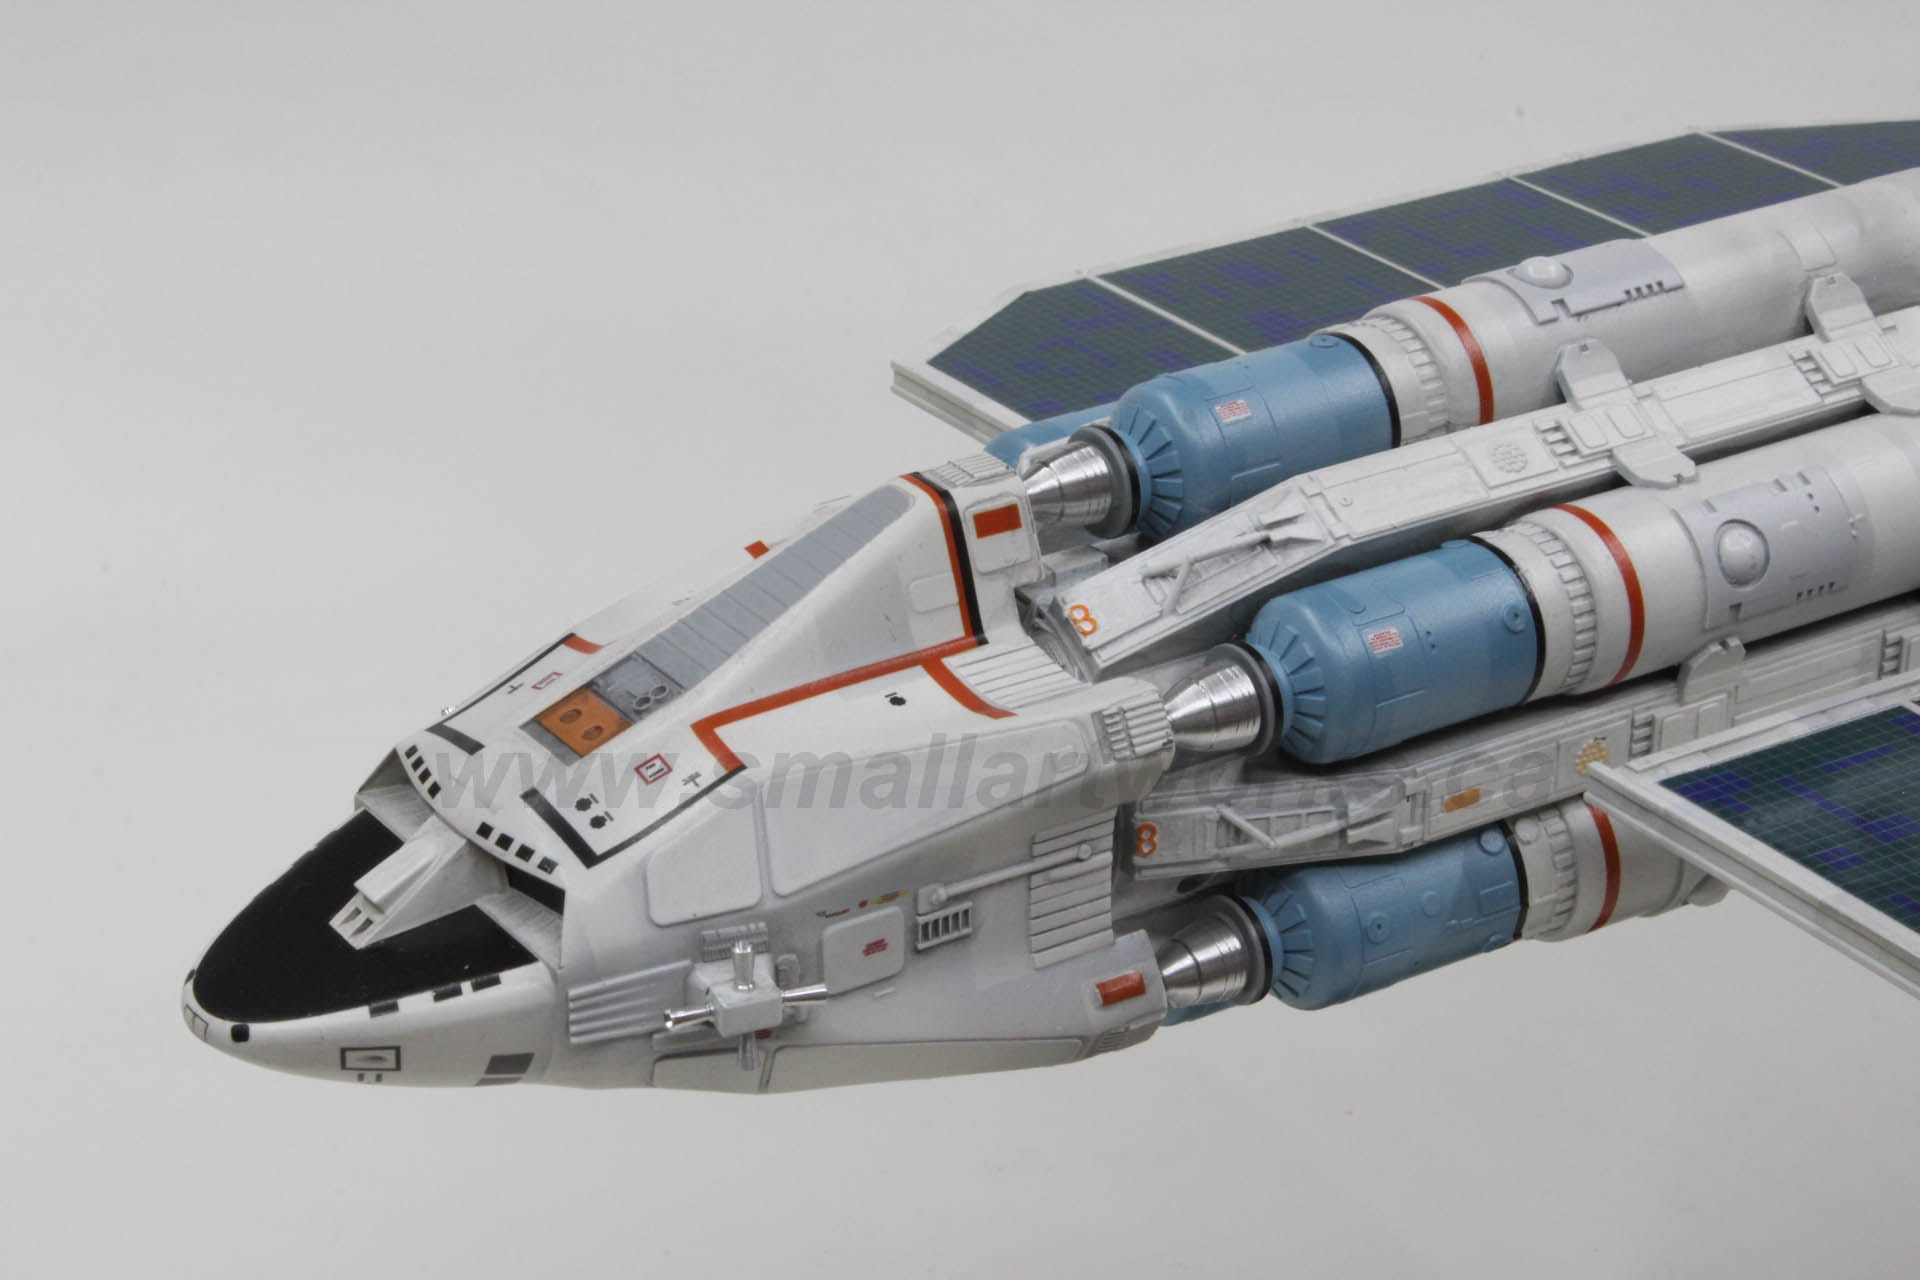
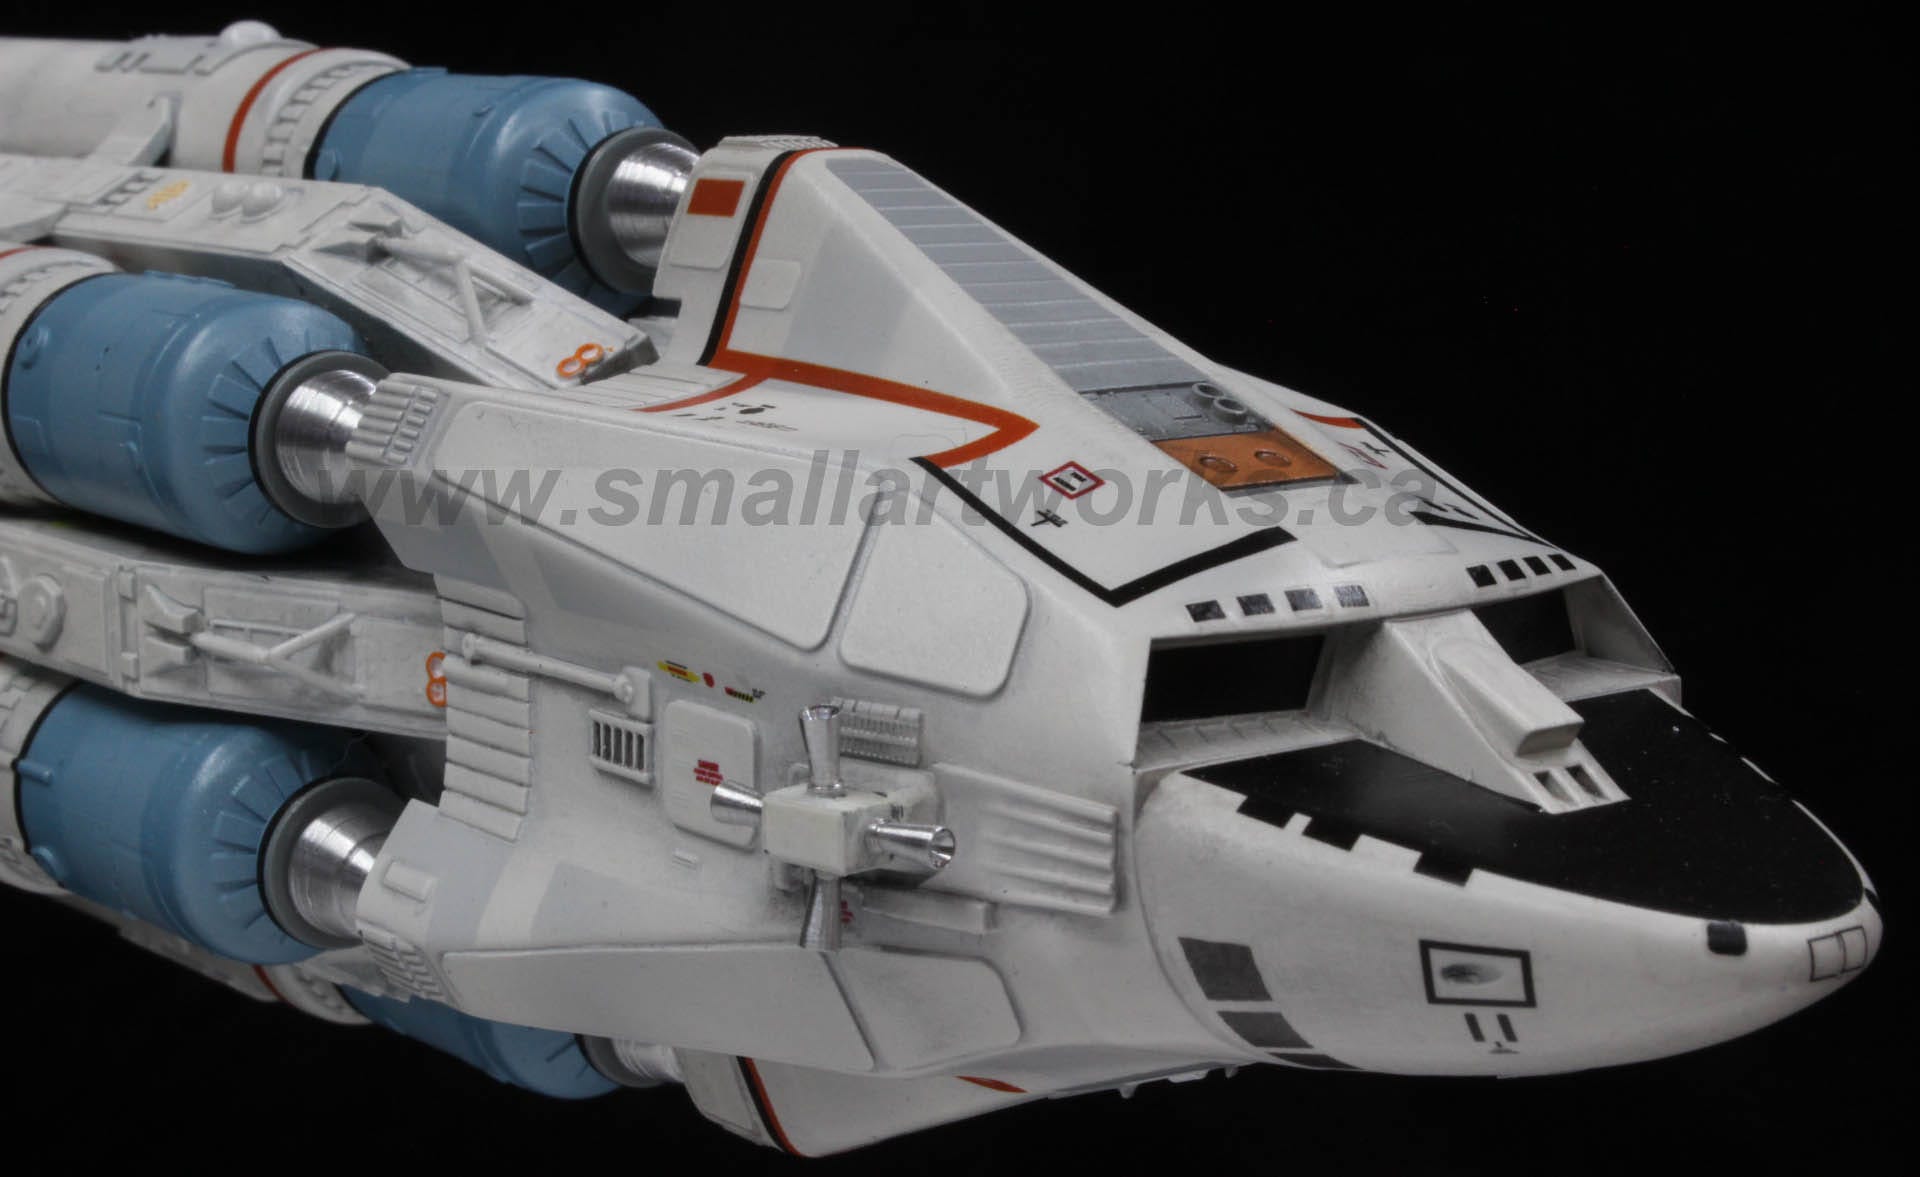
The front of the ship, nearing completion. A few more decals and the tiny “attitude control” thrusters to be added.
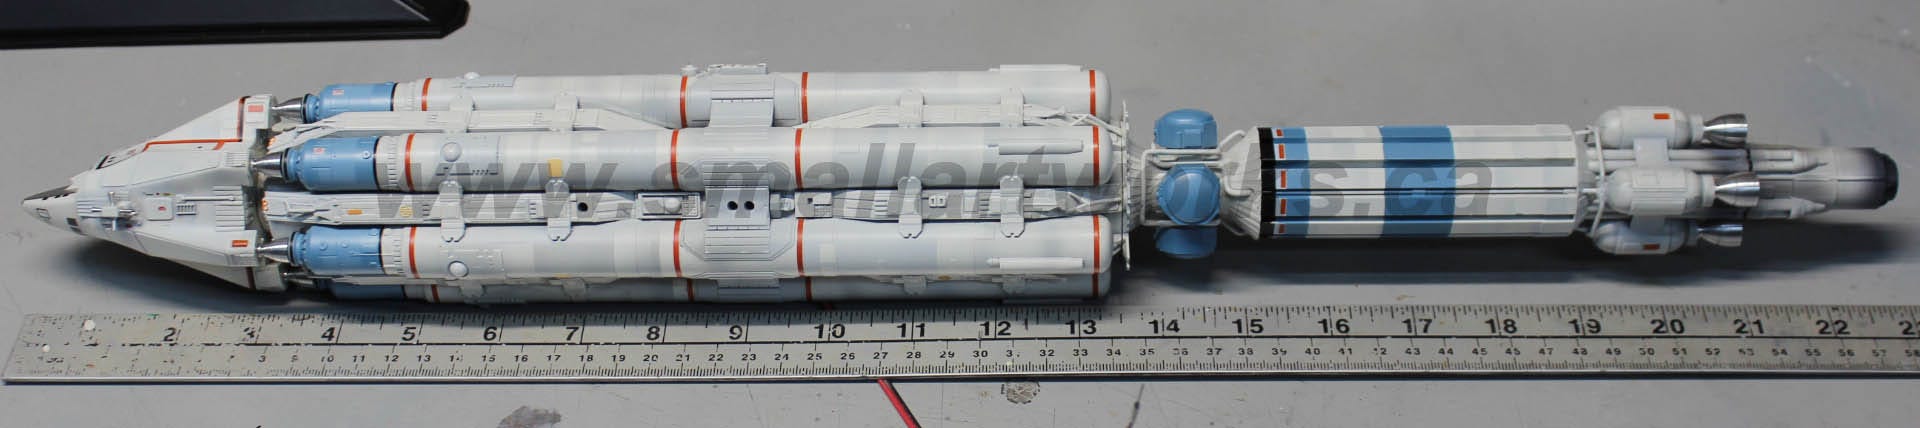
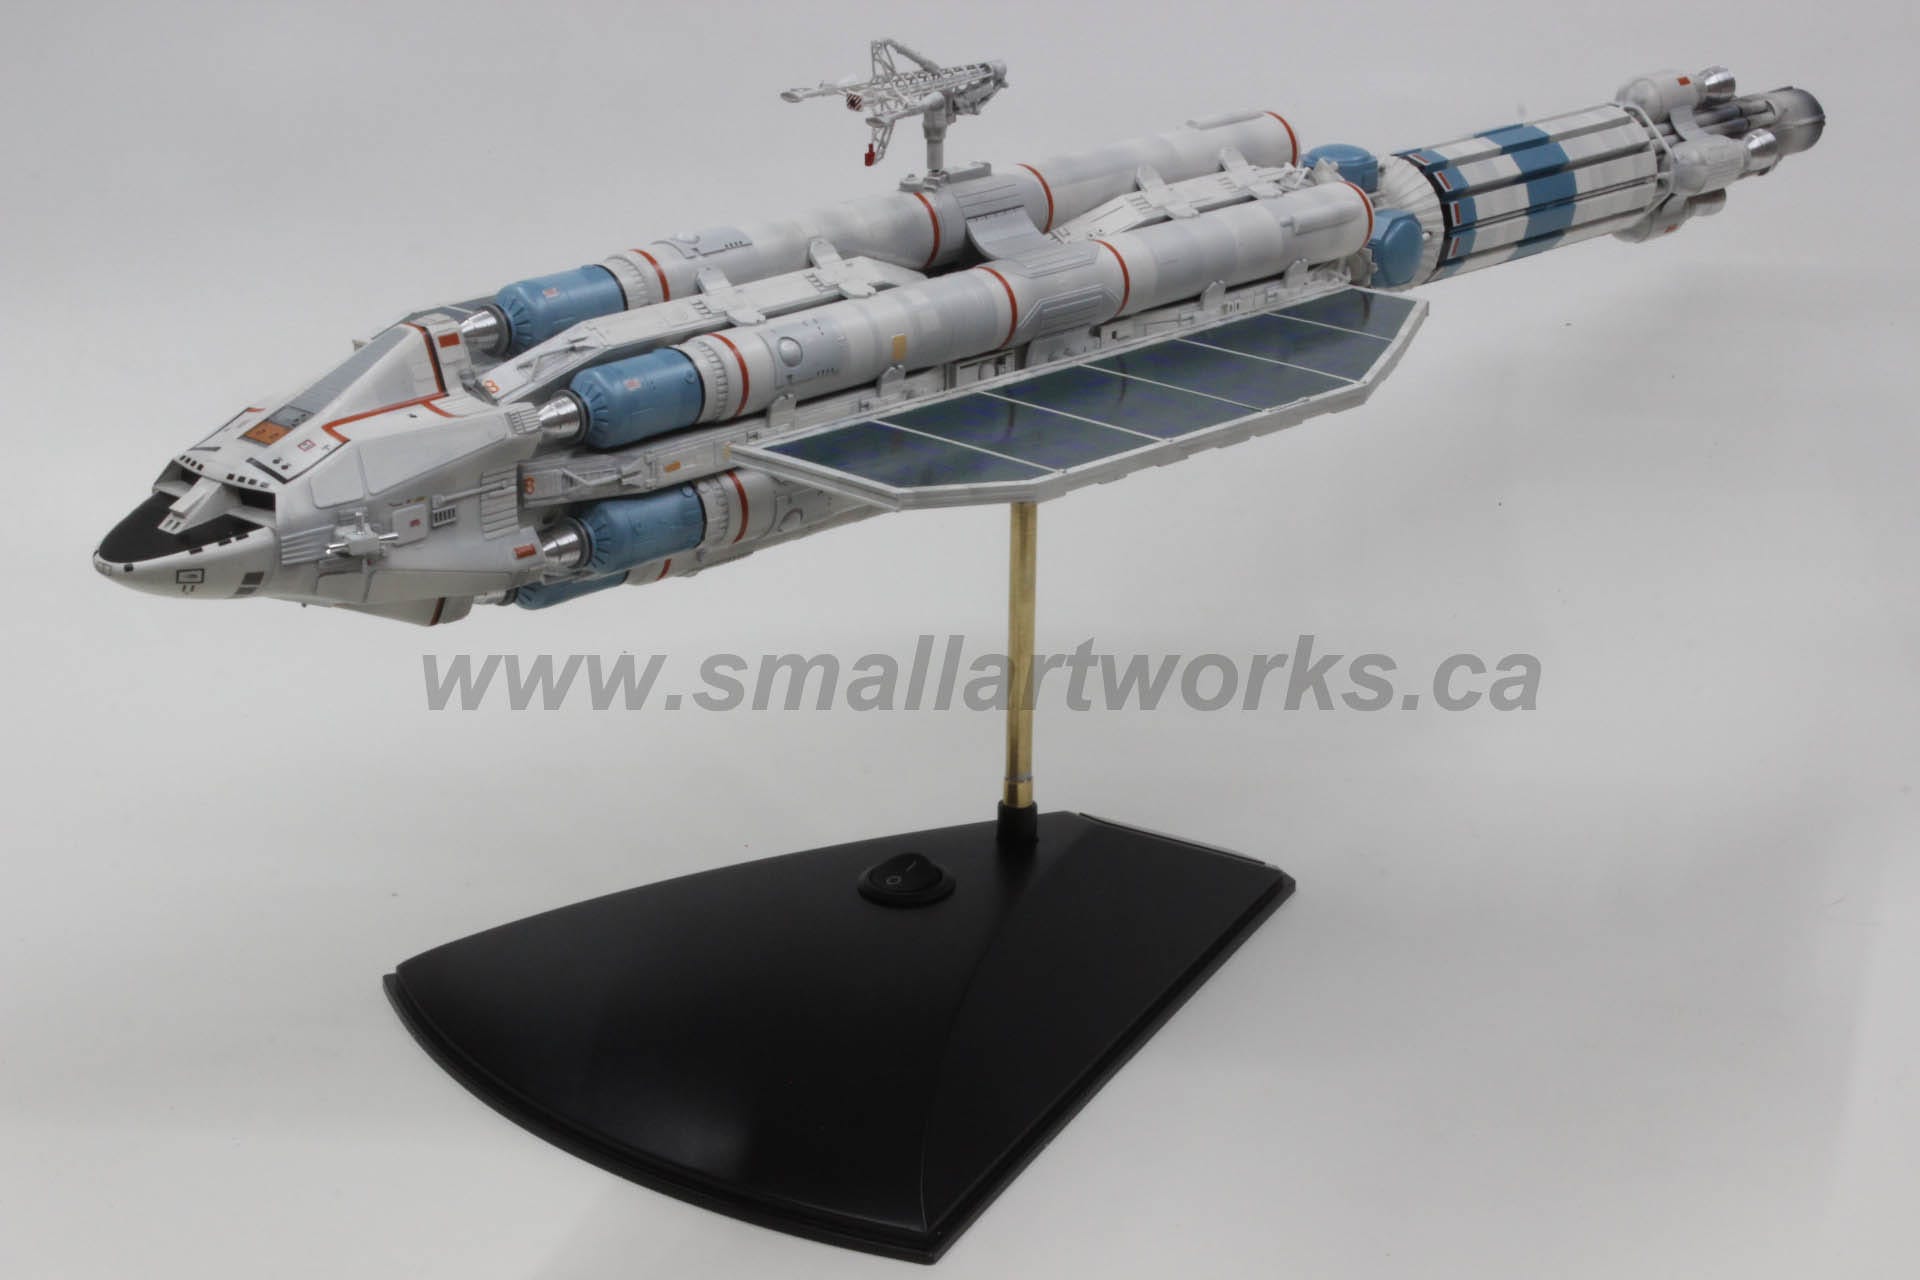
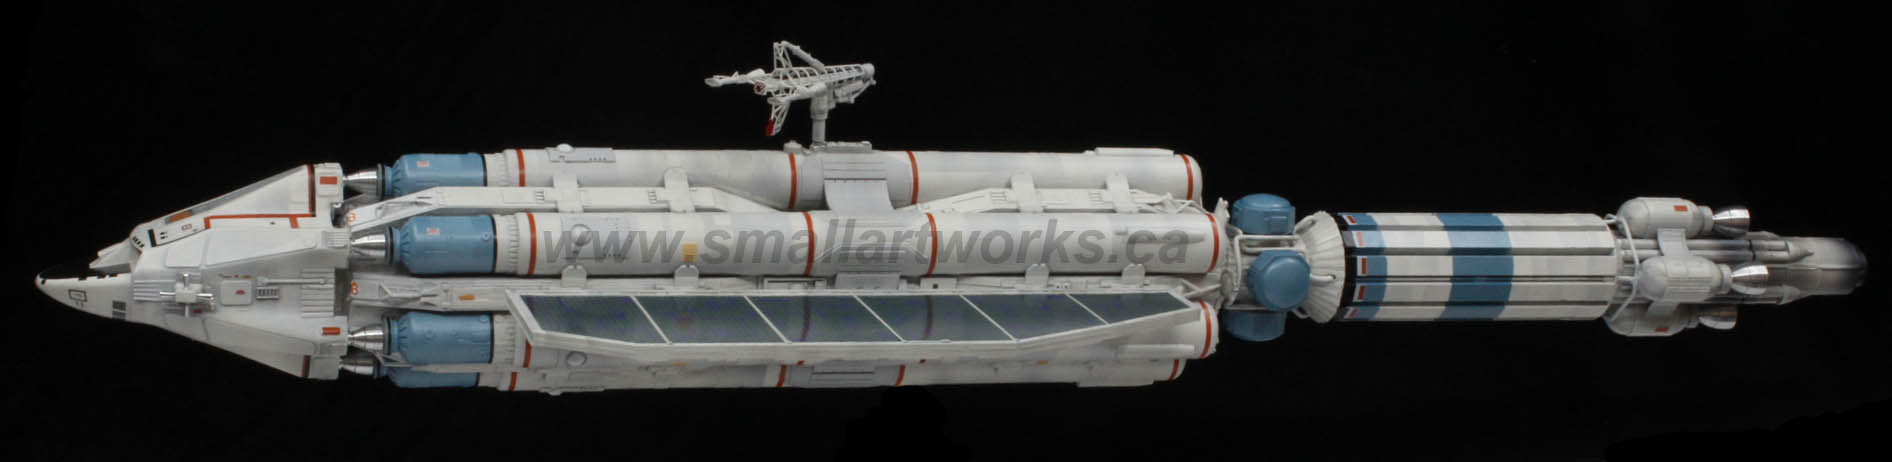
Measuring exactly 22-3/4” long:
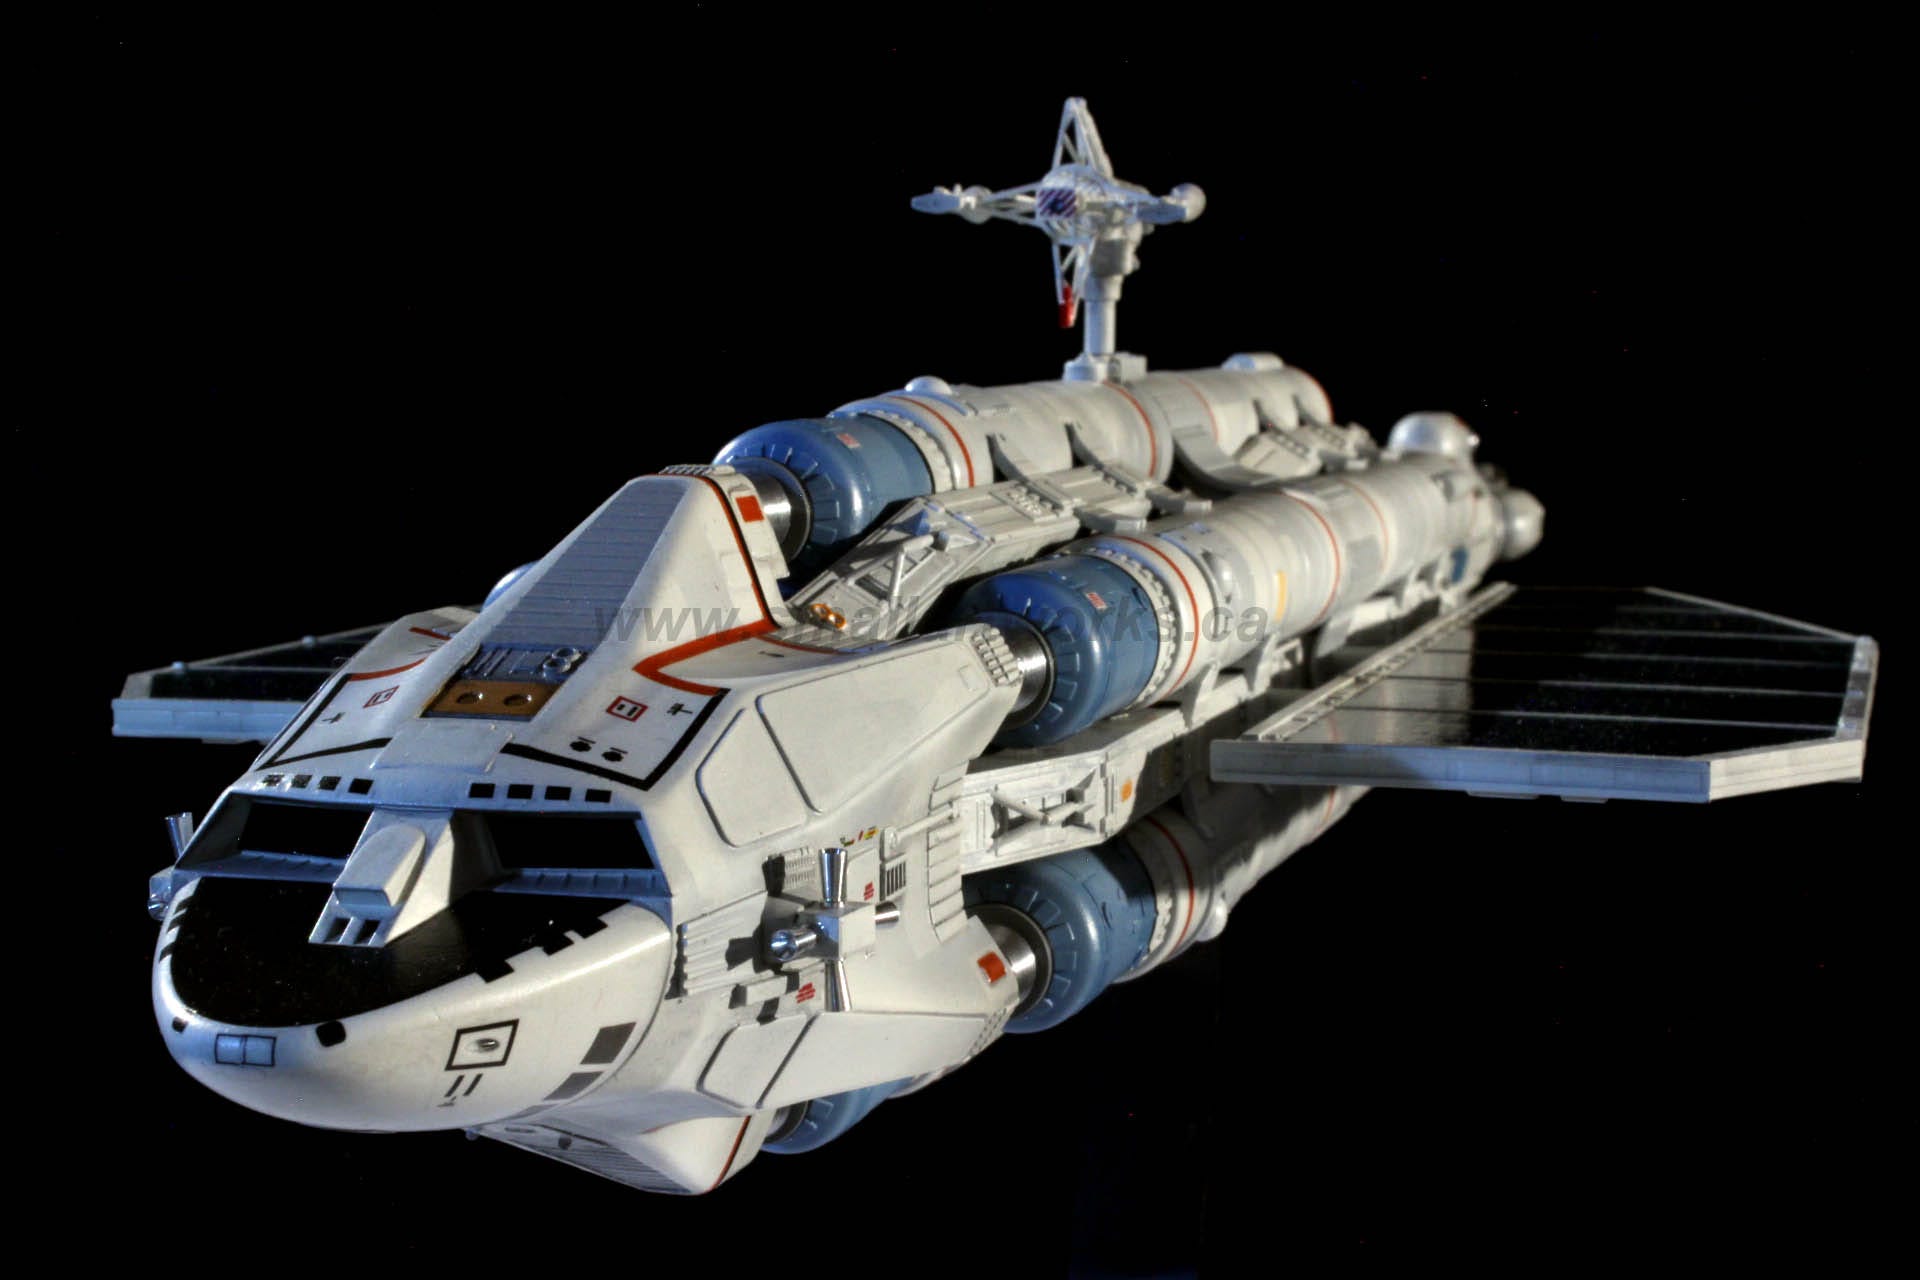
This is the very first picture I shot of the finished model on my workbench…
Following are pictures of the now finished model. I wanted to try and dream up some more alliterations to make this more fun, something like…. “Anthony’s Altares with aluminum attributes amazing and awesome …” or some such thing. But I’m getting tired now and it’s time to go to bed. Maybe you people out there can come up with something more clever than I could dream up. ;-) Please place your pontification in the comments below!
Oh, and, as Columbo was famous for saying, “one more thing….” if you’d like a model like this (or any other subject) built for you, please email me at “jim@smallartworks.ca” and we can discuss what you’d like to have done!
Enjoy!


That sure is amazing.
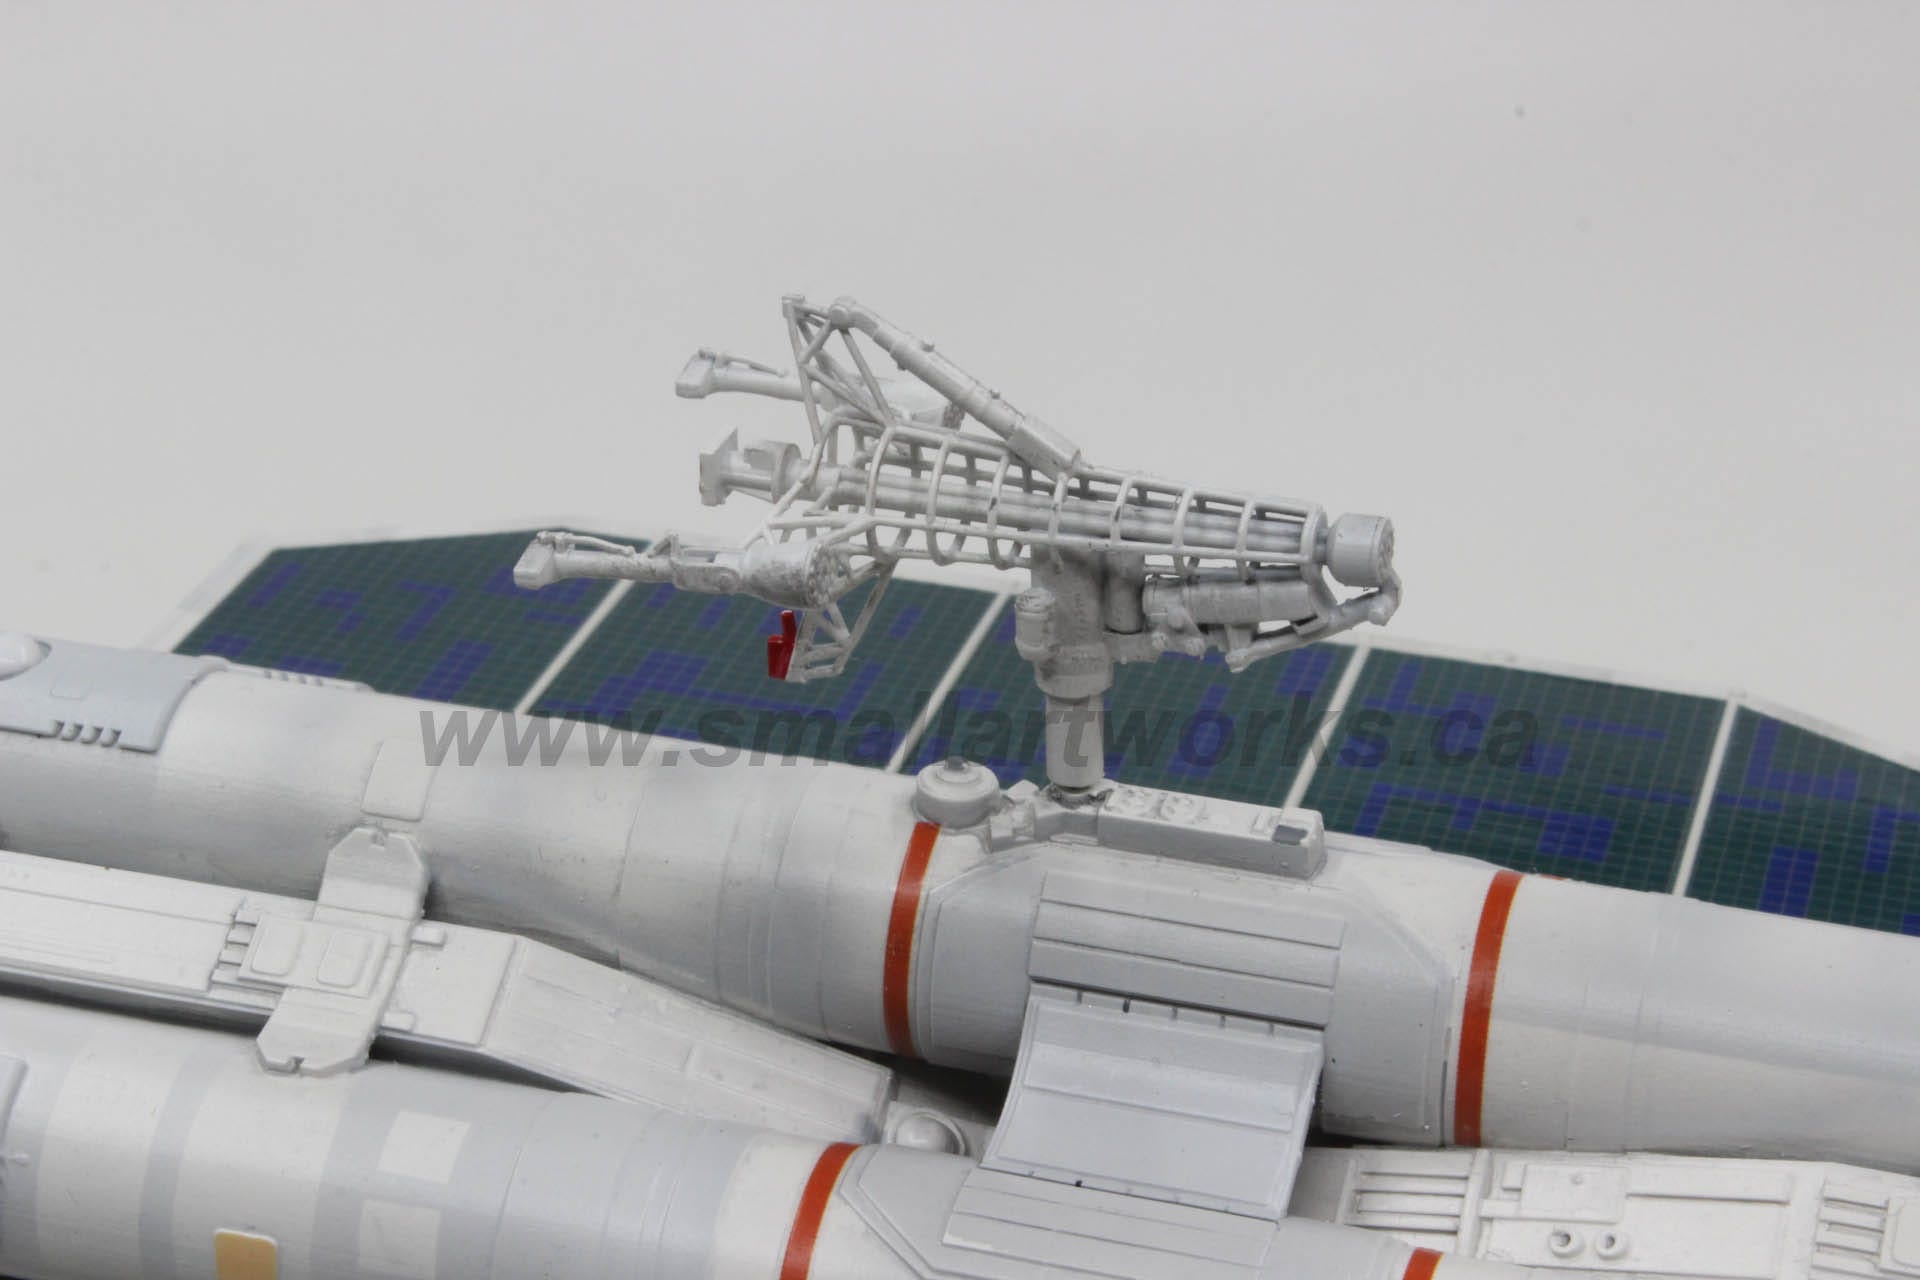
Spectacular !! Have one too (also a 3D print by Altenburg), but the antennae is missing and I'm yet to get my model properly finished.