

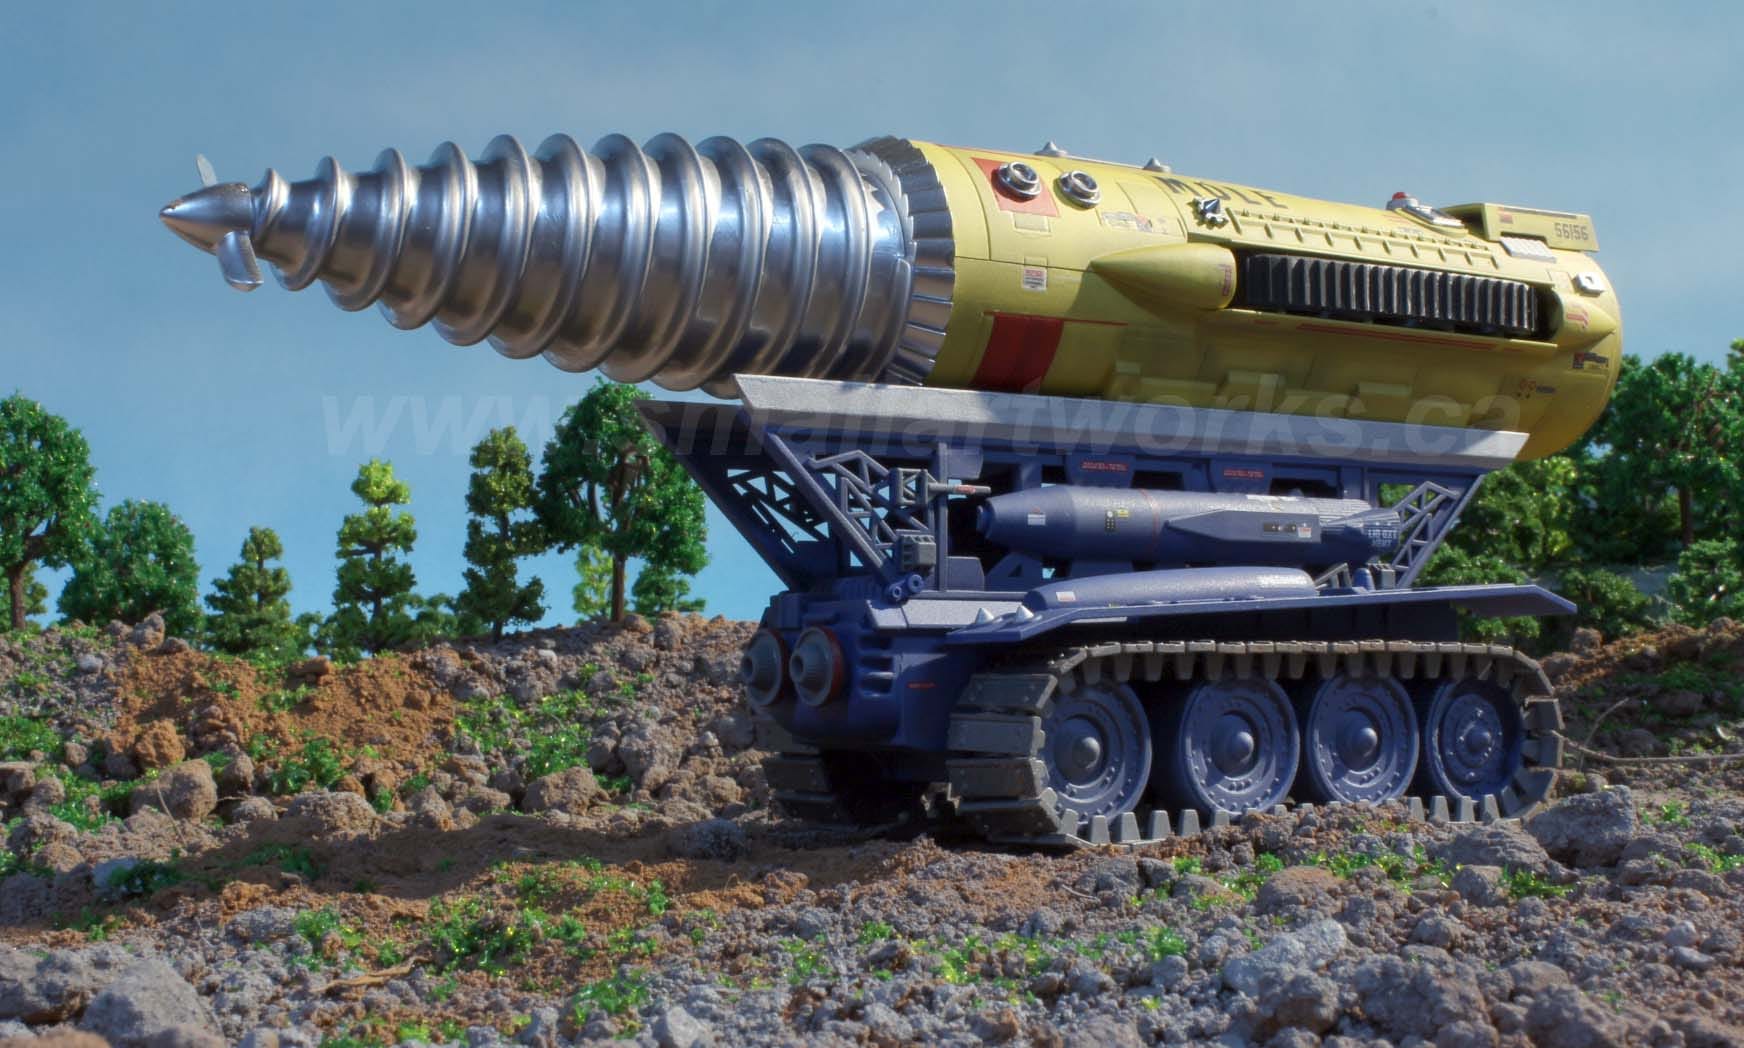
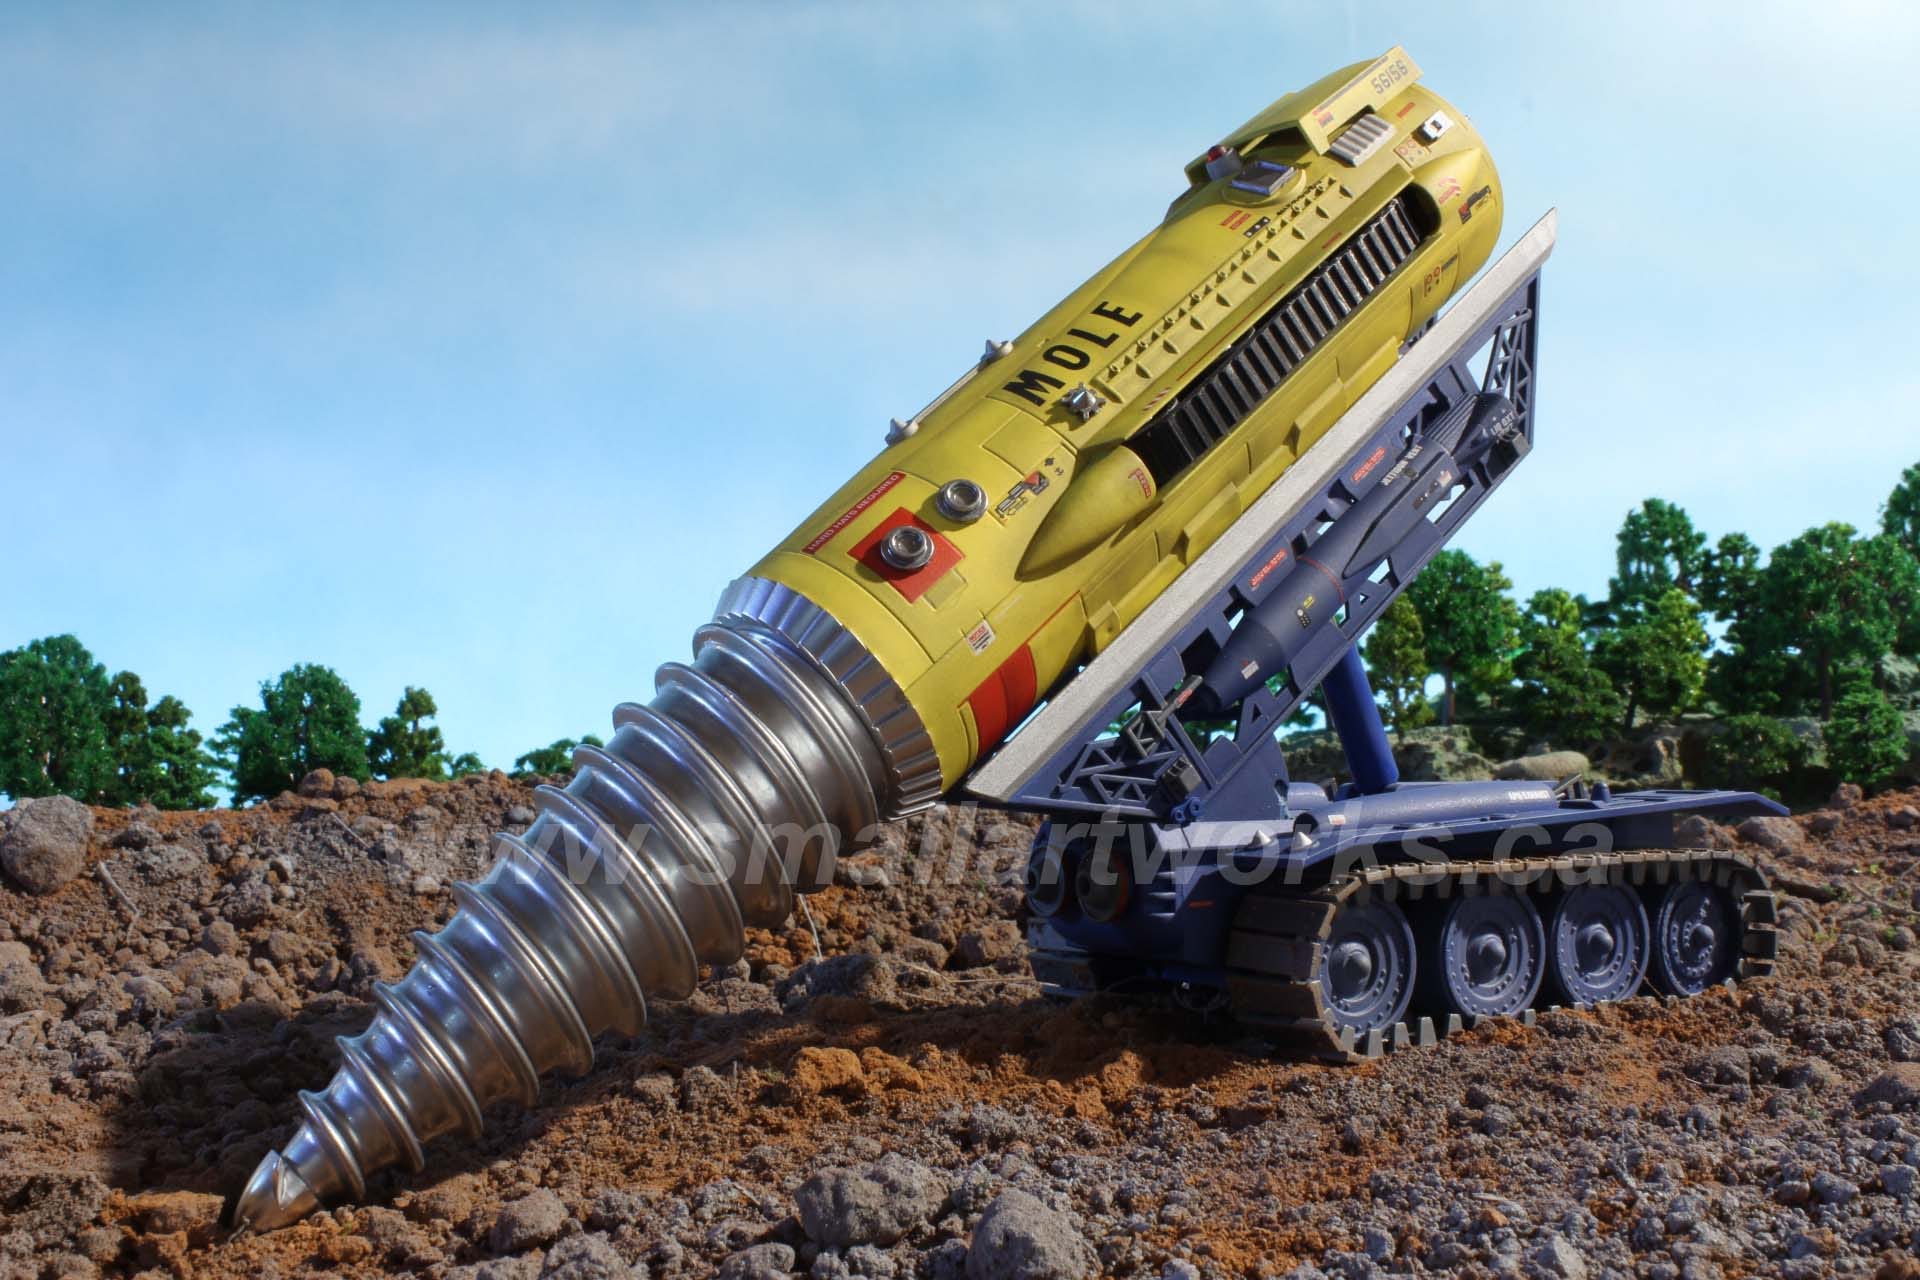
Another Thunderbirds model built for my buddy Dan. This is from yet another AIP/Aoshima kit and somewhat modified. I had a lot of fun building this one too, as it’s so different from what I usually build. The finished model is a mere 10 inches shlong... I mean LONG (OK, stop with the obvious jokes you’re gonna burrow into now… and how can they be avoided noting the shape of this thing!) but surprisingly articulated, and with the slight modifications I made to it, even more so. This kit as sold originally by Aoshima apparently came with several motorized features (Hey! I said stop with the obvious jokes!), but AIP sold the kit without those benefits (!!) so they could, I guess, make more profit by excluding them and simply selling it as a static model at an inflated price. But the remnants of the motorized version made it easier for me to make the mods that made it a little better as a display model with a few manual features, such as the flashing red light on top (maybe not “canon” but it looked like something that should have been) and a “sled” that allowed the Mole section to be positioned anywhere along its launch track as well as being easily removable by using magnets instead of the rather difficult and fragile clip-on tabs that were supposed to be used.
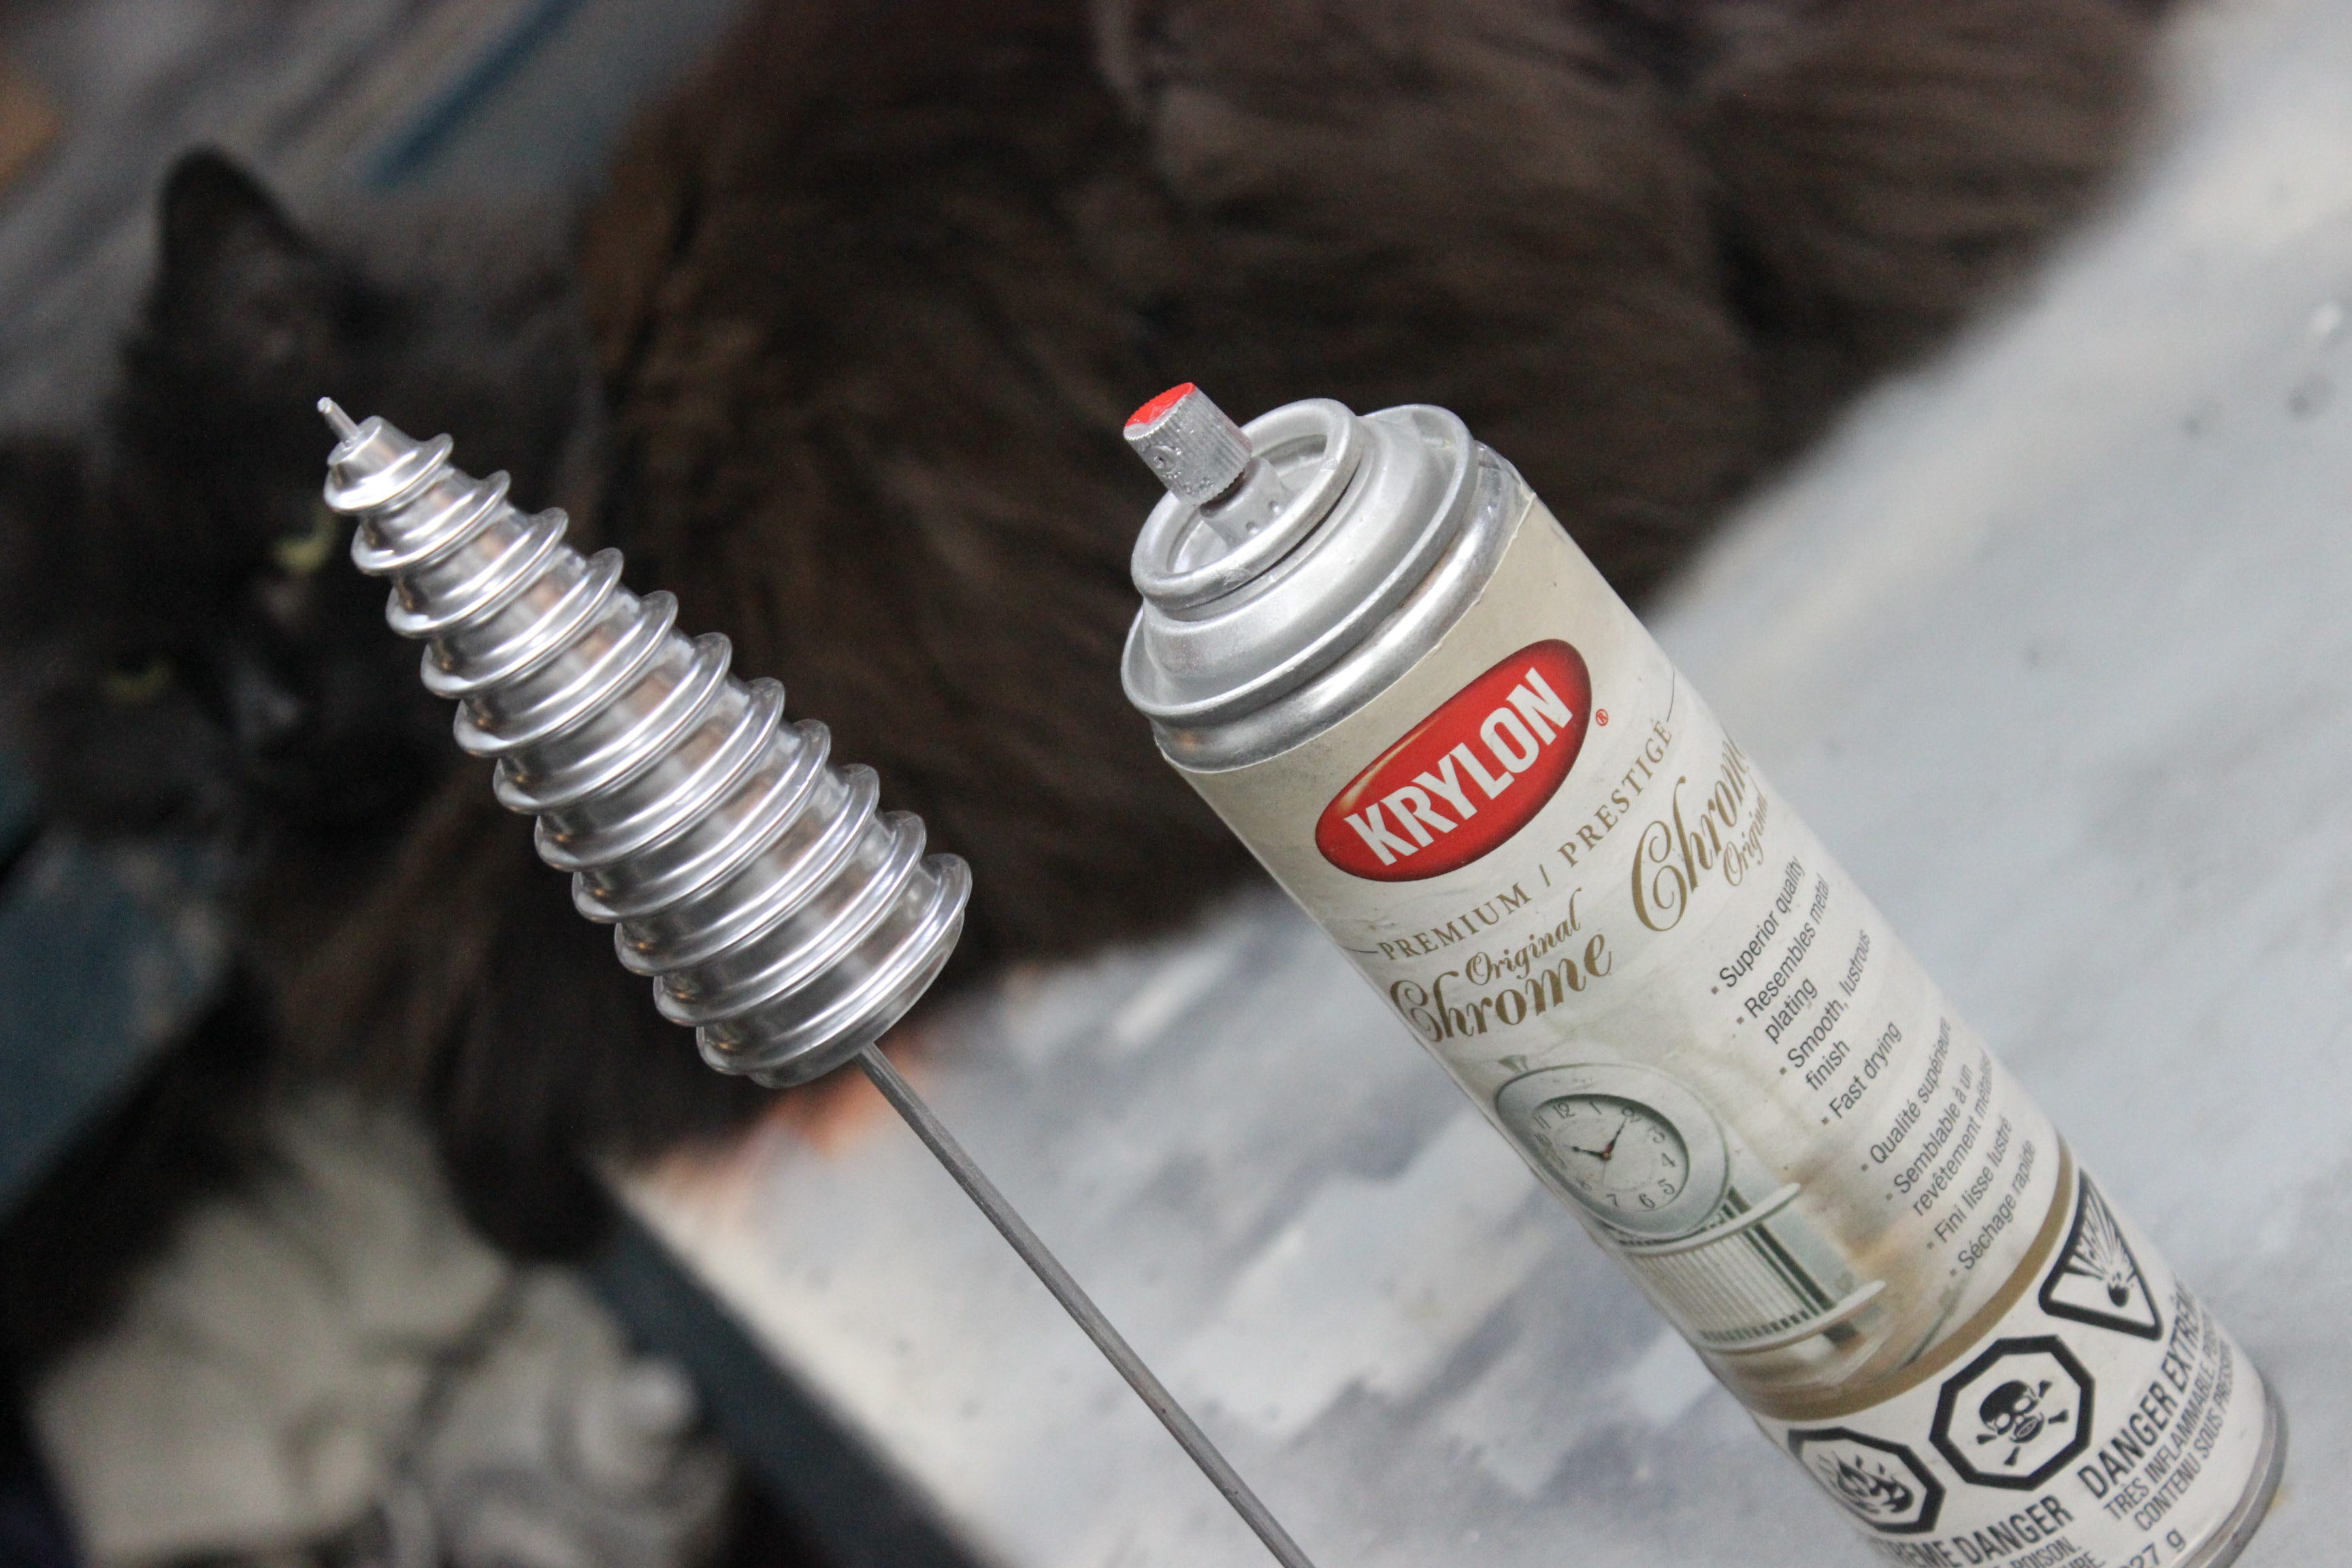
I didn’t photograph everything I did with this model but one disappointing thing is that I had to destroy the beautiful matte silvery plating on the “screw” (Ugh.. more jokes abound) in order to hide the molding seam, as shown here:
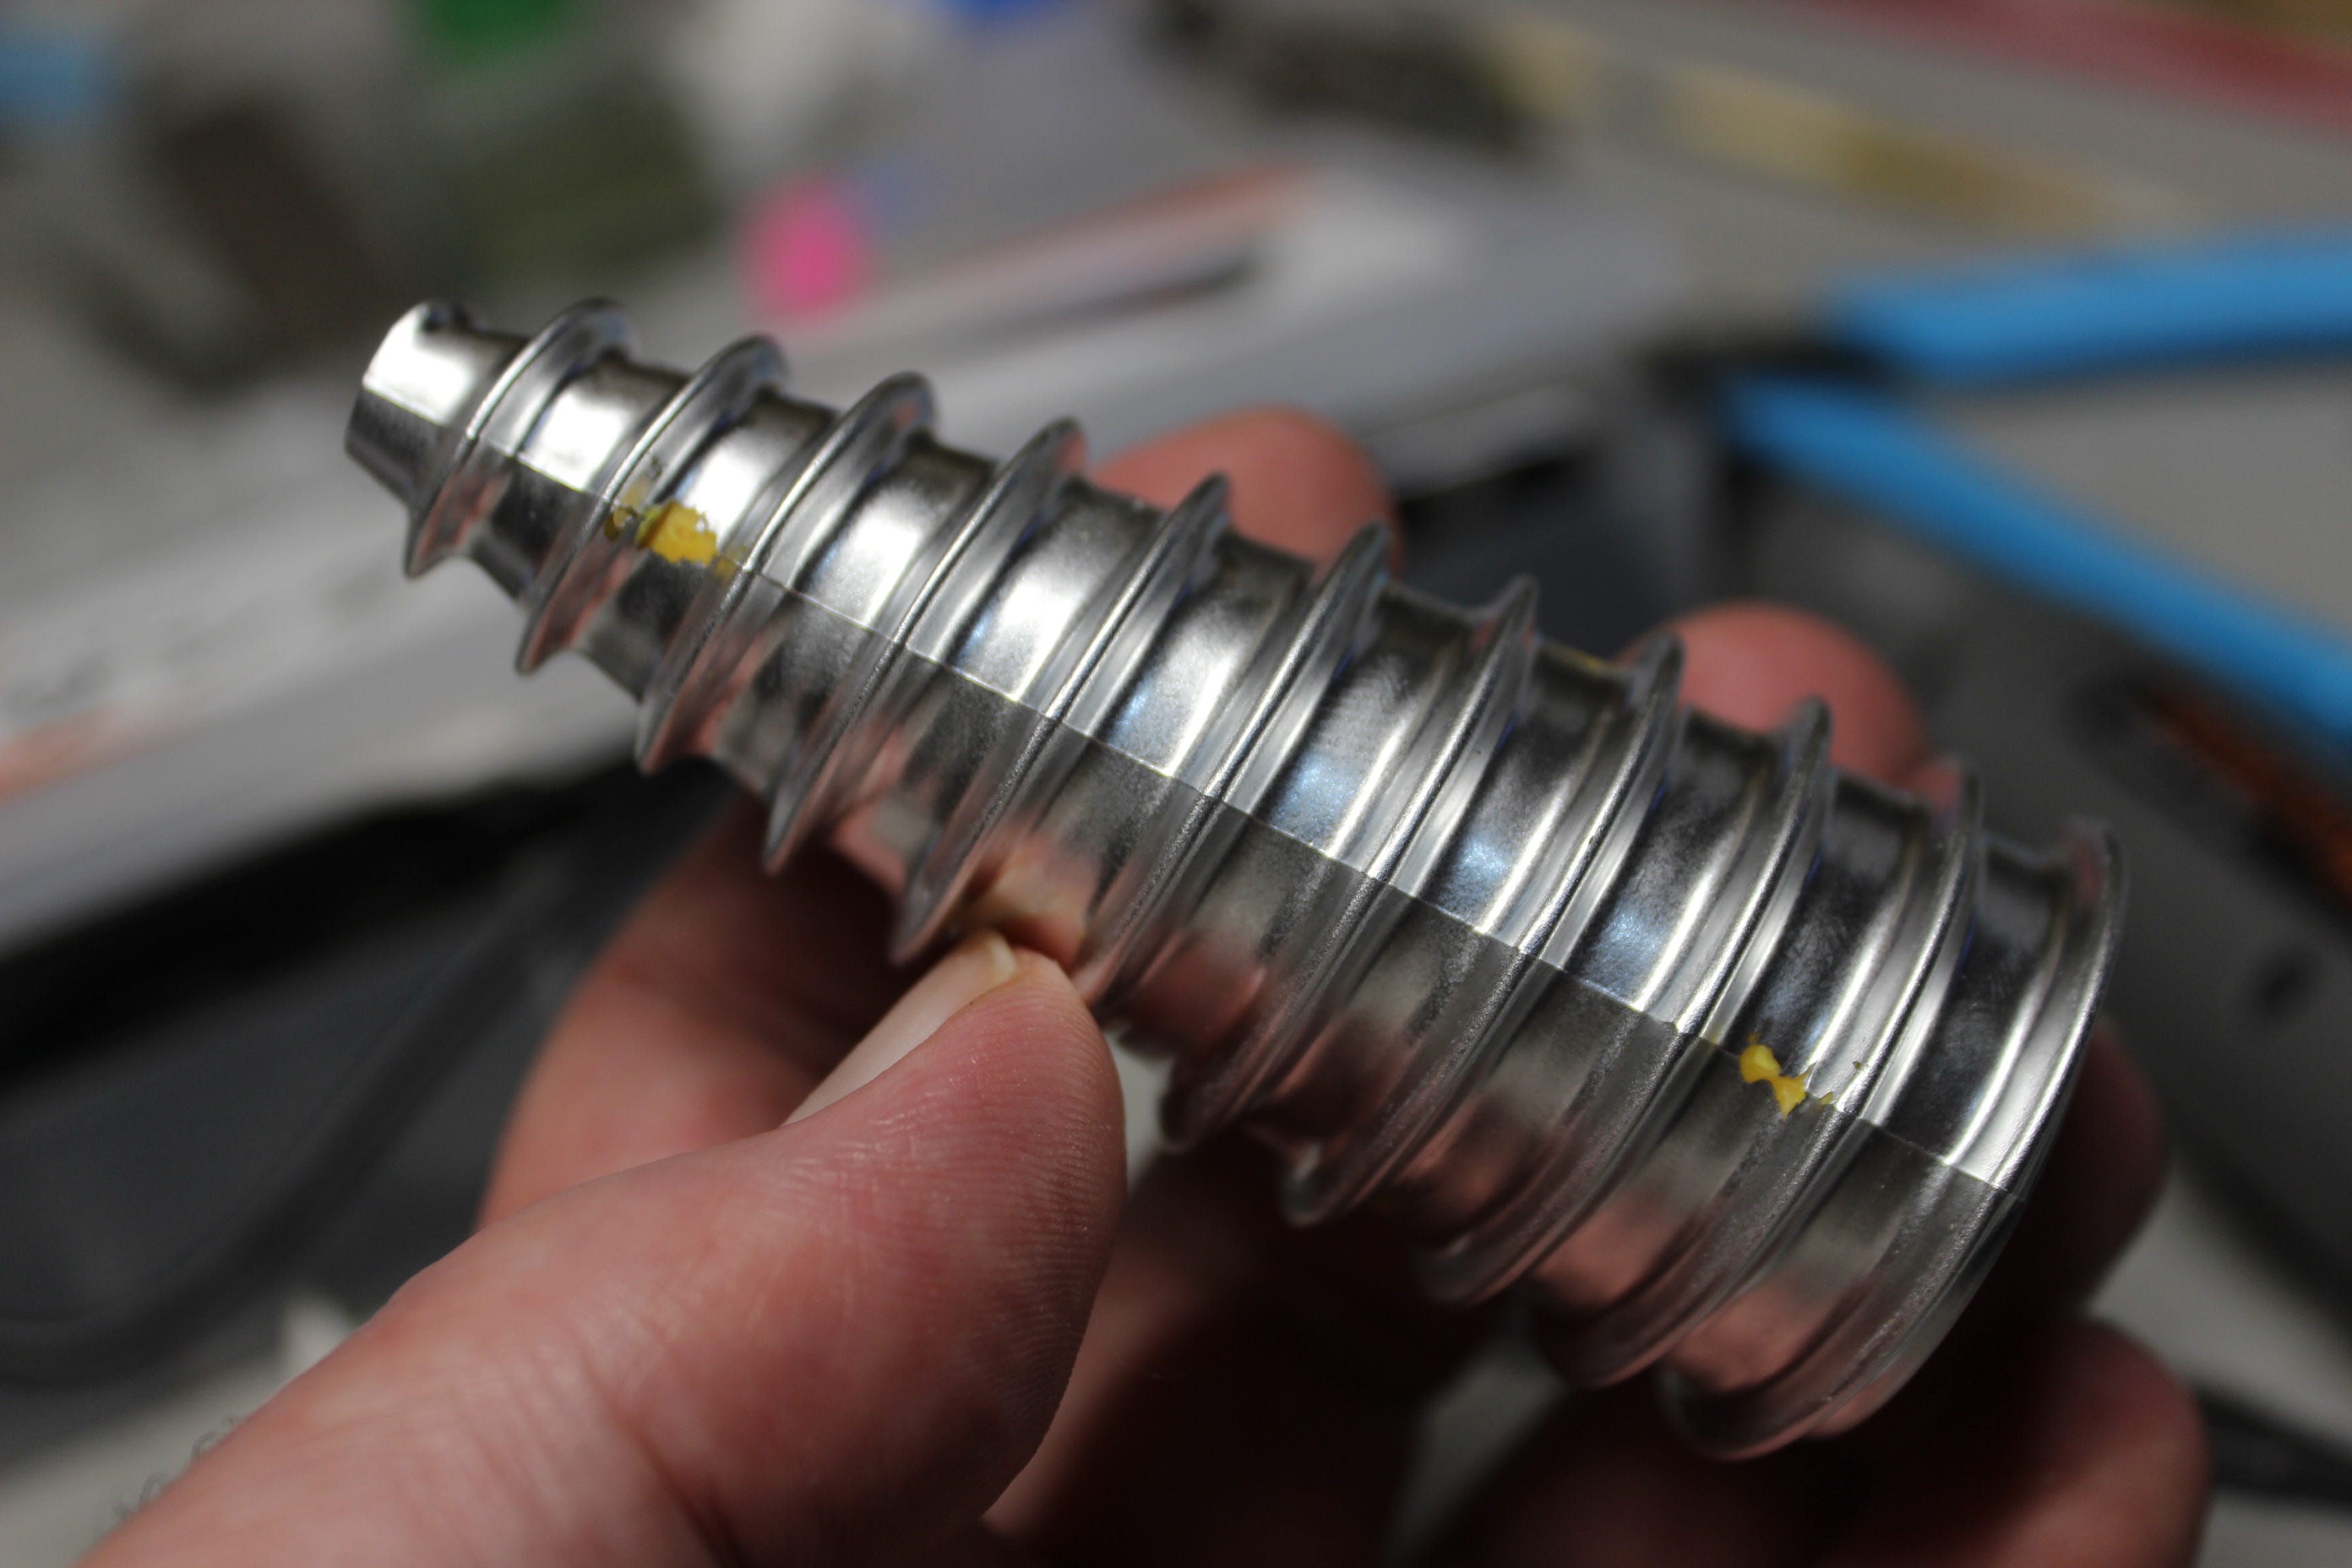
That seam, plus the necessity of exposing the yellow plastic underneath from cutting it away rom the sprue, was unacceptable. So I had to use files and sandpaper to remove that seam, as you can see here:
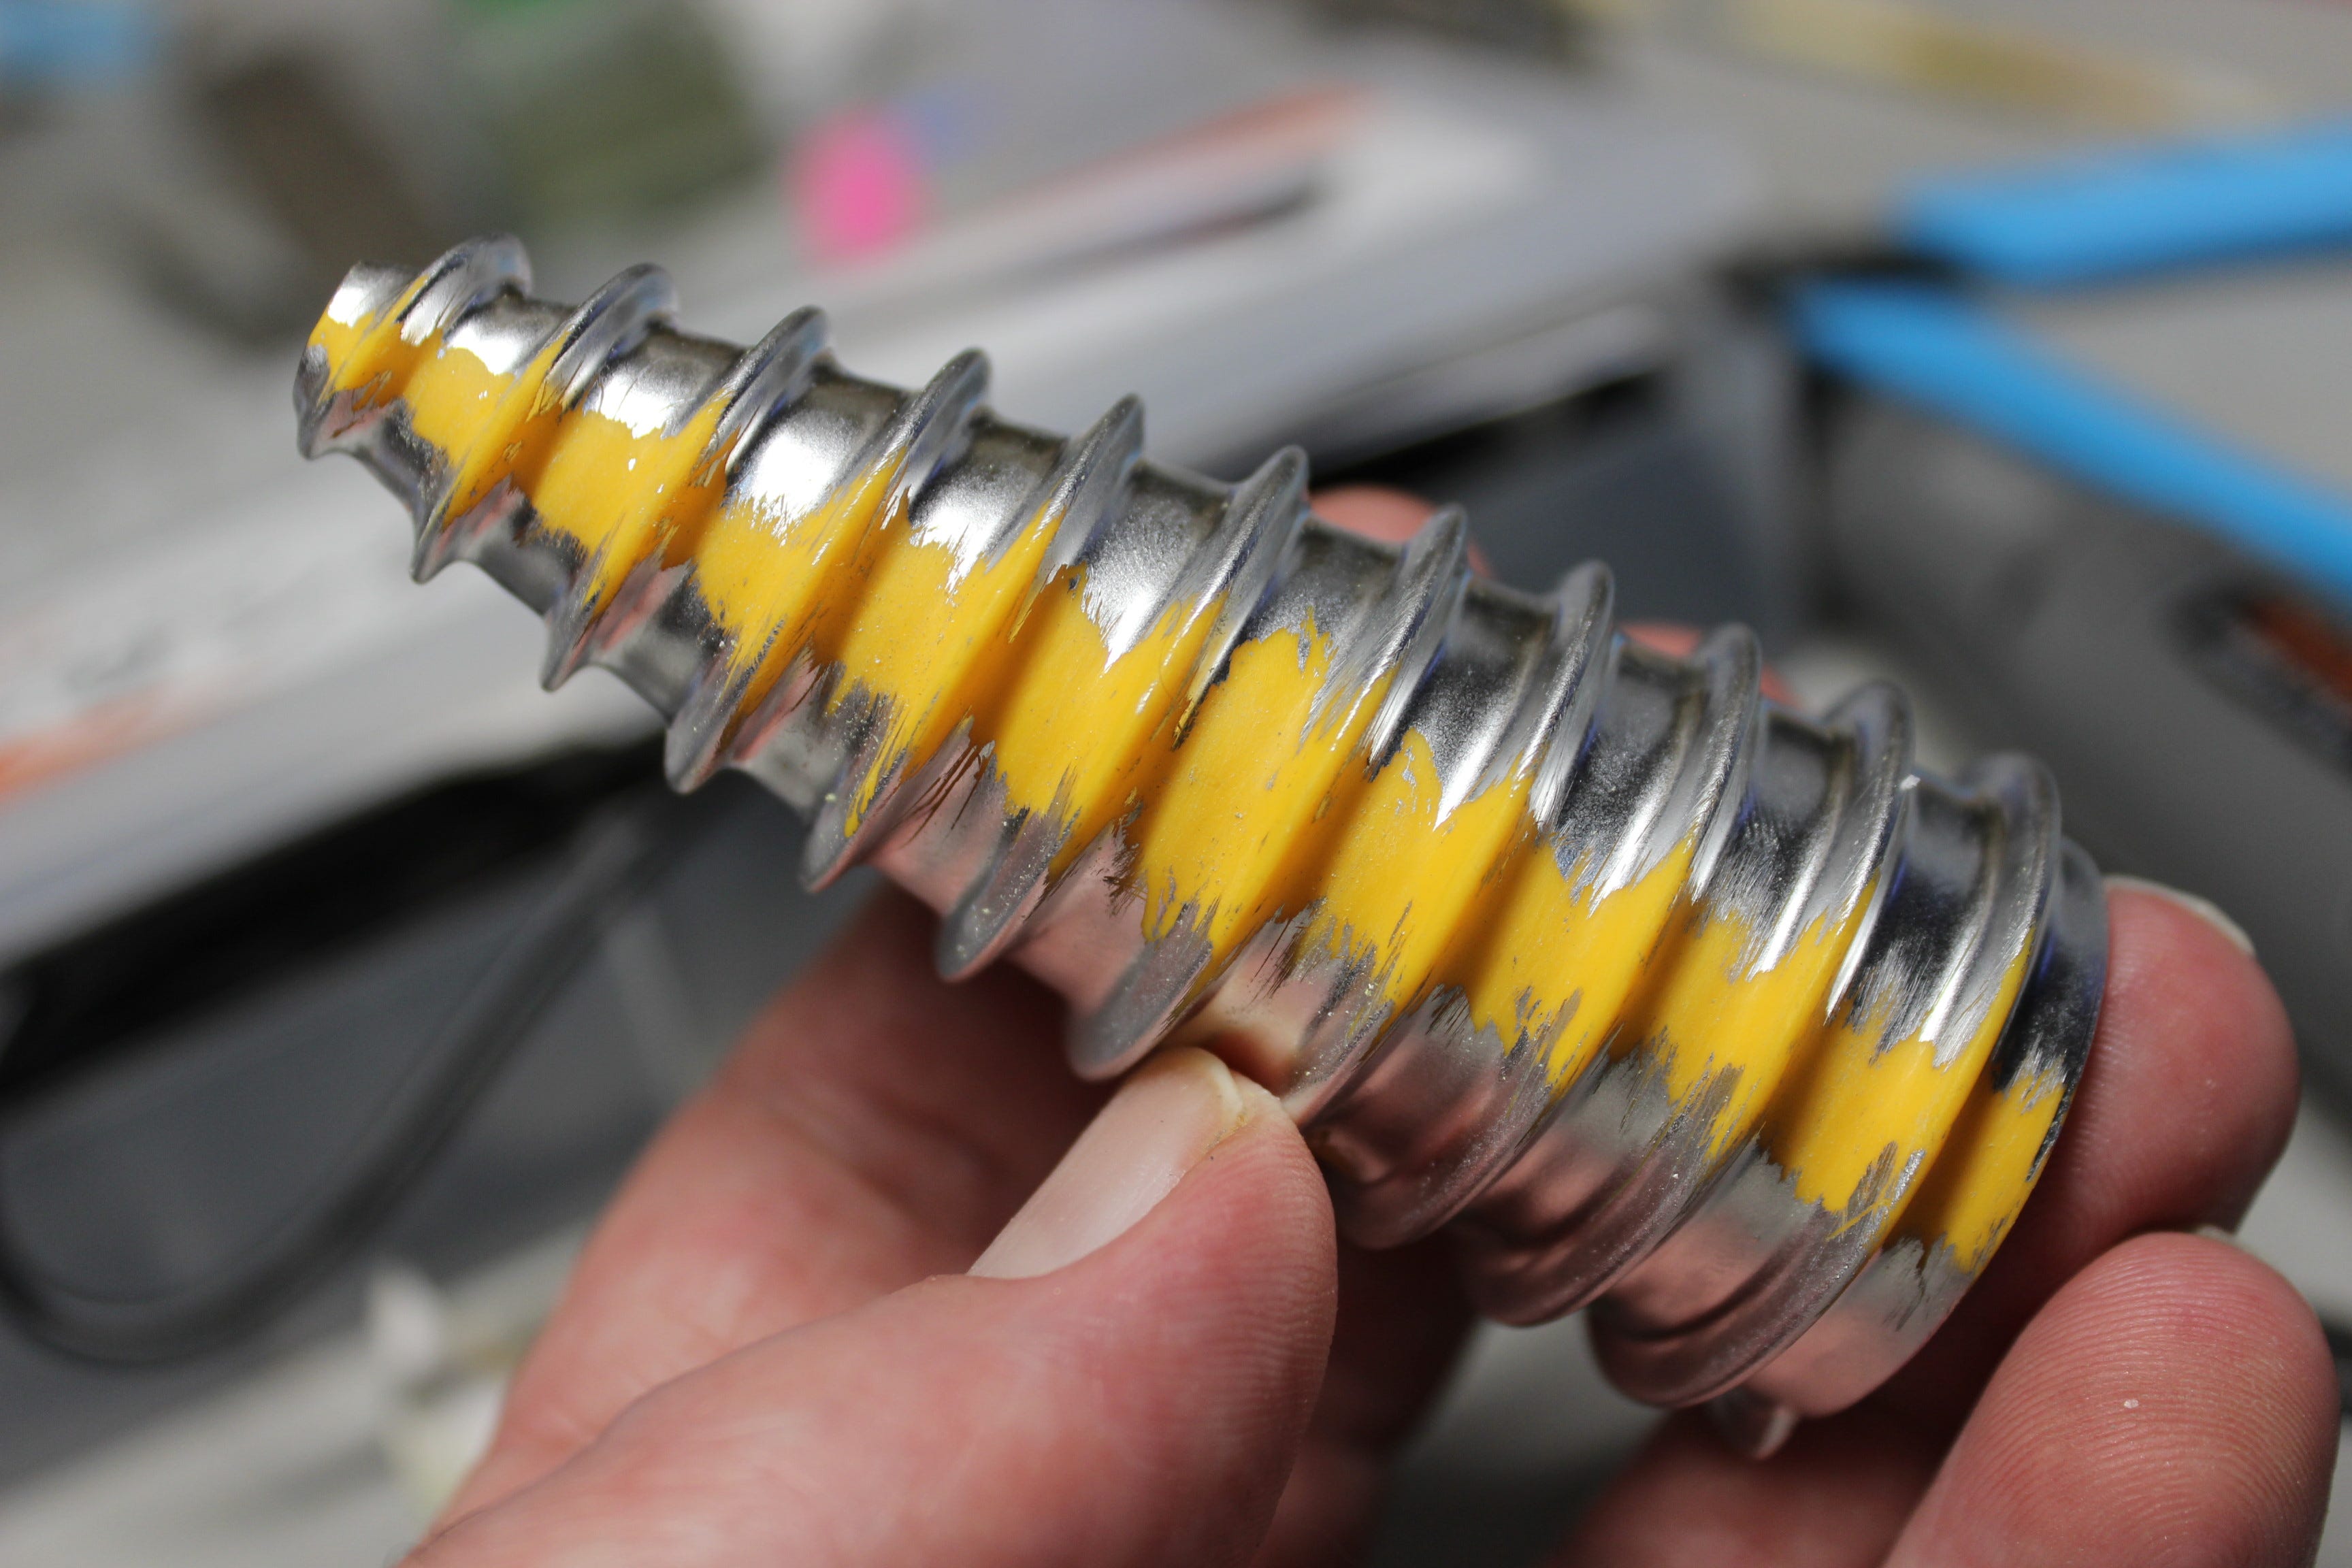
The part was then sprayed with primer to reveal further flaws:

And once smooth, the whole section was primed and then sprayed with a “chrome” paint. These supposed “chrome” paints are outright lies by the manufacturer, as they do NOT approach “chrome plating” as advertised (despite the fact that the can had a cap that was indeed vacuum metalized chrome plated) at all and are nevertheless a bright silver, but they will NOT withstand ANY handling whatsoever, even when dry, so a suitable protection coat was needed. After spraying and drying overnight, a coating of “Future” floor polish (or equivalent) results in a finish that is VERY close to the way the original kit plating looked, and the seams are gone. Houdini, my last surviving cat (as I lost my tuxedo cat Zander a couple of months ago… sadly he died after fifteen years of friendship), lurks in the shadows behind the silvery bits in this shot below.
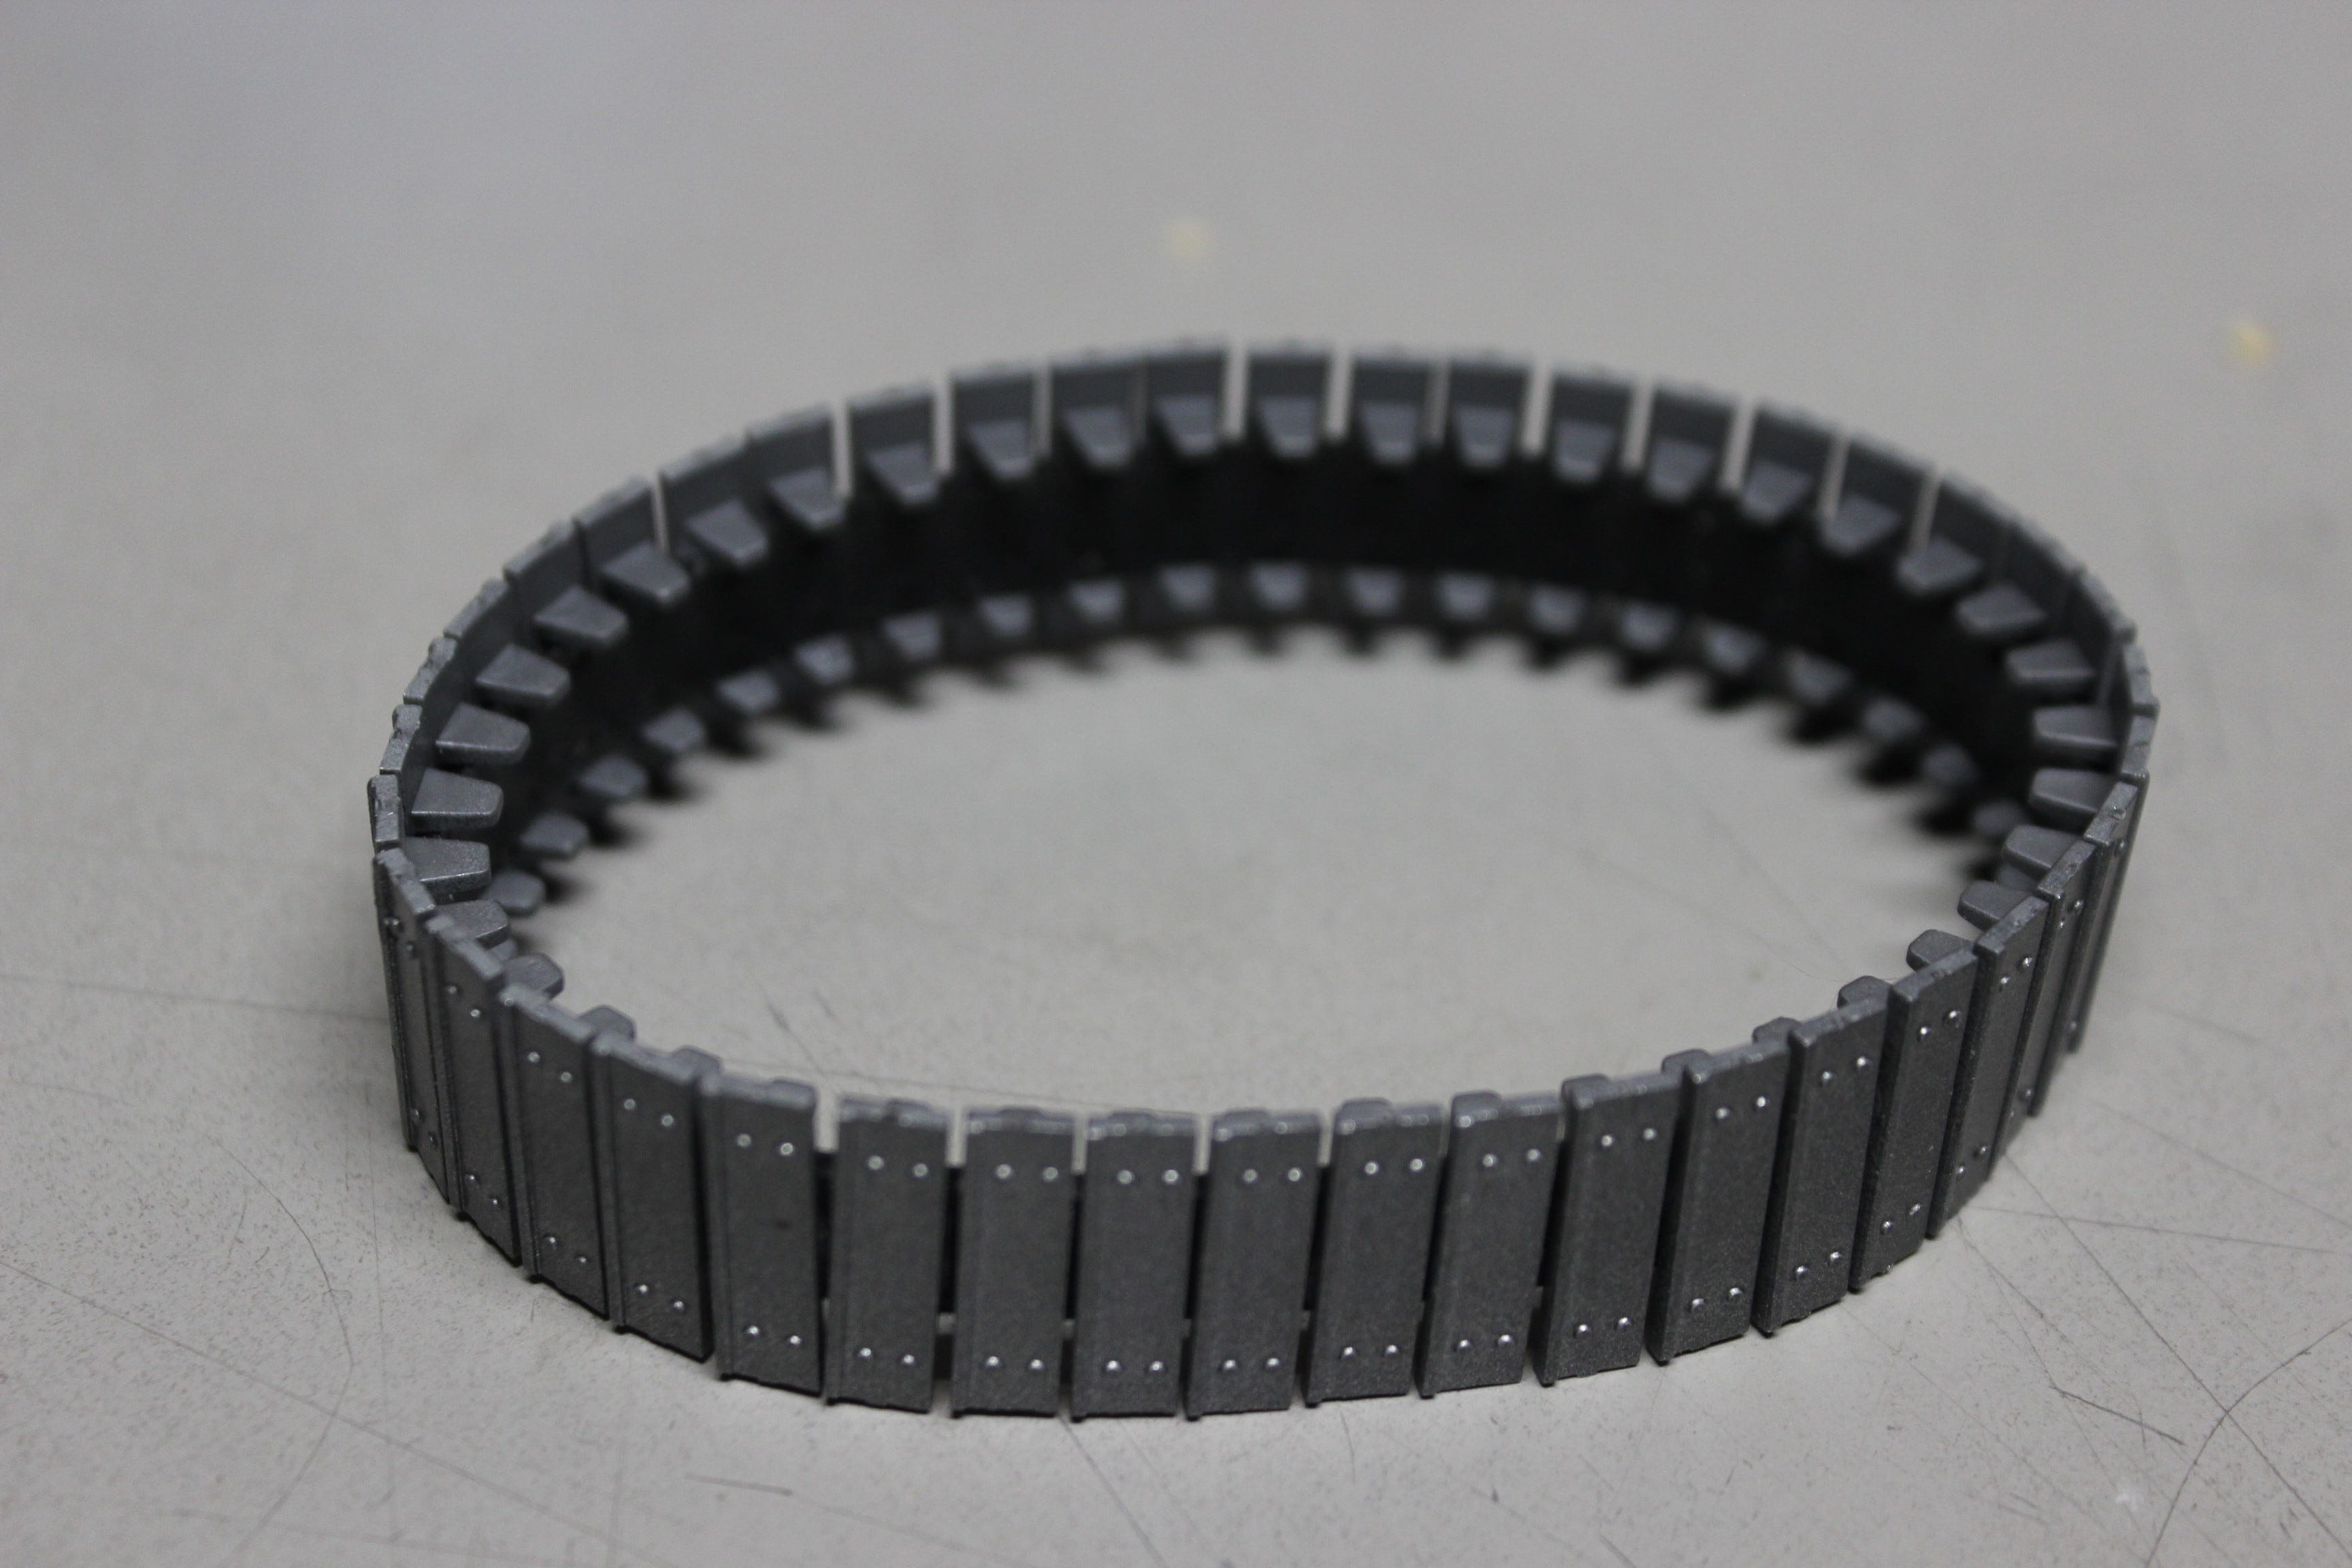
The tracks on the main carriage vehicle on the kit was essentially a rubber band that you had to glue the track plates to using Cyanoacrylate (superglue). This worked remarkably well as per the destructions.
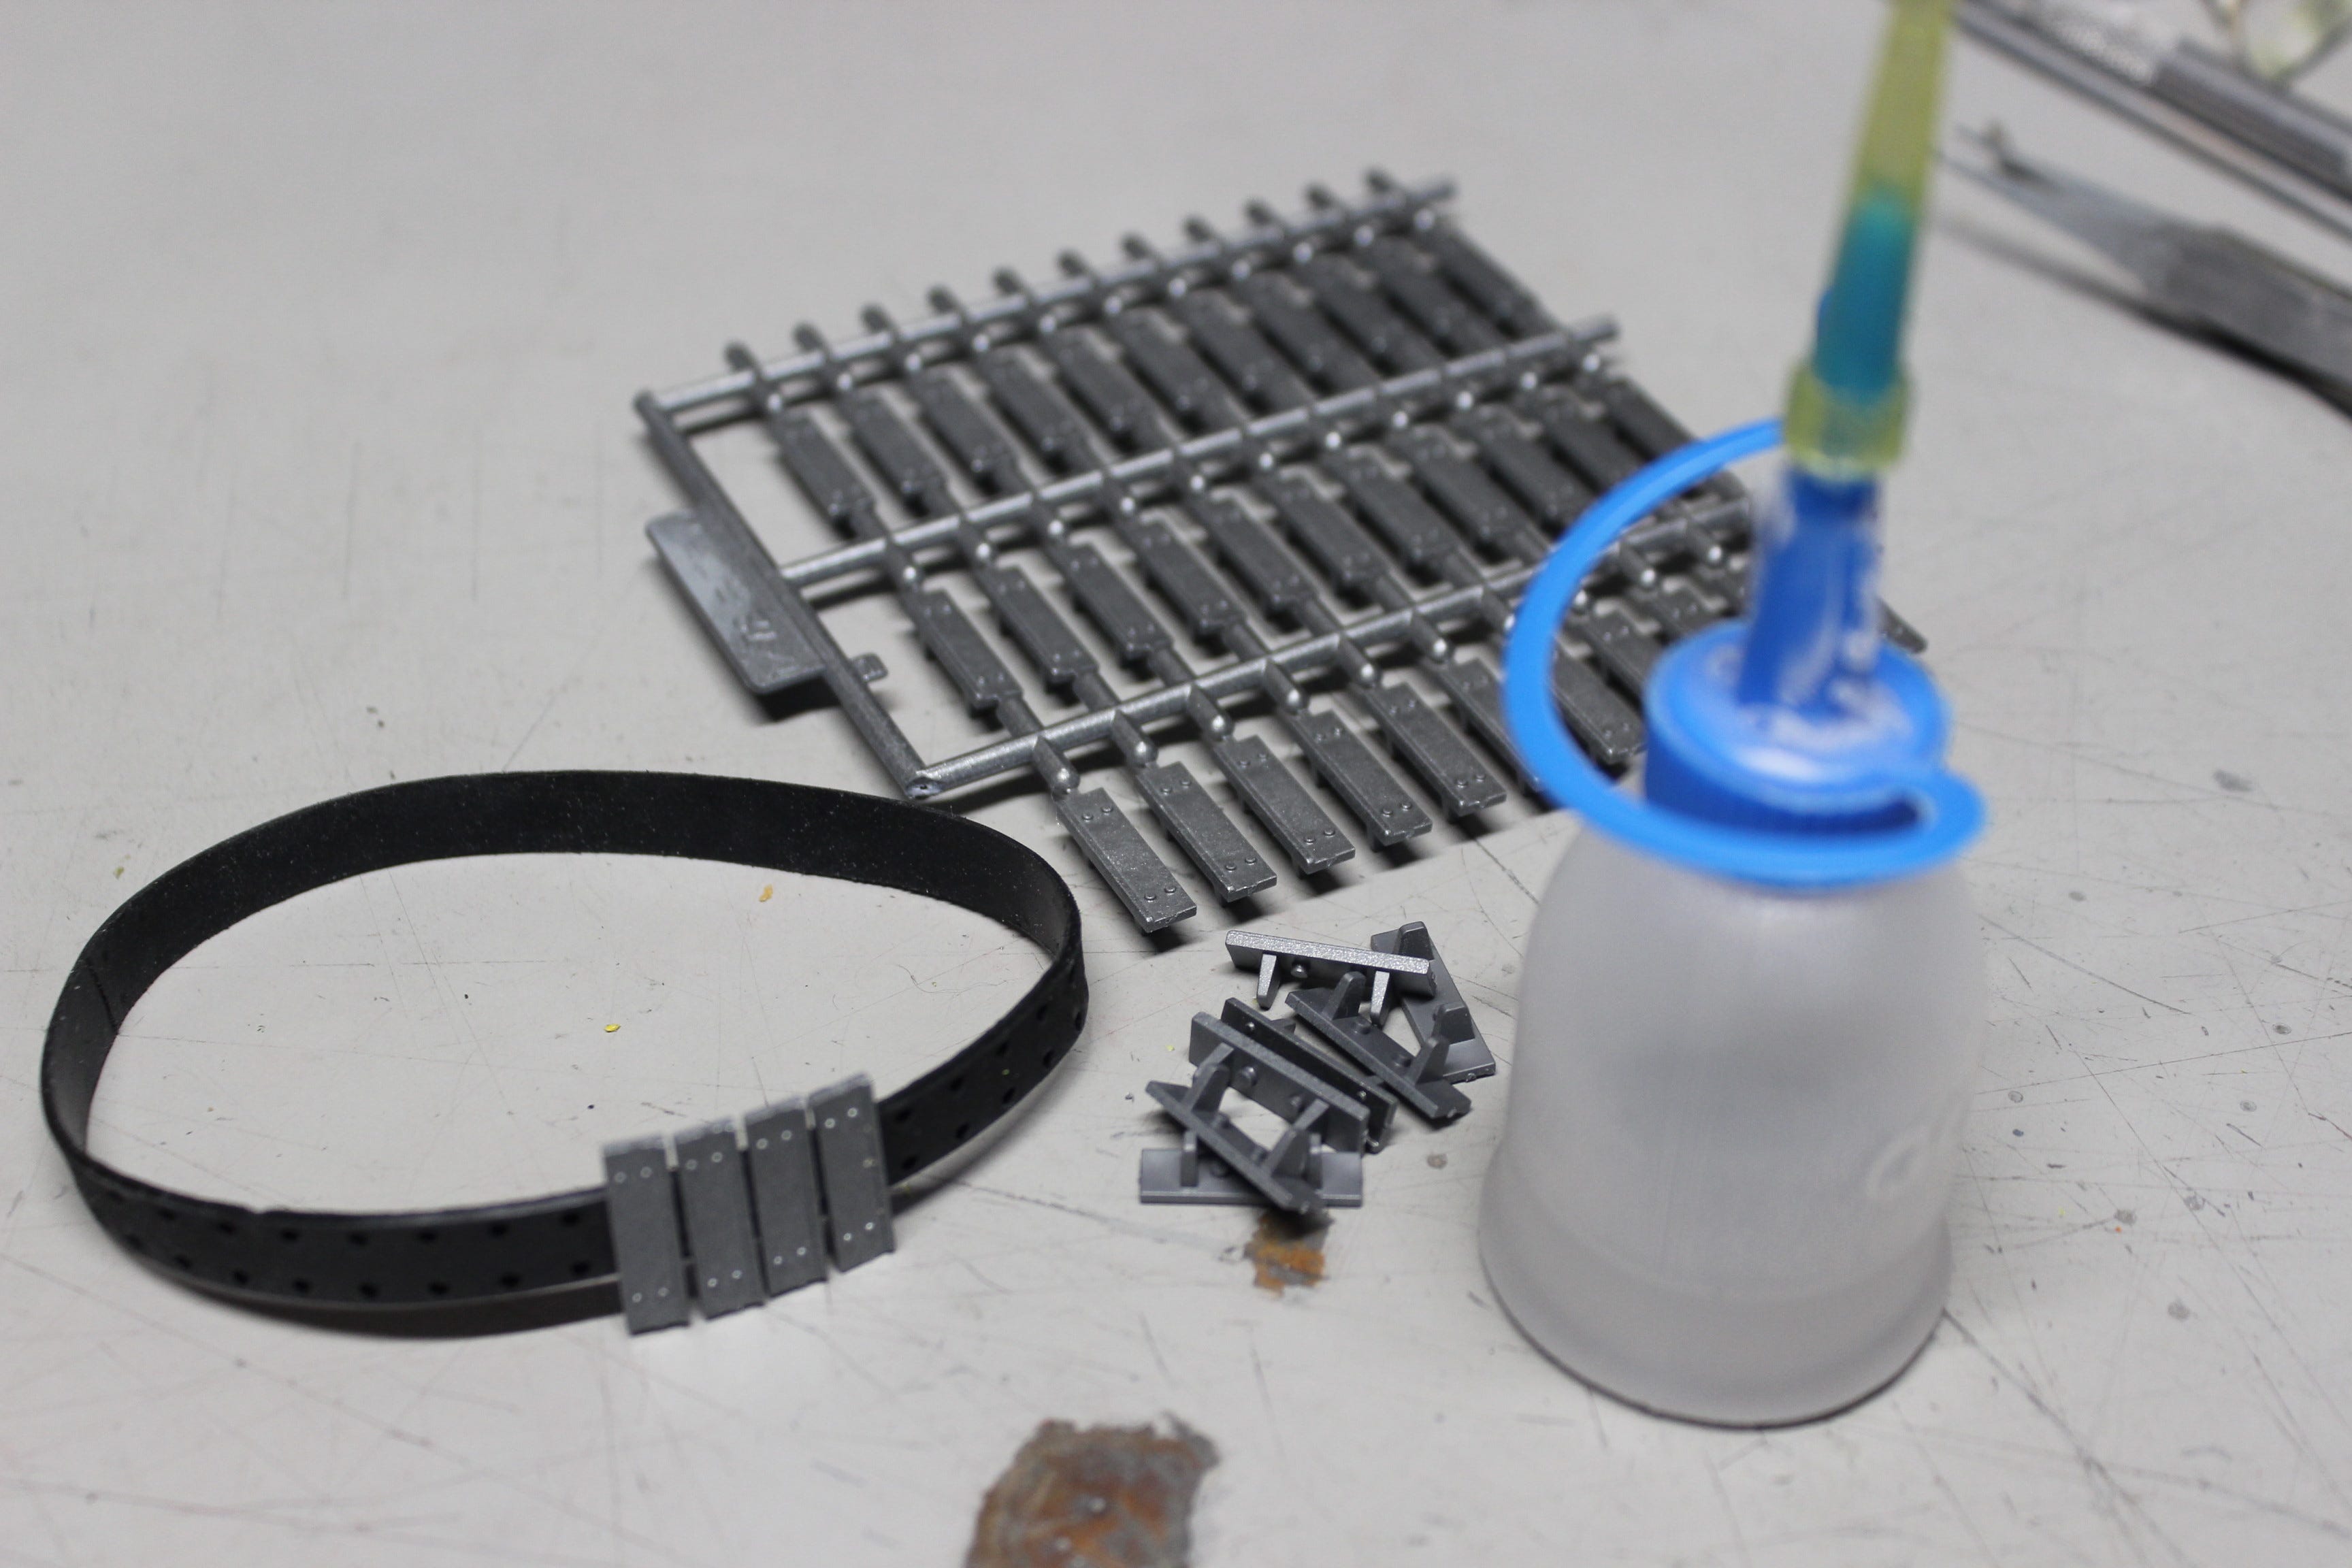
The tracks remained workable and supple so they would actually move as per the original studio model. (BTW the original studio models for most Thunderbird tracked vehicles such as this Mole and the Firefly, the recovery vehicle and others used a kid’s toy called the Vickers Vigor, about a foot long, available at the time for the chassis which was a tractor/bulldozer type model.)
Below is the delivery caterpillar with the angled launch platform. I made a movable “sled” that has magnets on it that attaches to the yellow Mole cylinder that allows the mole to be positioned as desired. The kit had relegated itself to one position only. I decided it’d be more fun to have it be variable.

The assembly is rather crude but it doesn’t matter since you won’t see it with the Mole attached anyway.

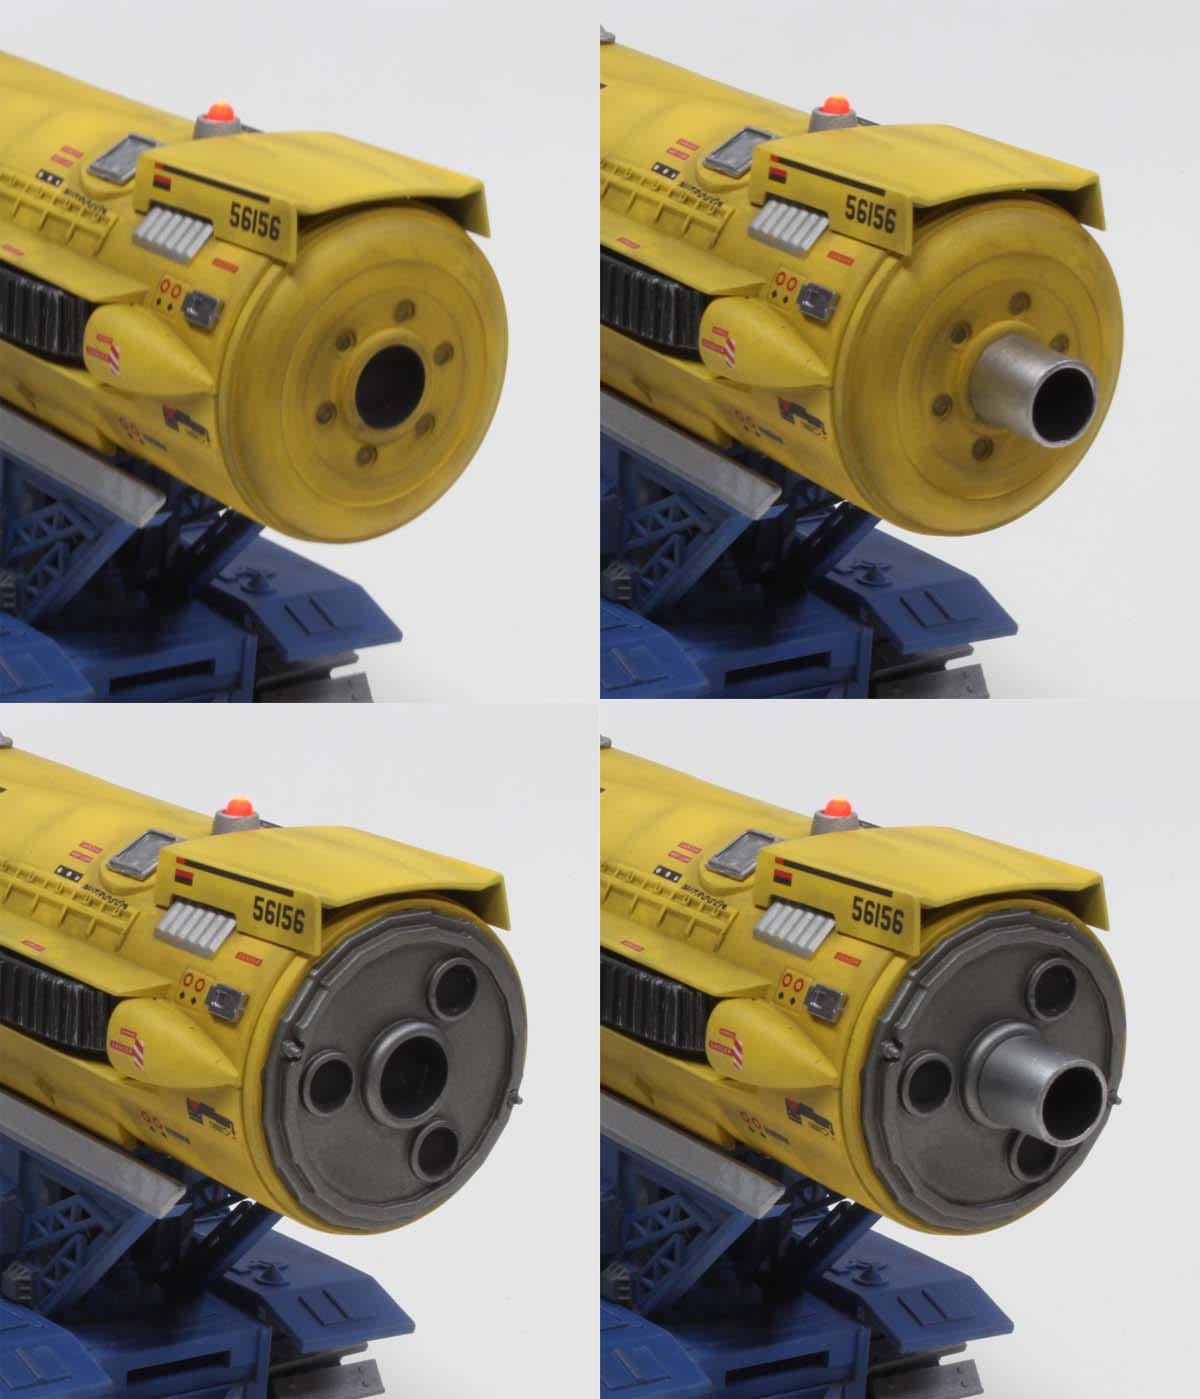
Here is the interior assembly of the Mole itself, showing the battery pack to run the red flashing light on top, the side tracks assembly and the modifications made to the drill section modified with an aluminum rod affixed with a collar and set screw so that it would turn and not flop around or come loose.
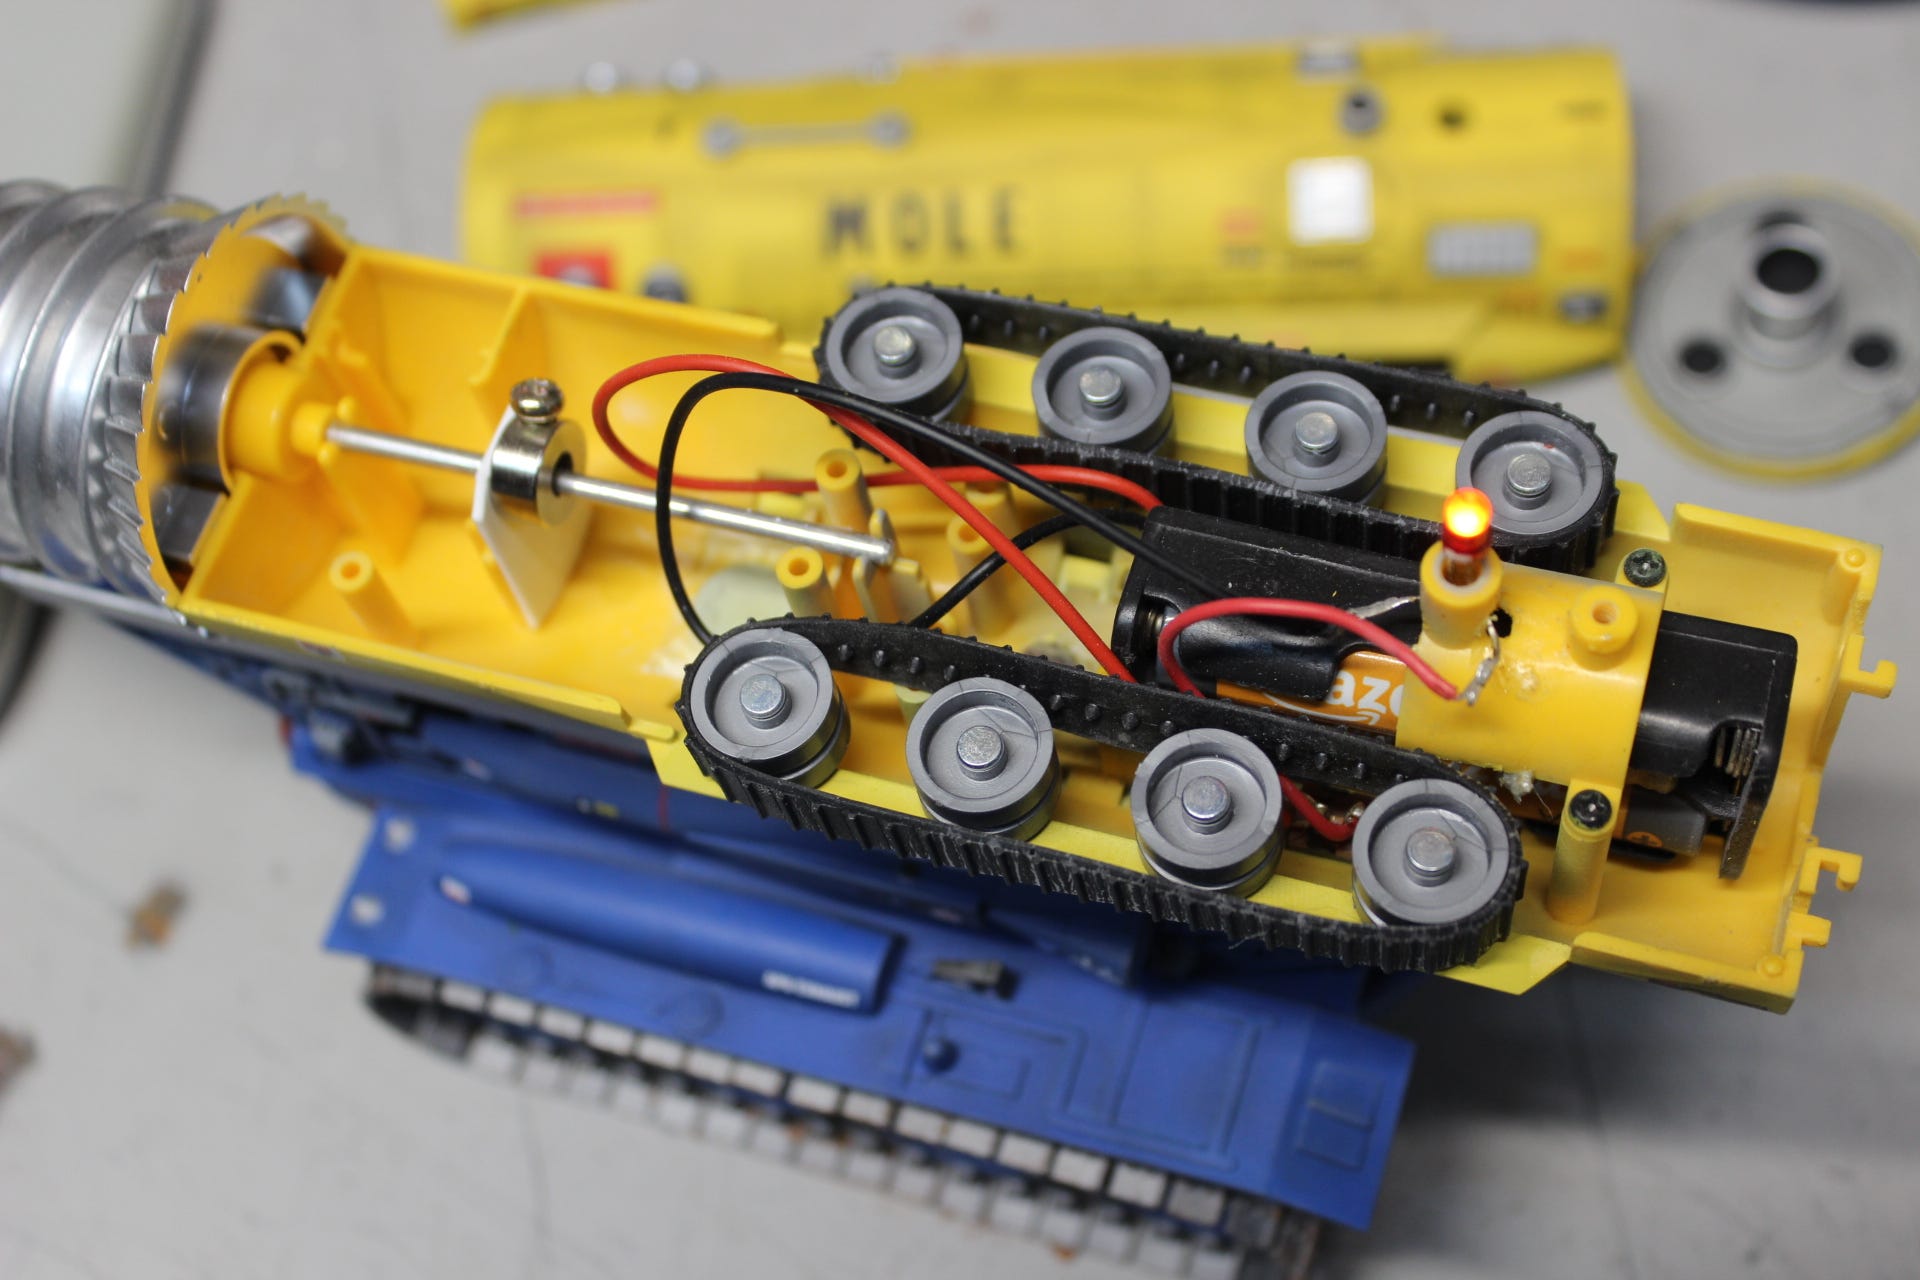
The original studio model(s) had some differences in the rear end of the Mole, and the kit provided a choice of styles that would be permanent. BUT I wanted the choice to be choose-able (is that a real word? Meh… gonna use it anyway since nobody cares about using proper grammar these days) after the fact so I made sure that both versions, including the optional rear rocket motor could be swapped out at will. I used magnets for the rocket motor and I found some extra screws in my stash to allow the second backing to be put in place too. This removable/swappable plate also allows access to the battery pack that runs the flashing light on top.
Anyway, that’s about it. Here is how the photos of the quick-and dirty diorama shown at the top of this article were shot:
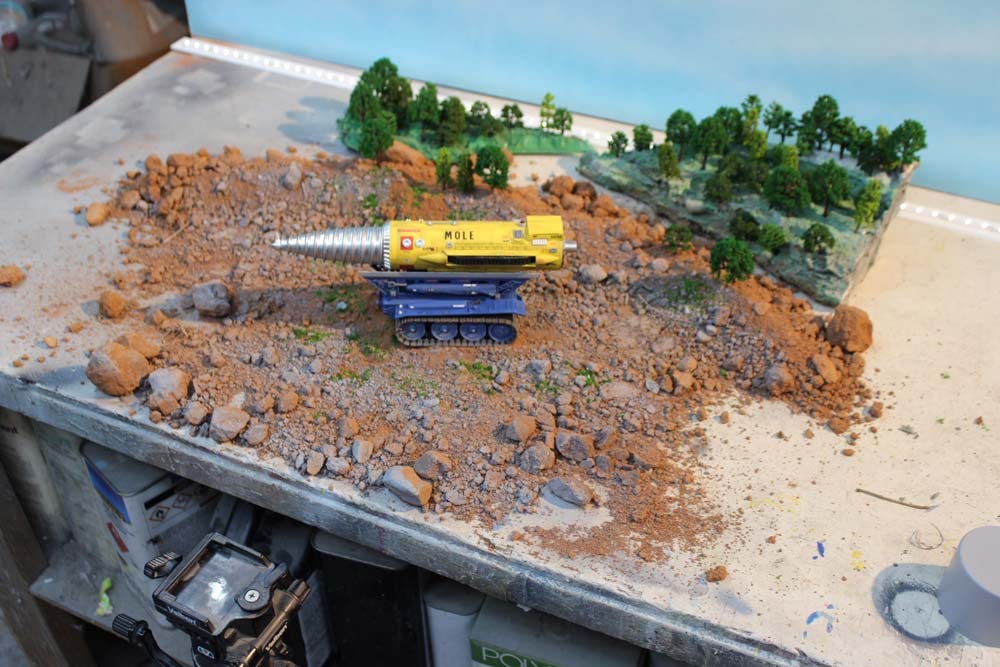
Camera tripod head is shown at bottom left. The set was just “dressed to camera” and lit appropriately with a key light to fake sunlight and fill light simply provided by the LED strip lights in the shop. Another LED strip light at rear helps to give depth the the crudely sprayed sky backdrop.
Enjoy… and PLEASE….
Remember that if you want to have a model custom built for you, please contact me at “jim@smallartworks.ca” and tell me what you’d like to have done!
Beautiful model. Top shelf craftsmanship, as always!