

Falklands "Harrier" Jet in 1/24th scale
Large model, custom-built and fully lit!

This model was built at the request of a Canadian customer who wanted a replica of a Falklands war era version of the famous British “Jump Jet”. He and I talked back and forth for a while to decide on what specific size and kit he wanted built. He settled on having me build the massive 1/24th scale Airfix version which measures close to two feet long. I love lighting models too, so he went with that option as well. Lighting really adds a lot of life to any miniature.
I started by planning out all the various LEDs required to animate the model and began with various subassemblies The kit is very old, originally released in the late 1960s or ‘70s so, although nicely detailed, parts fit isn’t up to the standard of modern kits.
I did some research to try and find out exactly what and how the lighting on a Harrier should look DURING the Falklands war era. Modern Harriers look considerably different than those used in the early 1980s by the British air force.
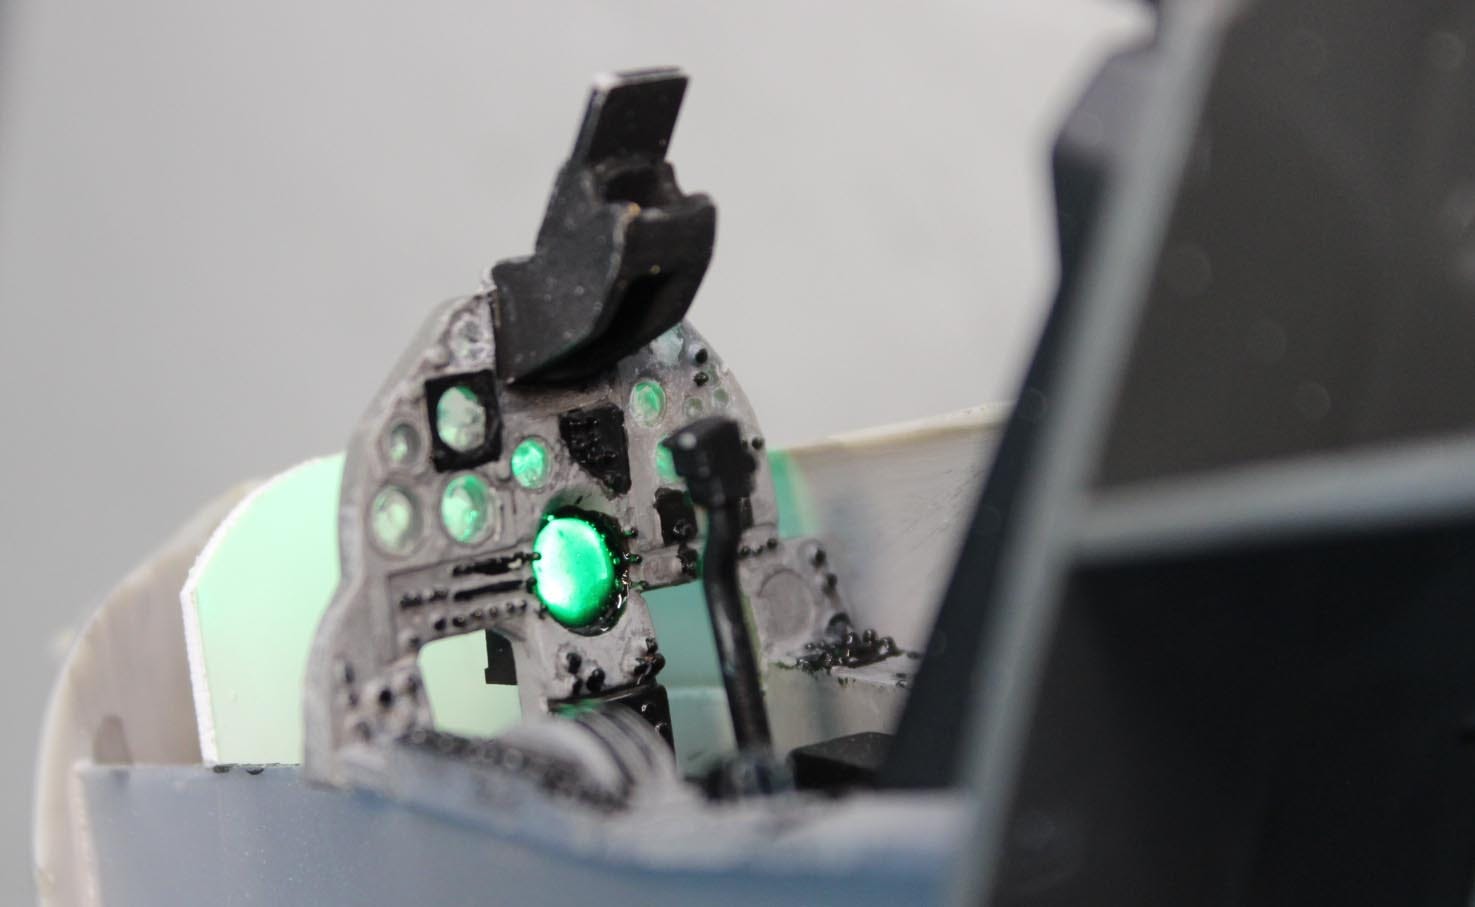
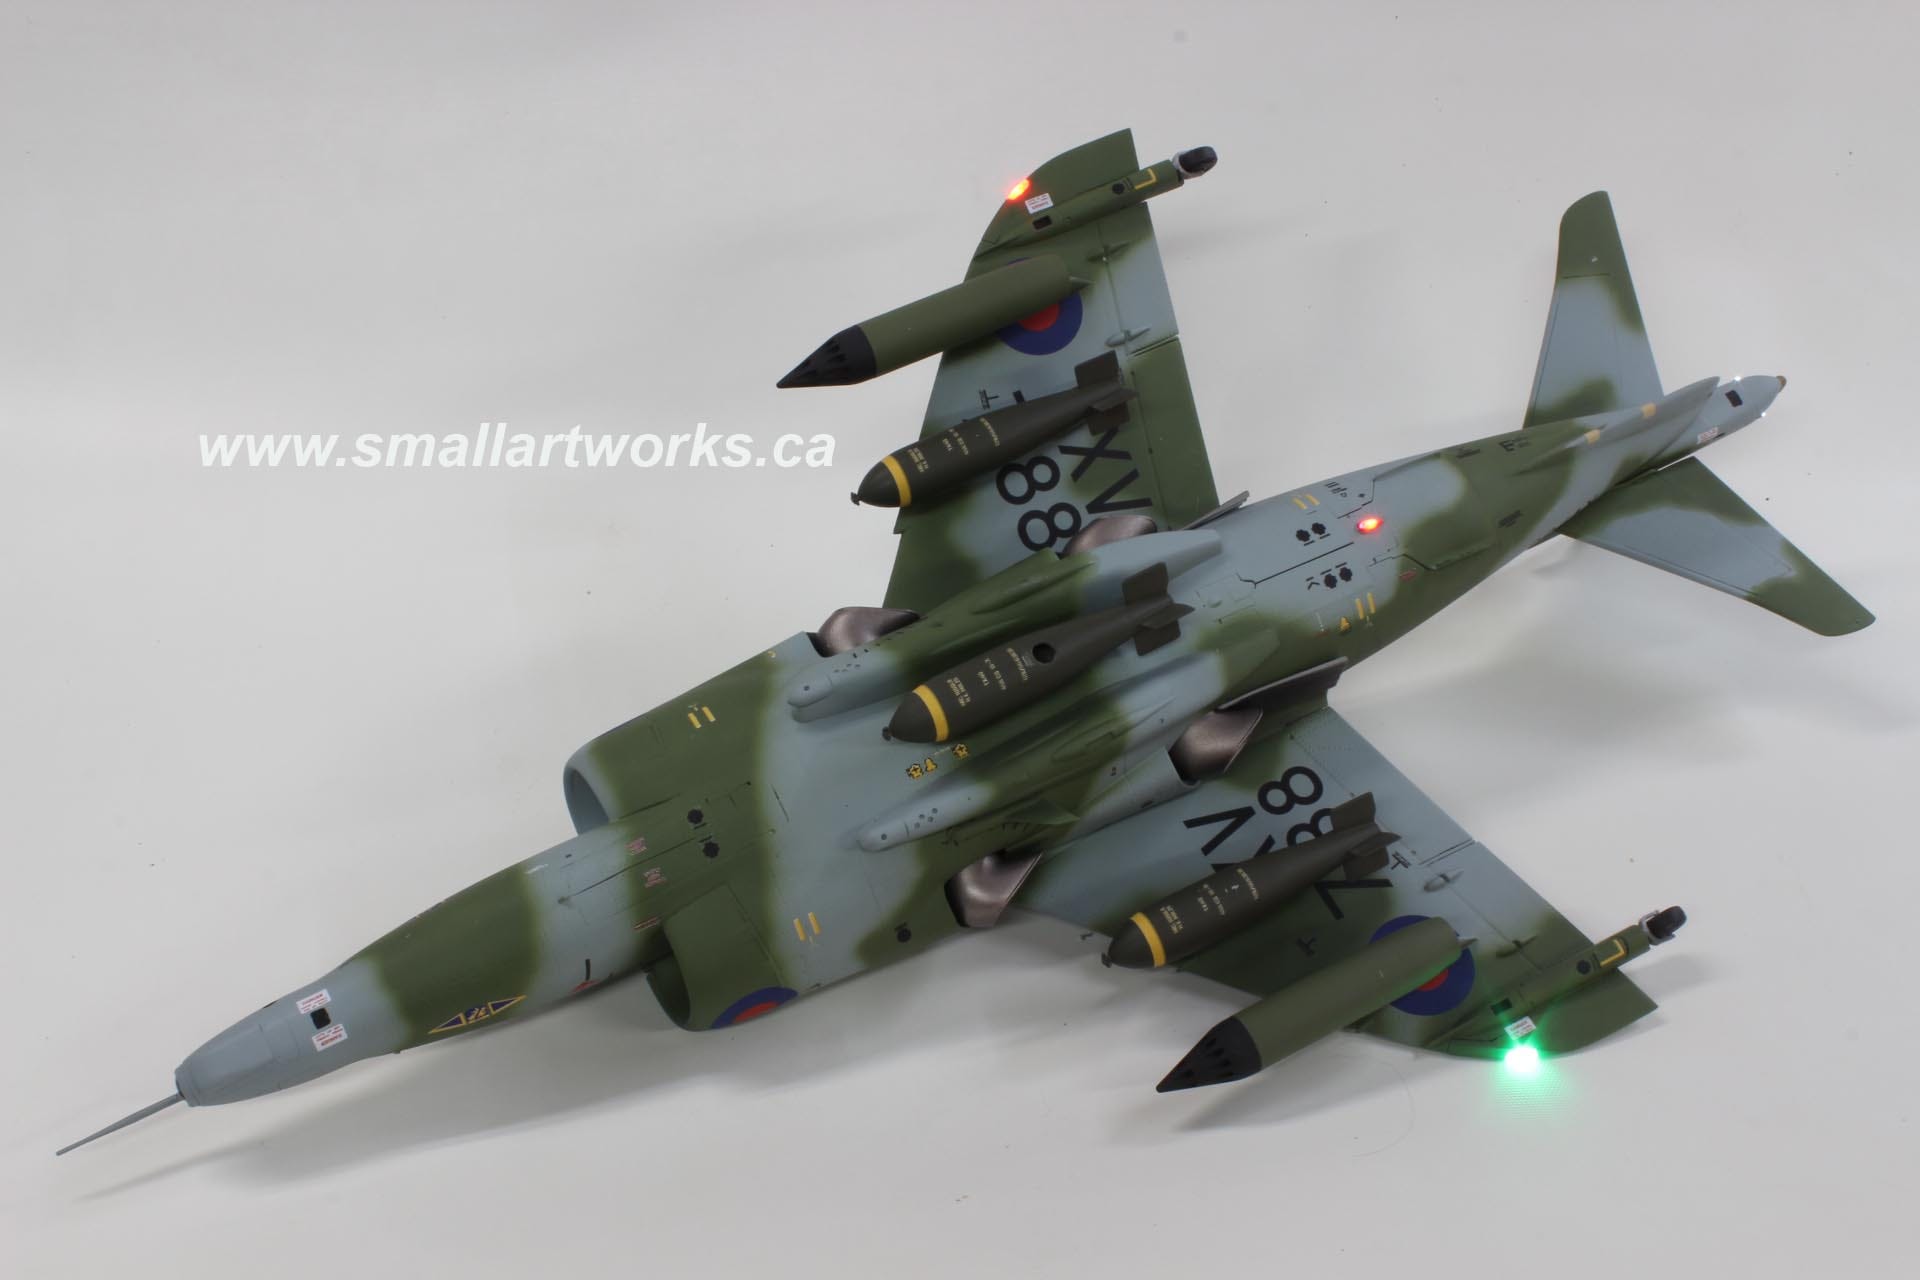
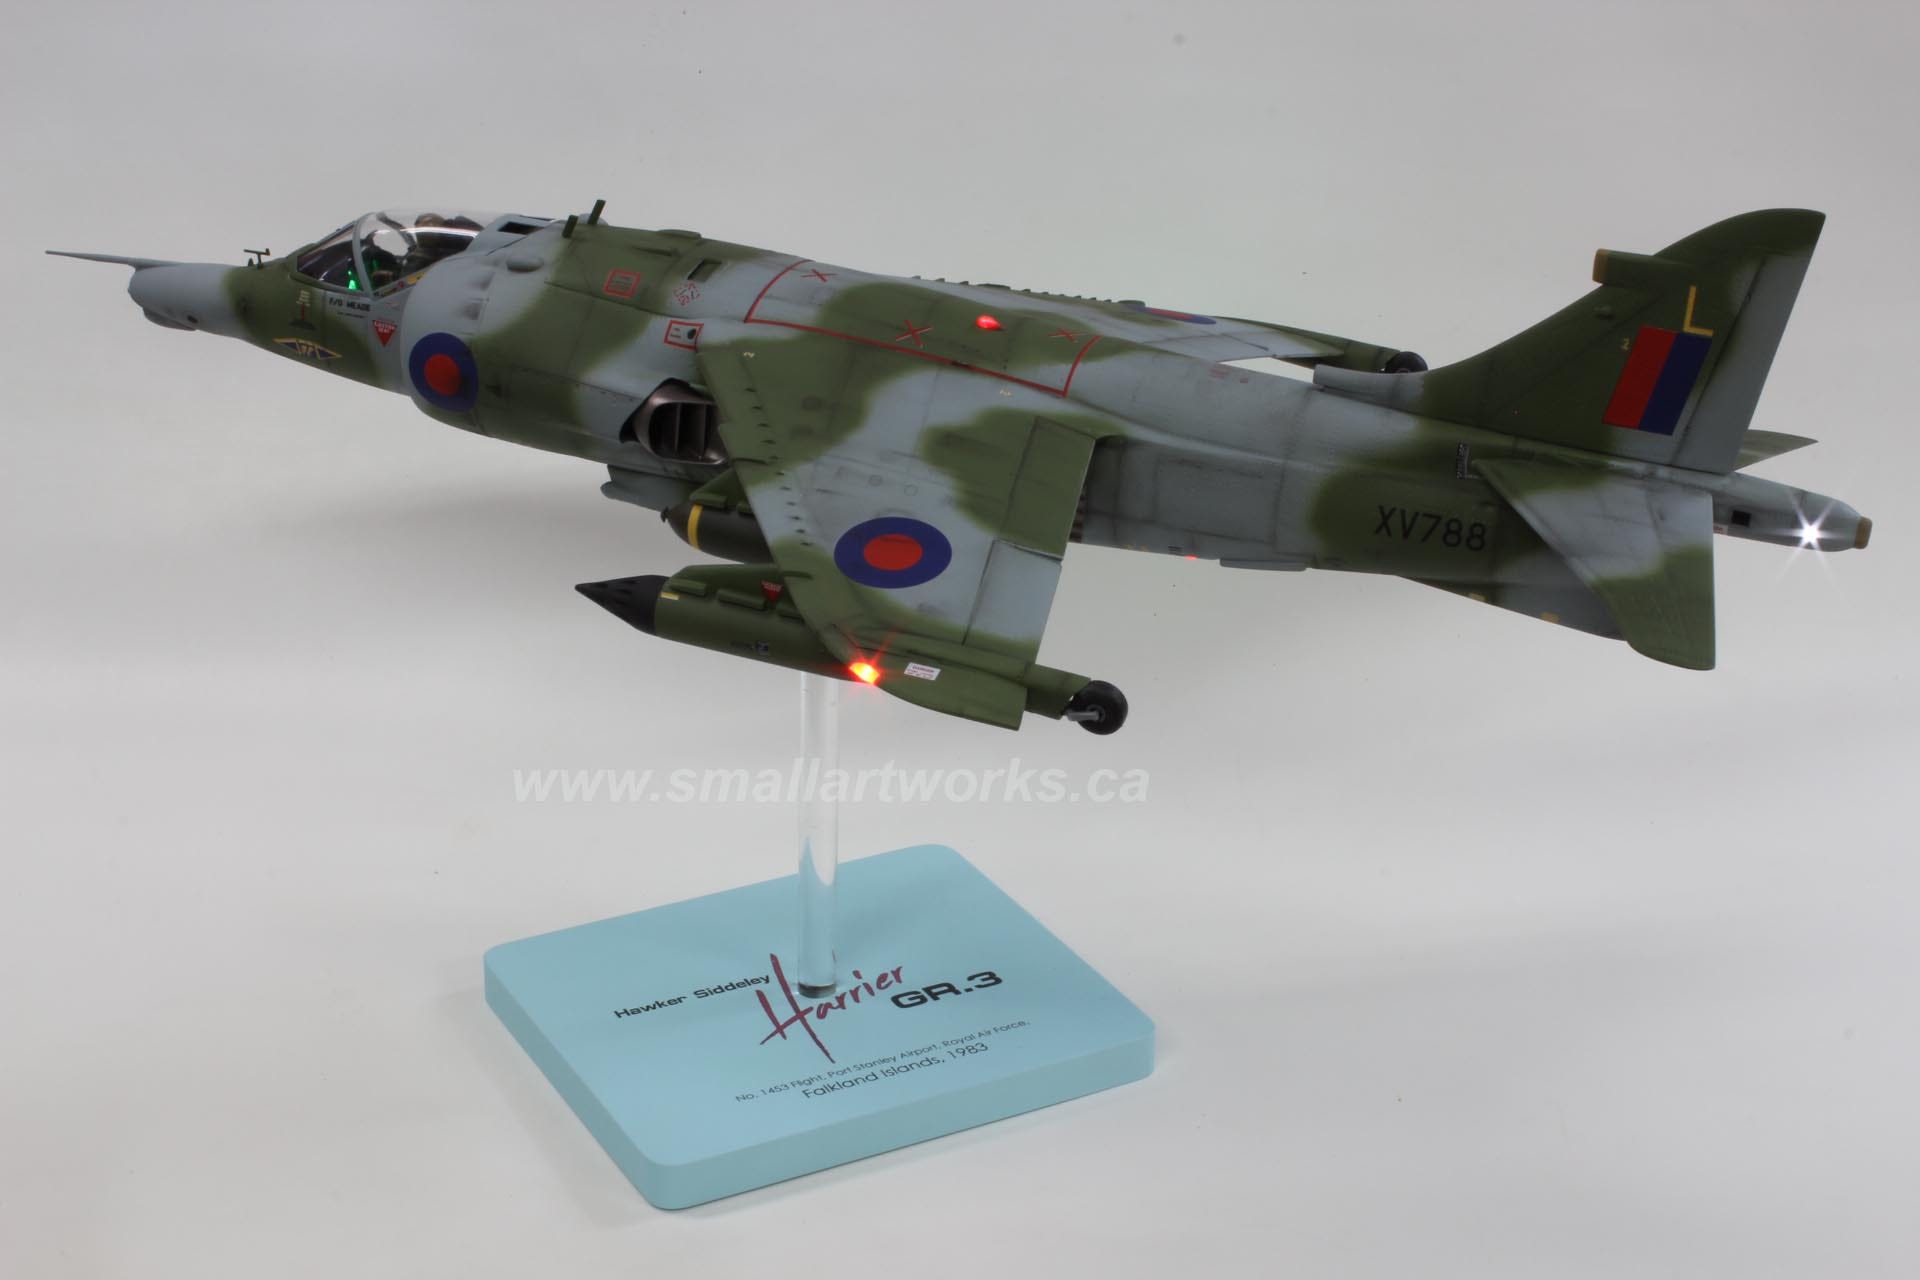
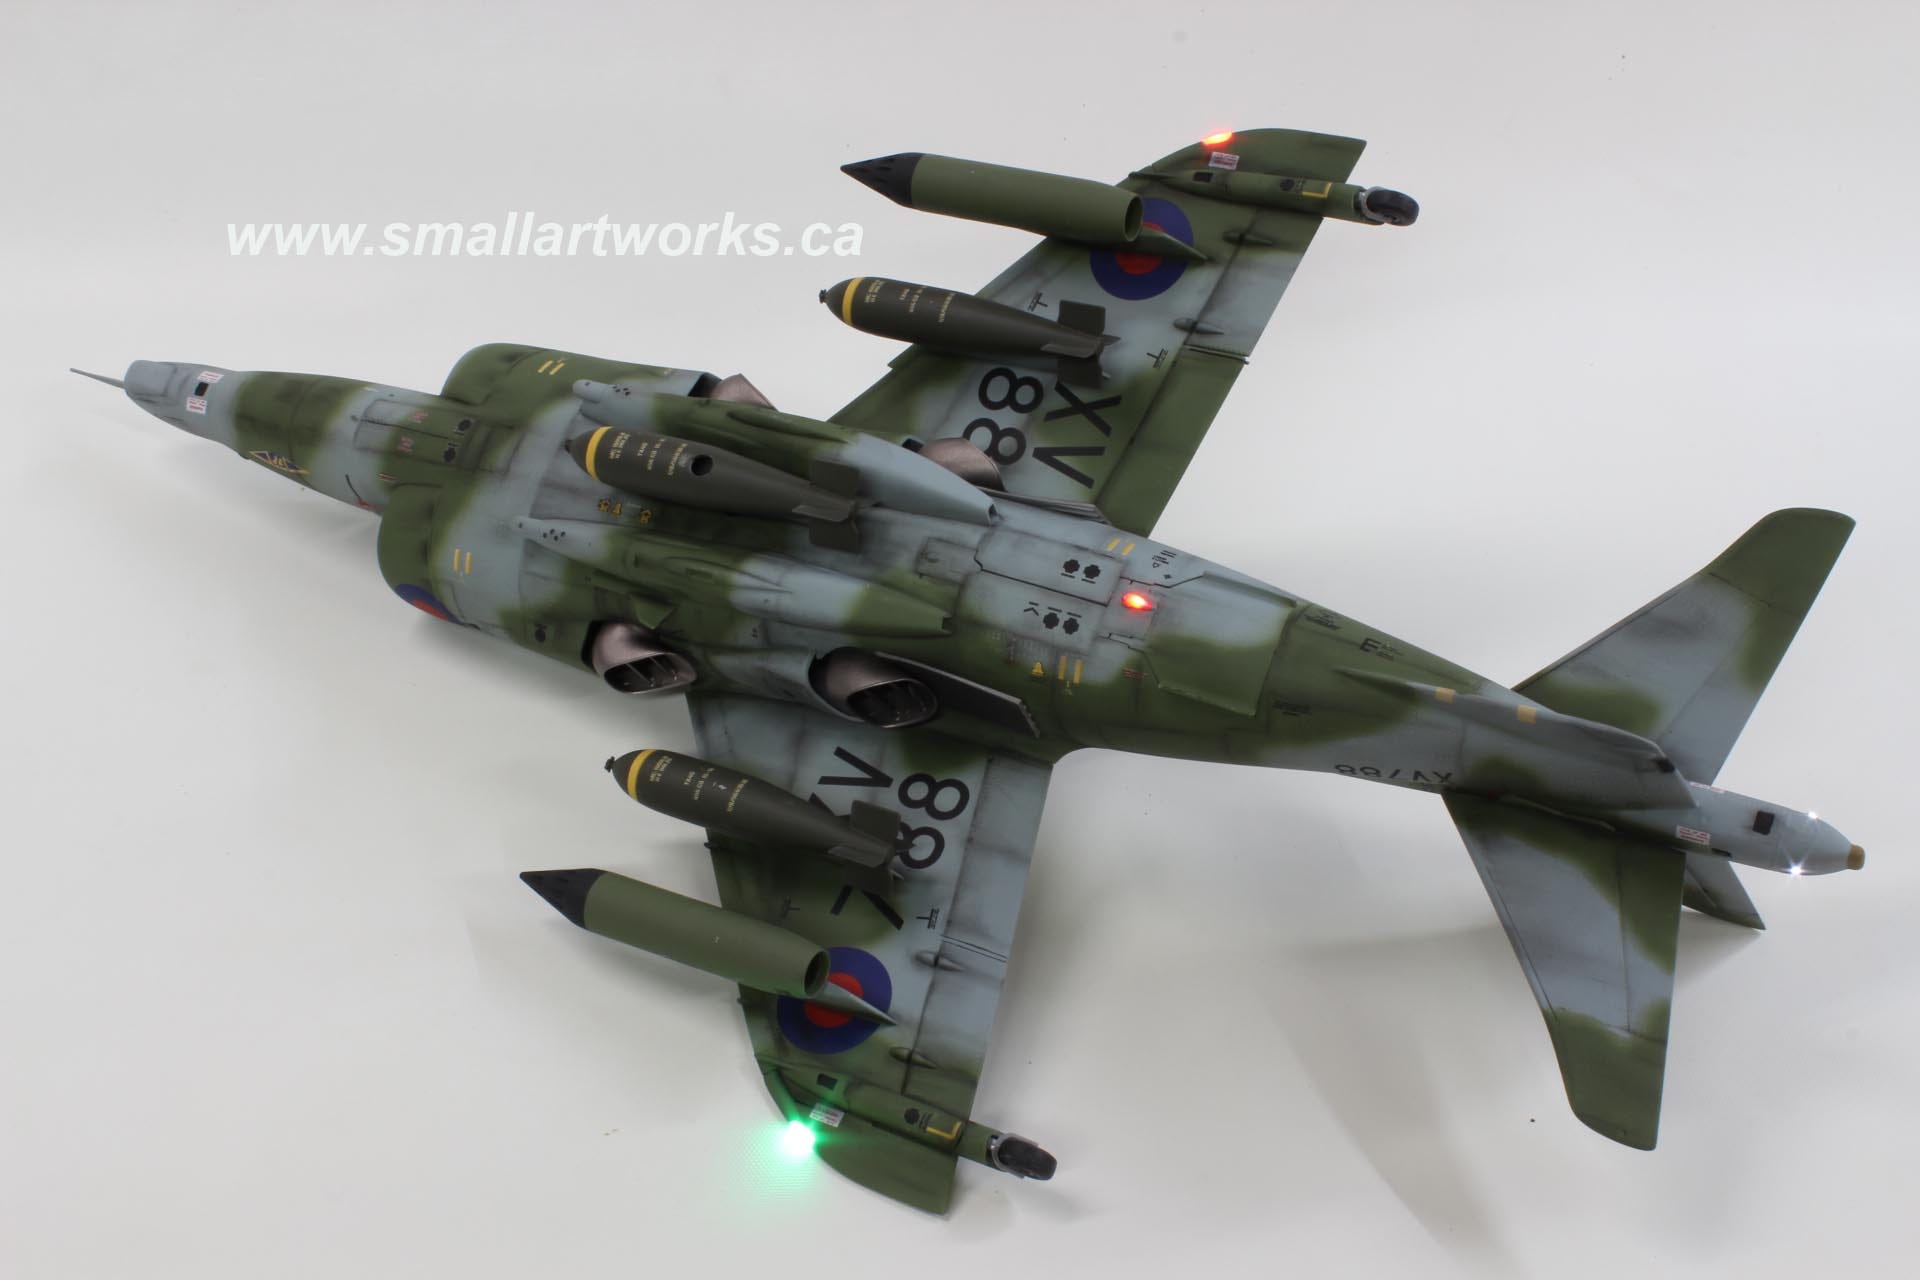
Anyway I found that all lights are normally steady except for the red beacons on the top and bottom of the aircraft which at the time were rotating beacons like an old fashioned police car, not strobes, so they should appear to blink on and off instead of having a fast and bright strobe effect. Therefore, regular blinking LEDs would do the job. The rest were a combination of rectangular LEDs in red and green colours (for the wingtips and cockpit instrument panel lights) and standard white for the tail marker lights.
This was also the first practical use of my freshly designed custom modular LED bus PCB which I now have available for sale on my website.


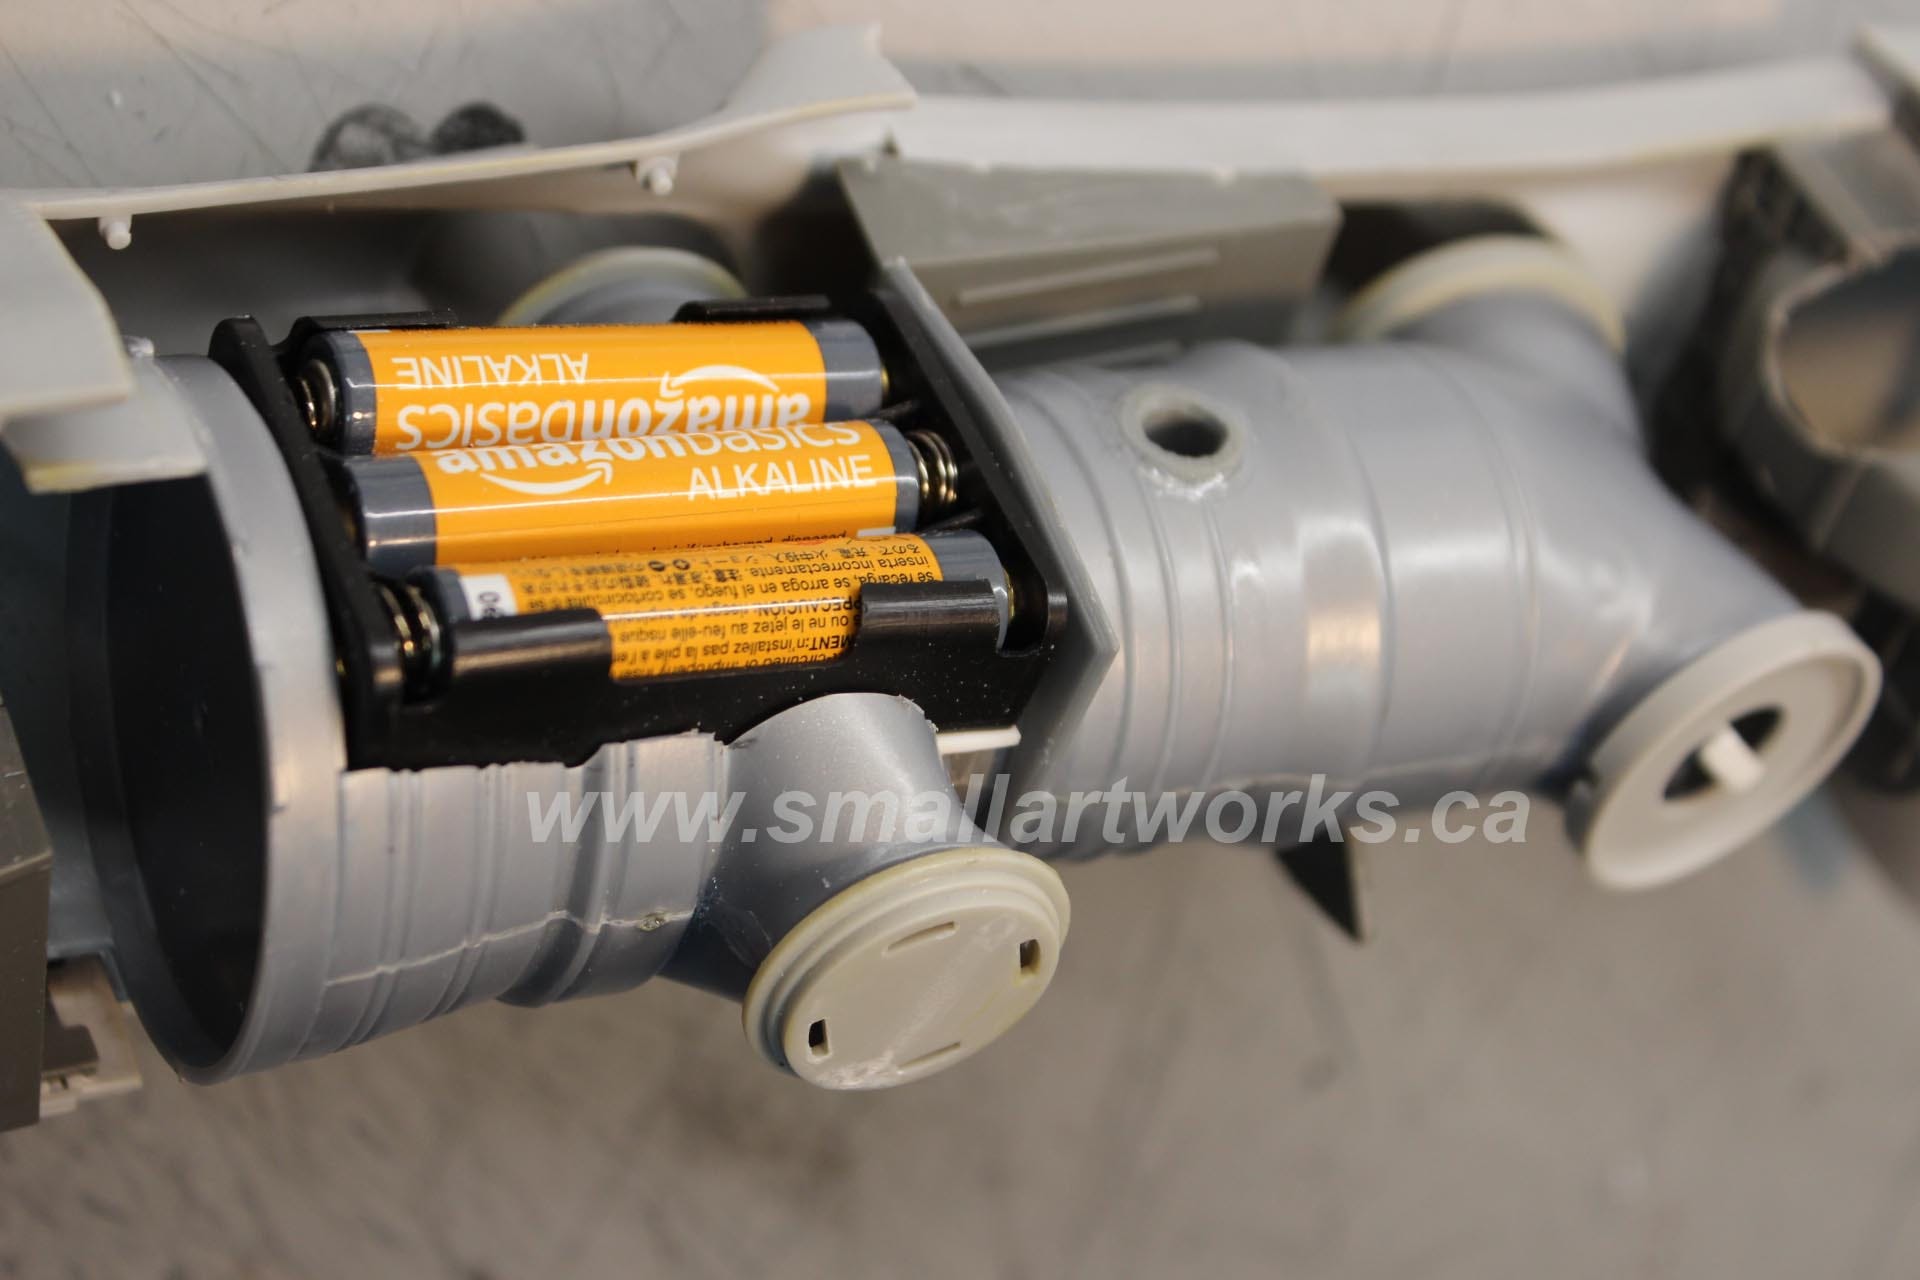
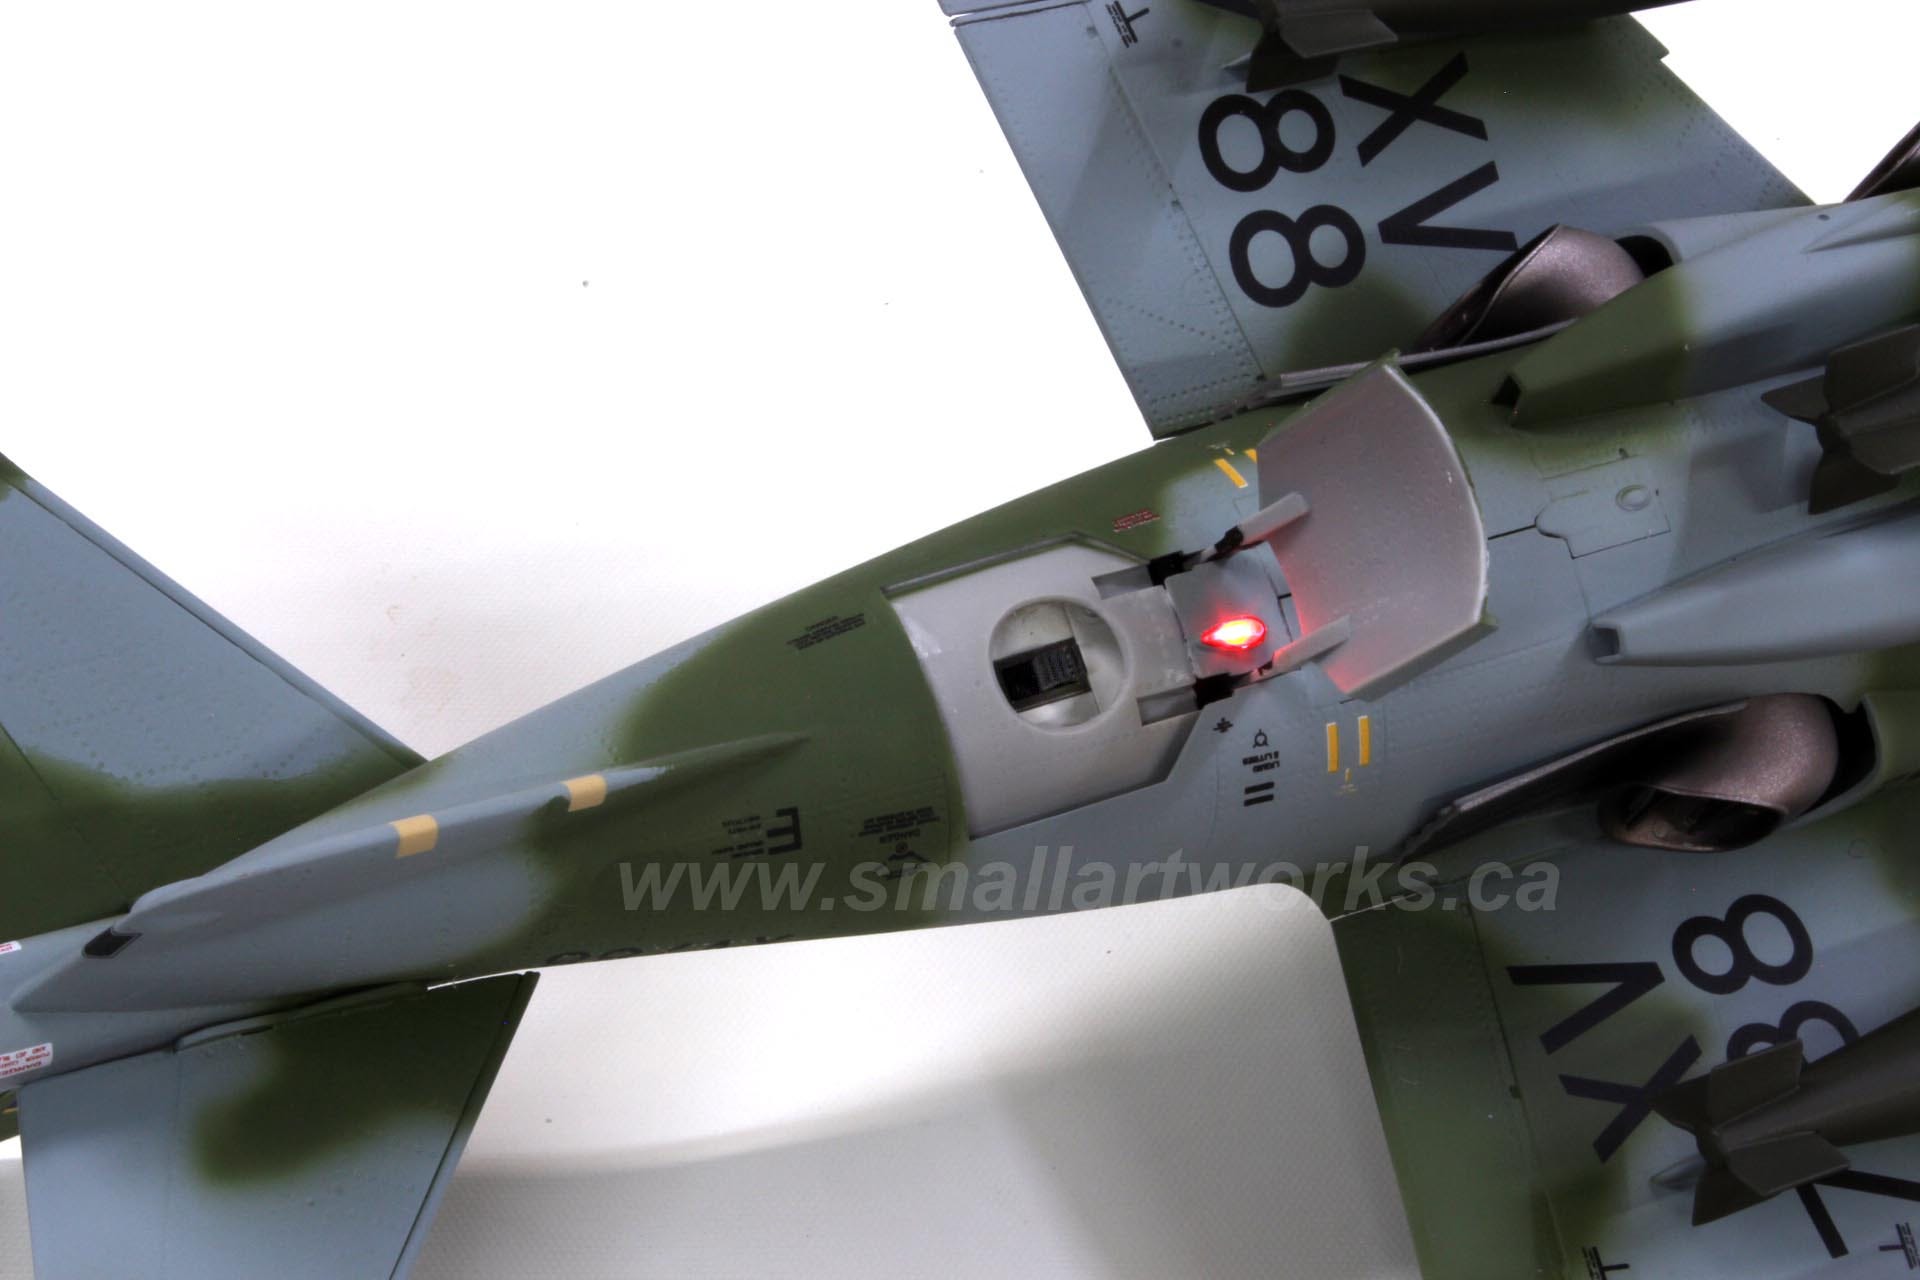
The kit comes with a highly detailed engine section with a removable body hatch. This was perfect for using as a battery compartment to run the lights. of course, the engine detail had to be sacrificed, but it was a small price to pay for having the model light up with interior power.
The instrument panel lights. The model is fairly basic despite its size so rudimentary lighting is all it needed to provide the right “aura” of a functional aircraft…
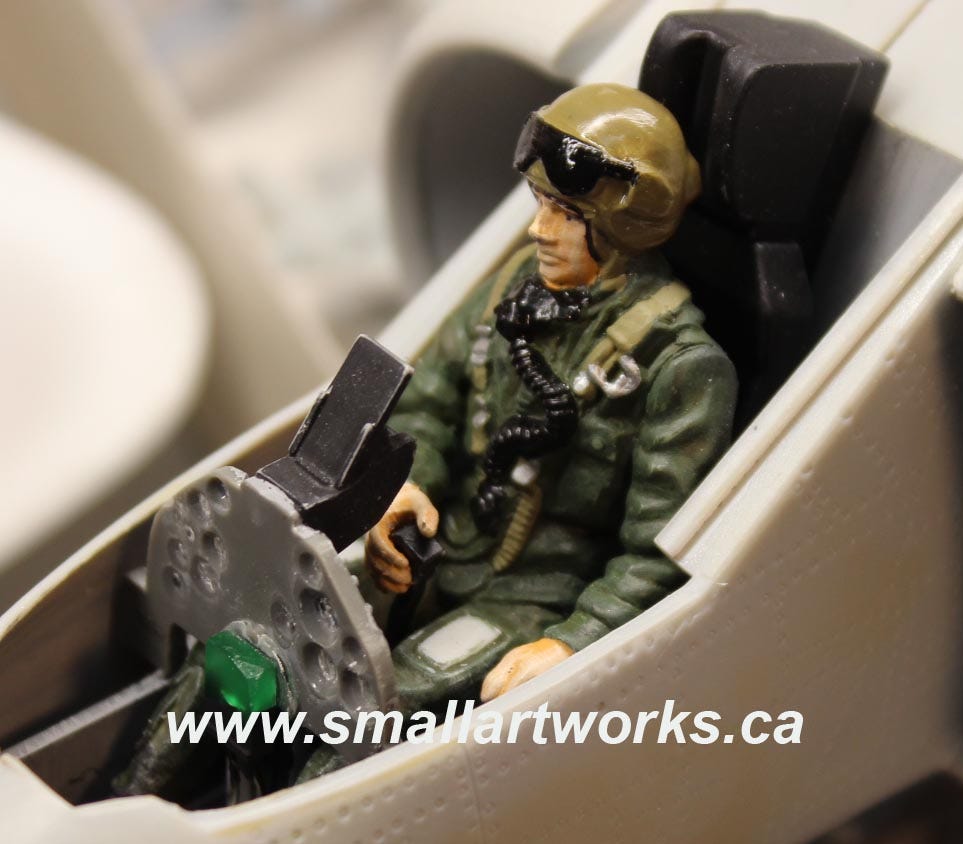
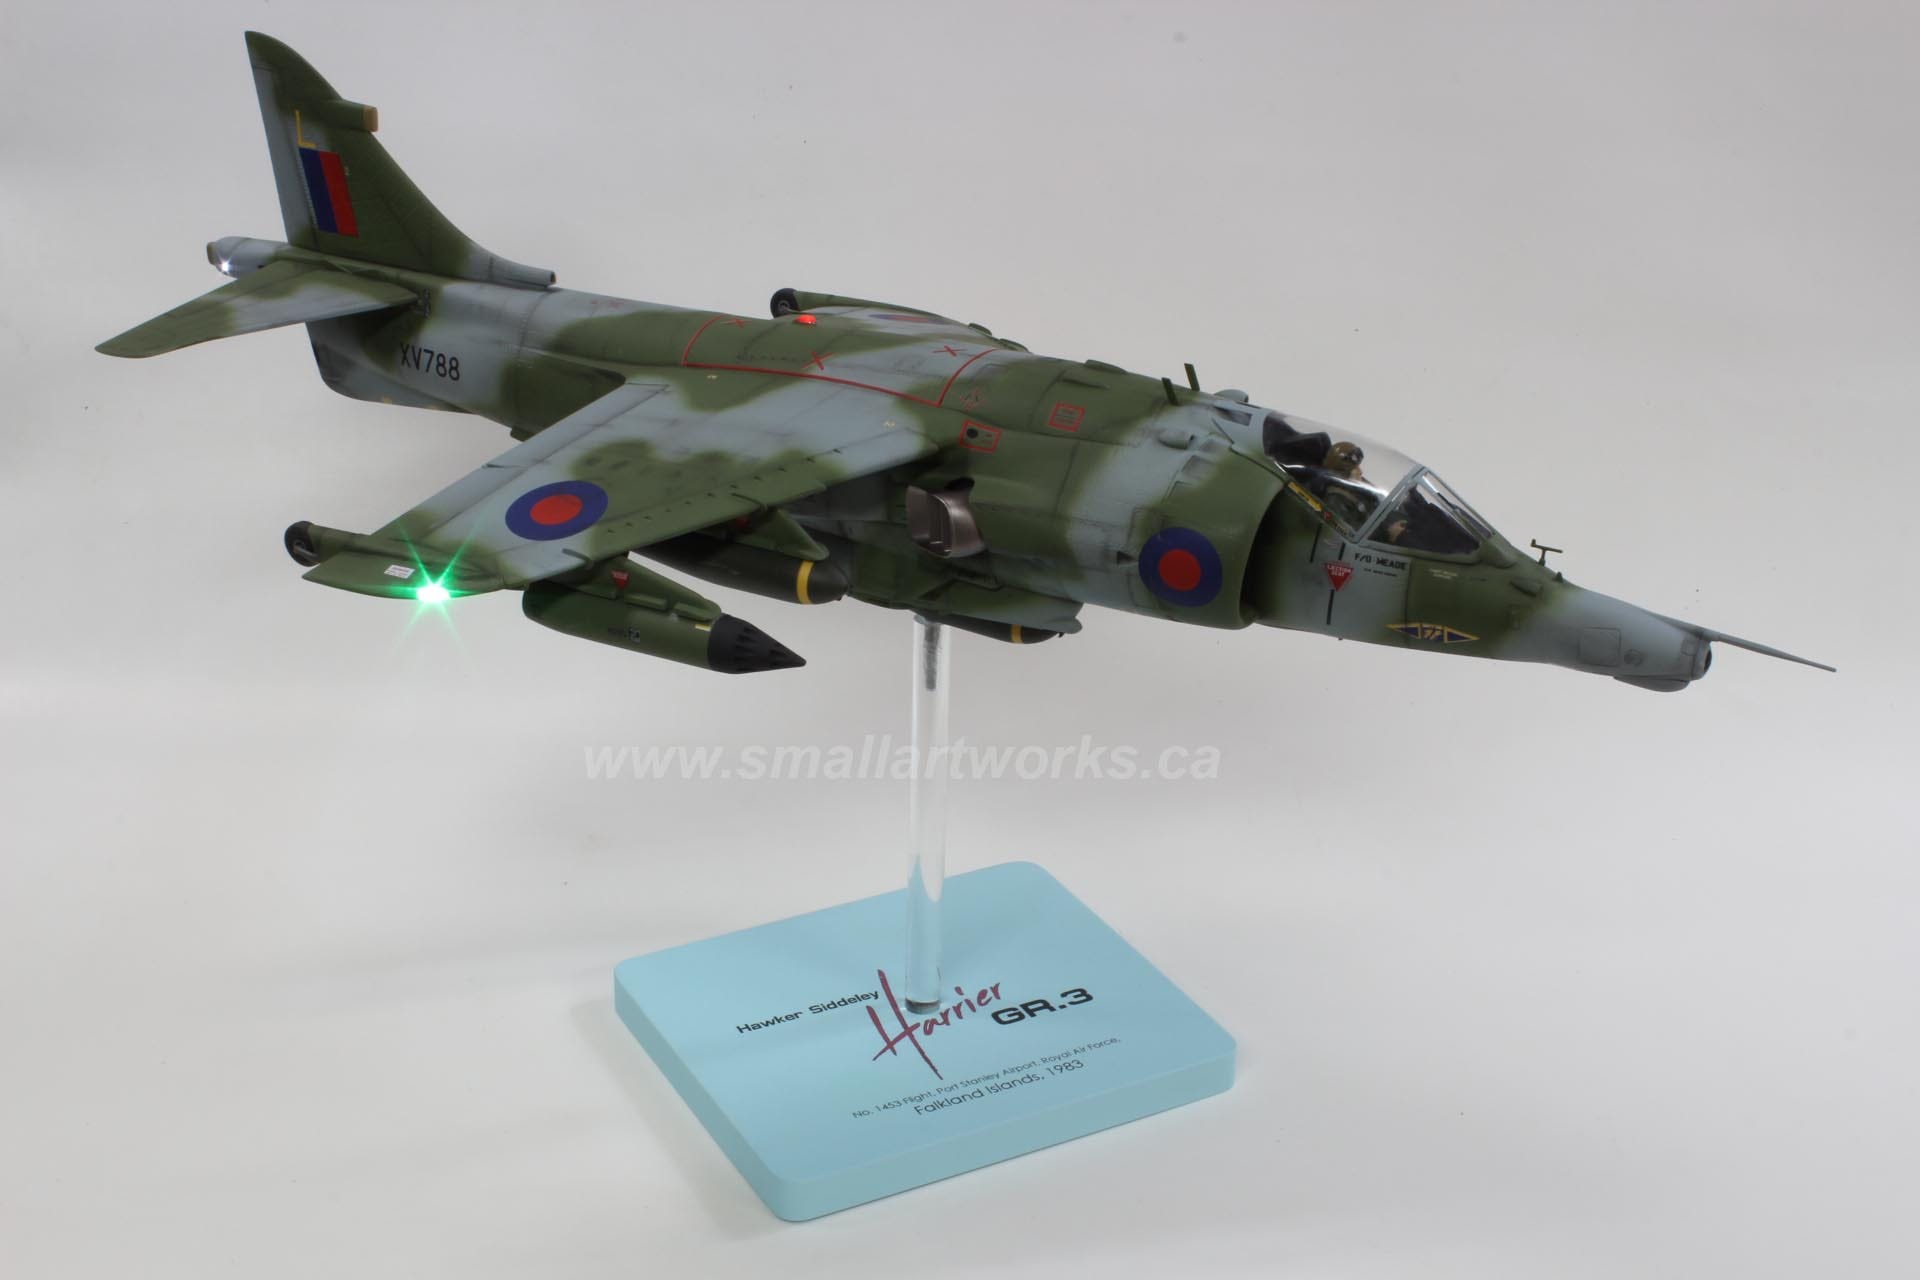
A closeup of the pilot figure in the cockpit.
The model slowly comes together with lights being constantly tested at each step.

After priming and light blocking, the model is given its camouflage paint scheme using an airbrush. Decals are then applied.
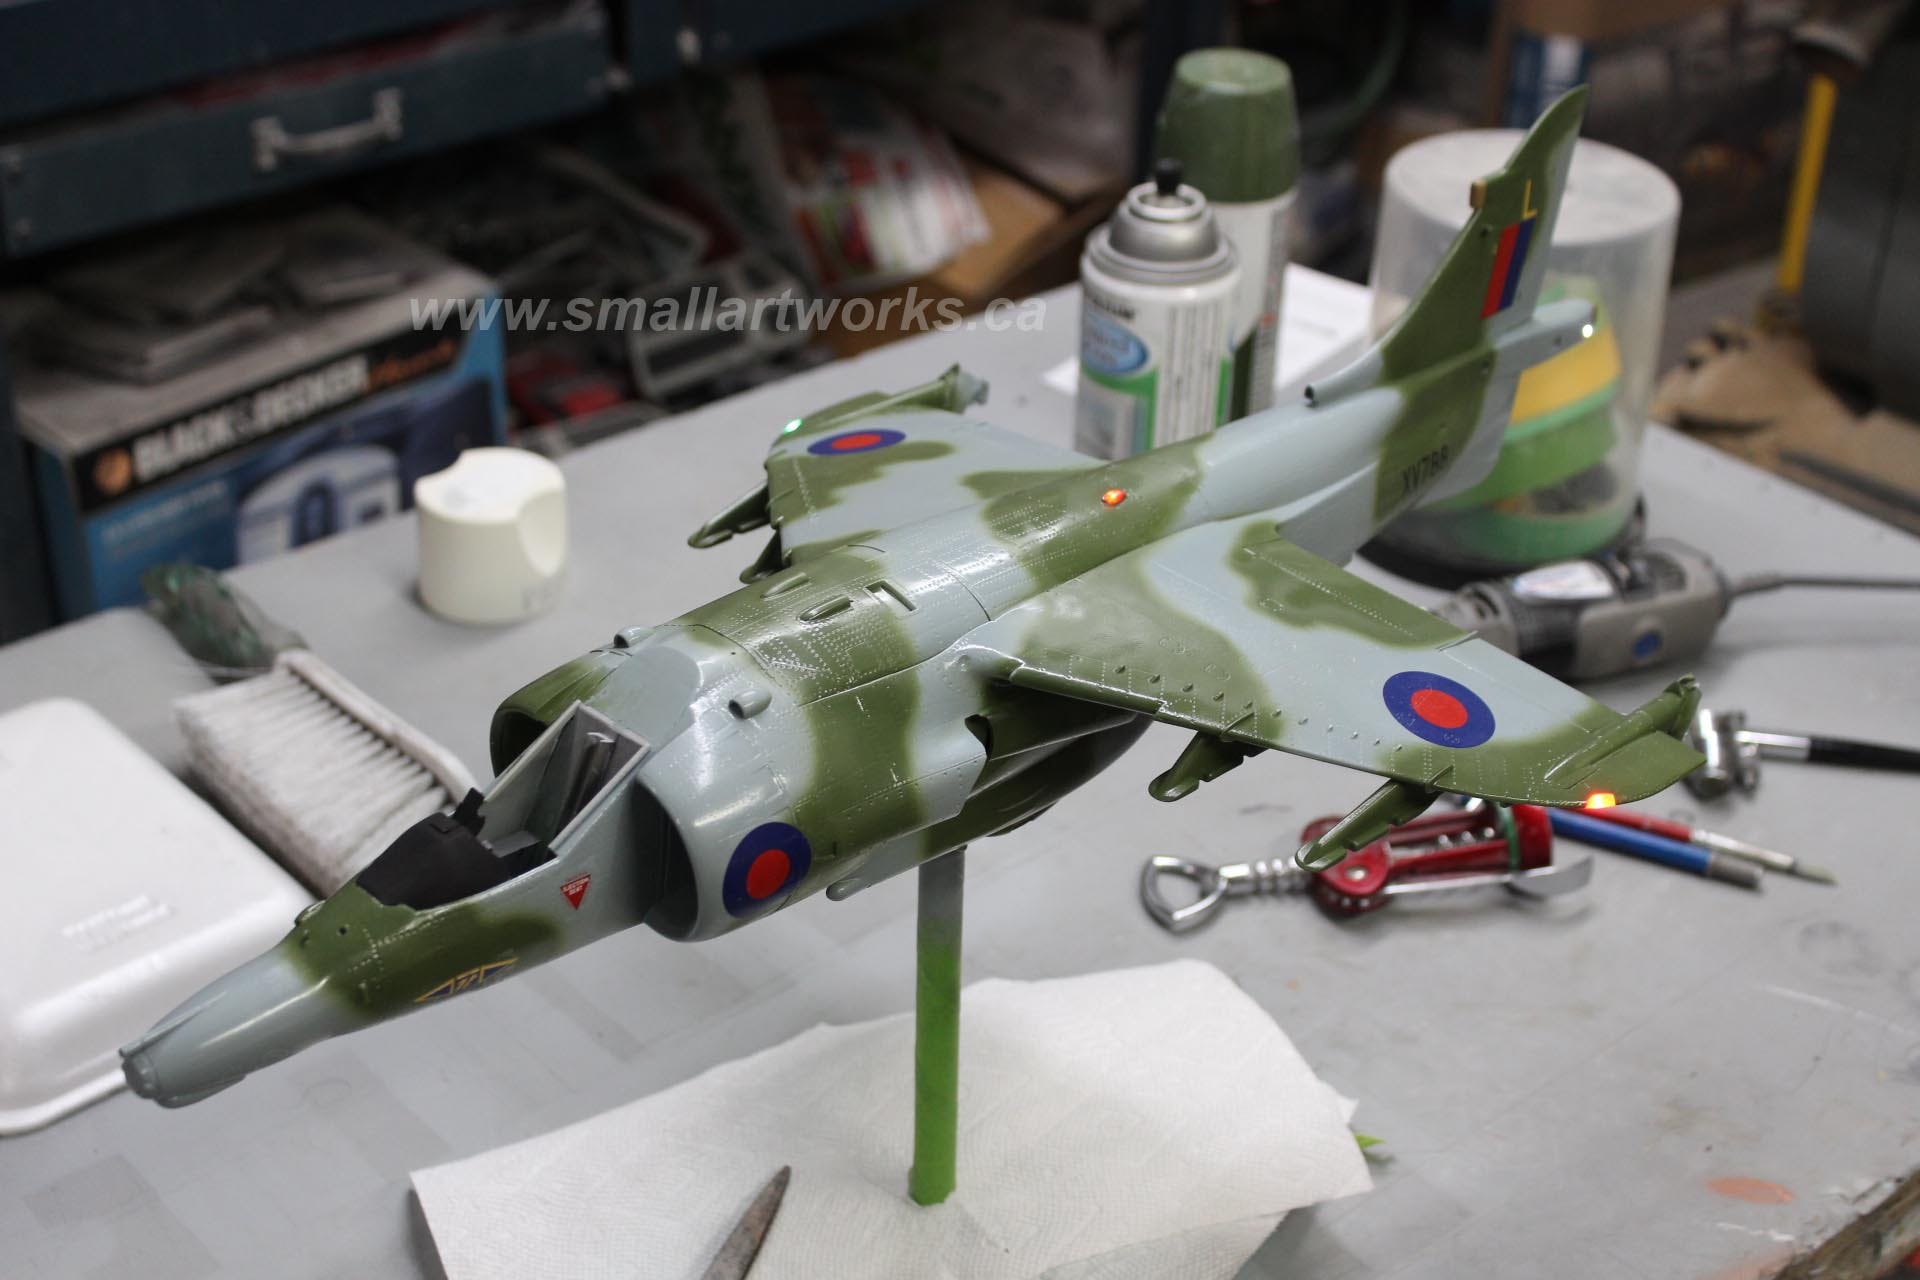
Finally, the model is finished after a dull coating. I initially finished the model without any weathering to give the customer the option of having it look clean or used. This is the “clean” version. Although it looks nice, weathering would make it look less like a toy.
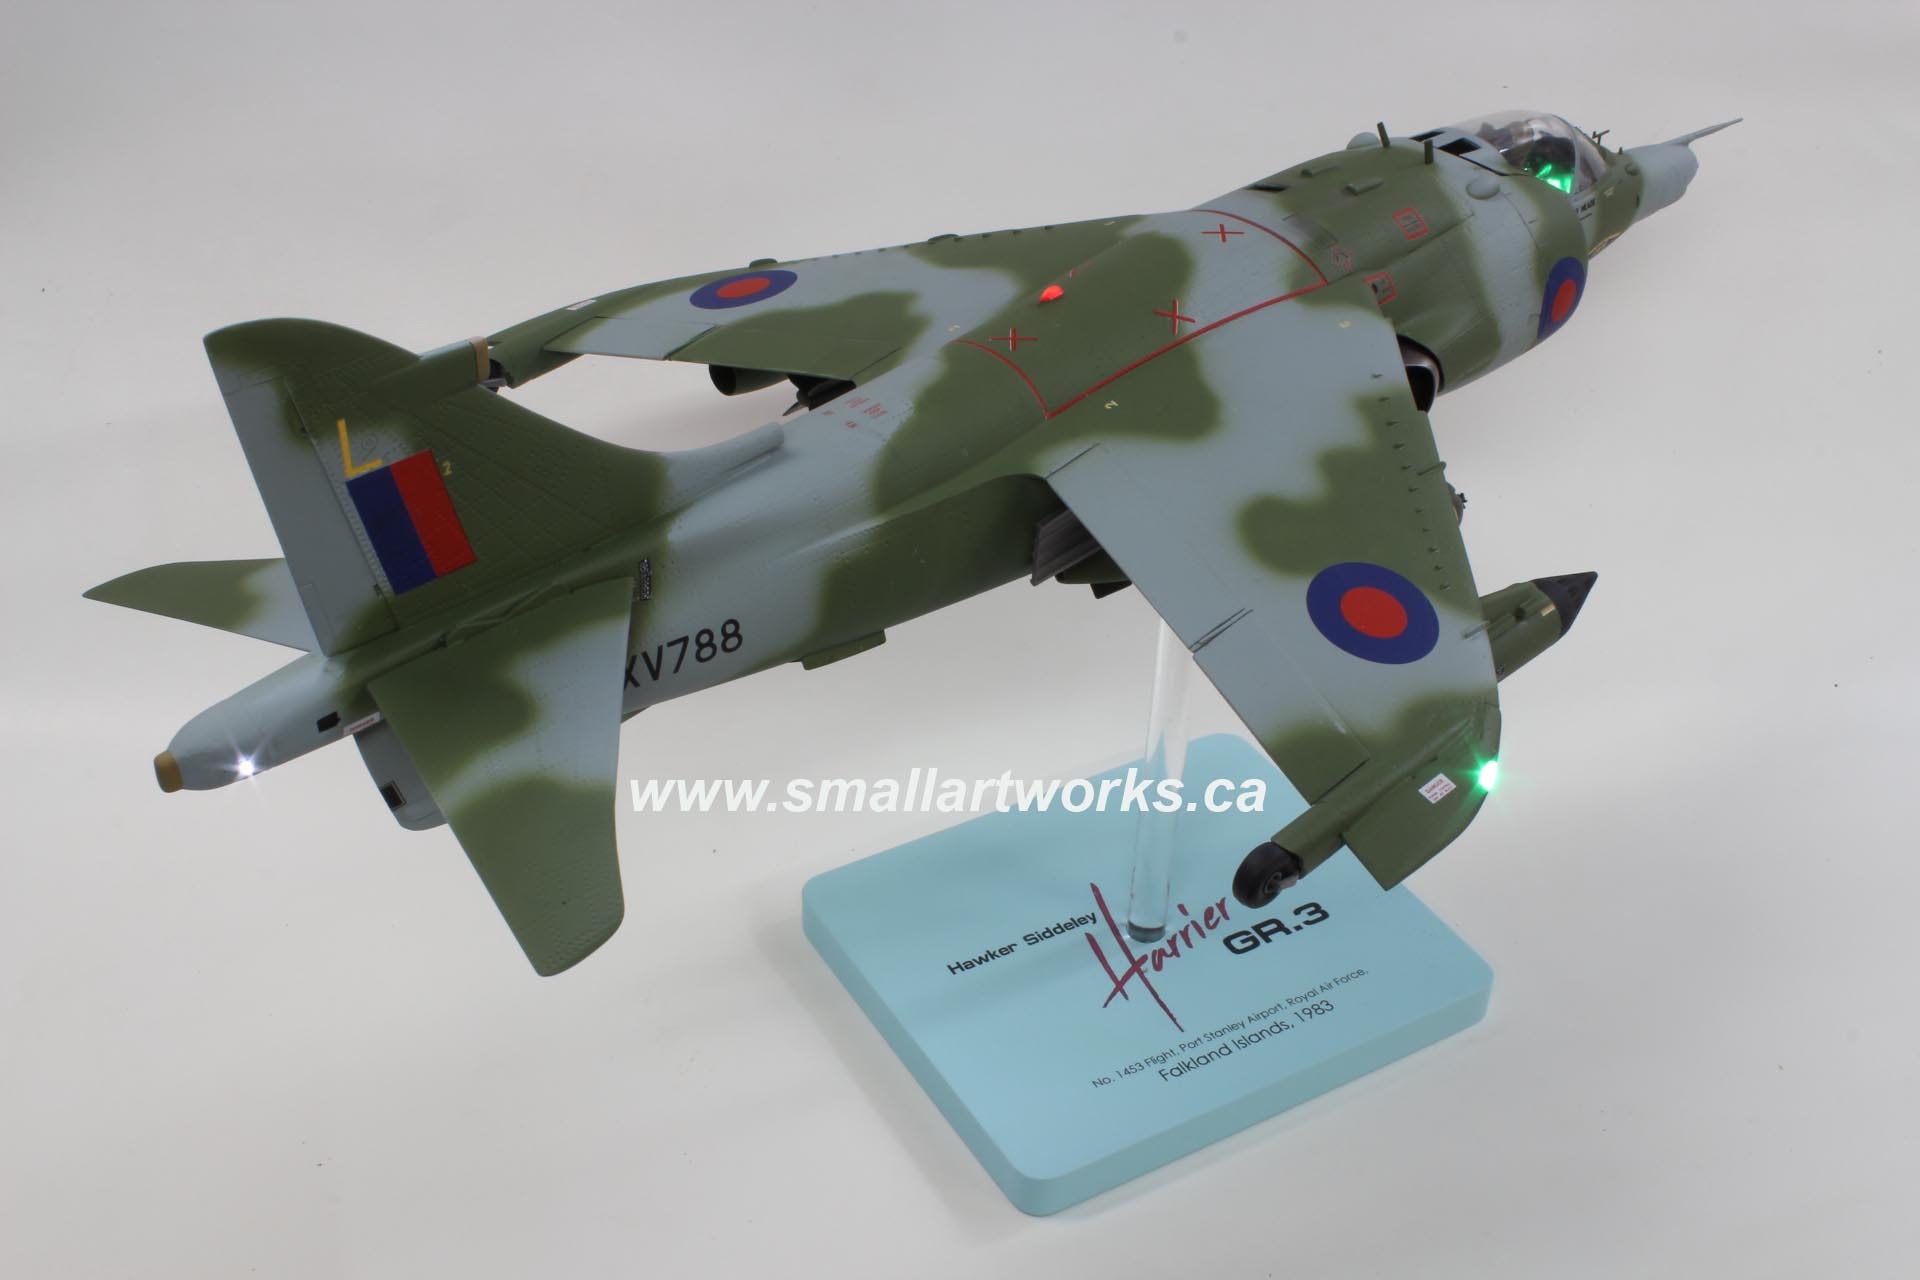
The kit gives many options for ordnance configuration. This is the configuration he chose. A hole in the centre bomb allows the stand to be plugged in. The stand rod goes straight into a tube within the model for stability and strength. The stand itself was made from a piece of MDF painted blue and a custom decal I designed applied to it. The acrylic rod to support the model was reinforced with a steel pin.
Here is a closeup of the hatch and switch…
Finally, my client decided he wanted a “well used” airplane so I used Conte chalk weathering to complete the look. The weathering may be overdone to a certain degree but he wanted it to look “battle-worn”. In reality, most aircraft don’t get this dirty, but when the model is sitting on a shelf, some slight exaggeration adds to the miniature’s character.
And that’s about it. I’d wanted to build one of these kits for years. I was happy to get the opportunity to build it for a fellow Canuck customer.
Enjoy, and happy modelling!
Jim.
I love the GR3 Jim. I look at it and see it in flight ready for action. So happy with the detail, weathering and lighting. Can’t wait to have you build that next kit. I think you know the one we both are looking forward to. Gold squadron! I want to thank you in waking me up and allowing me to realize I had my head in the present and not in the Falkland era. Keep Calm and Small Artworks.