(This article first appeared on Round 2 LLC’s web site in 2009 and has been edited for re-publication here)
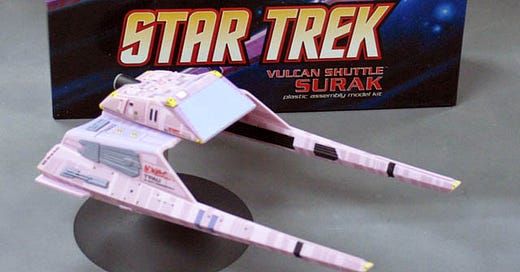
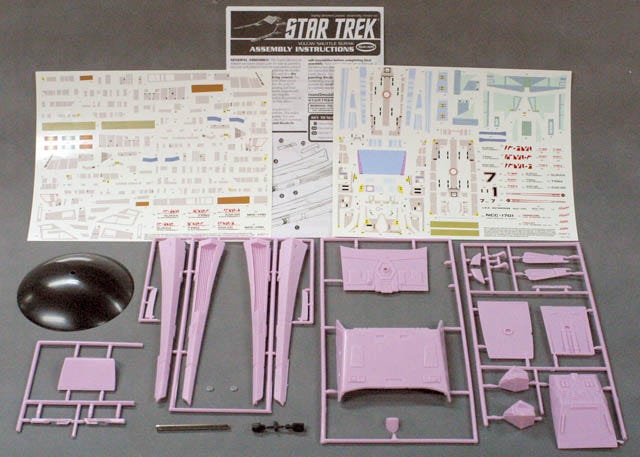
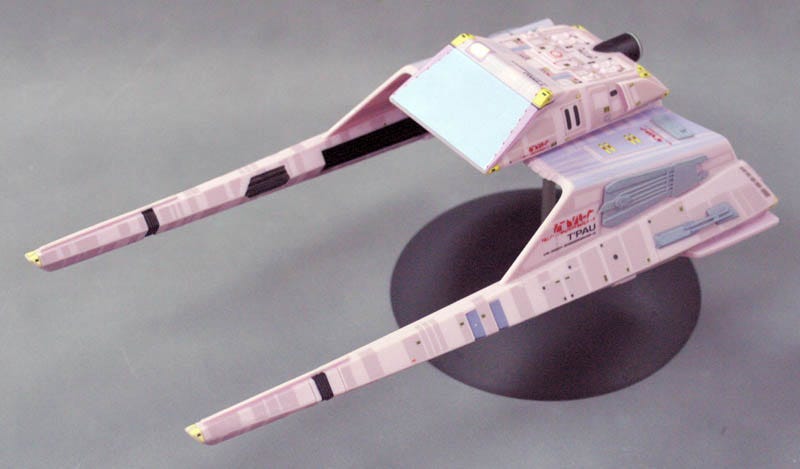
The Vulcan Shuttle kit was first released ‘way back in 1979, but in 2009 Round 2/AMT improved the model with re-tooled details, an extensive decal sheet and is molded in the correct mauve colour that the studio miniature was painted. Yes, it is supposed to be that colour! Below you can see what is contained in the box.
The kit has been improved so much that it can be done using minimal equipment and painting, which is ideal for the modeller who has limited experience, resources or budget. You’ll still need that patience of course! It’s important to take your time and not rush, but the model built as shown here was done over the equivalent of about three evenings.
Basic Gluing and Trimming.
The nice thing about a kit like this, with comprehensive decals and molded in the correct colour is that you don’t really have to go all out with fancy building techniques and expensive painting equipment. Just simple gluing and some minor painting techniques can result in a really beautiful job. Let’s walk through it.
First, following the instructions, glue all the sub assemblies together. When removing the parts from the sprue, do not bend or twist them off. Cut them off with a hobby knife or side cutters, then file or sand away the nub that’s left on the part.
Make sure you glue the magnets in place on the shuttle car’s inside bottom surface (part 17) and the sled’s docking surface (part 10) before gluing those parts in place on the sled or the crew module! The magnets cannot be held with regular plastic model cement, so you must use superglue or epoxy. Important! Pay close attention to the magnet polarities so they attract each other rather than repel! When you glue the magnets in place, do so while holding parts 10 and 17 together the way they would be when “docked”, then put the magnets into the recesses. They will automatically seat themselves and should be obvious if they are positioned right.
The best kind of glue to use for the rest of the model is the watery-thin plastic model cement that comes in a bottle with a built-in brush, like Testor’s Liquid Plastic Model Cement or Tamiya Extra Thin cement. In a pinch, you can actually use ordinary lacquer thinner and a small paint brush too!
First, carefully and thoroughly test fit the parts and trim away anything that keeps them from fitting snugly together. Then, while holding the parts together, apply a generous amount (a drop or two) of glue along the joint every inch or so. Capillary action will carry the glue around the joint. Now, press the parts together until the melted plastic and glue squeezes out of the joint (see below). Do not wipe off the bead! You’ll trim it off later after it dries. Doing this will ensure a very solid “welded” bond and also help hide the seams and avoid puttying when you finish the model, as this “ooze” acts as a kind of built-in filler. Be careful not to let the glue touch your fingers. You can use clamps or clothes pins or rubber bands or tape to hold the parts together until they dry in a few hours or overnight.
If you accidentally spill any glue somewhere it’s not supposed to be, don’t panic, but don’t wipe it off either. Wiping it will only roughen the dissolved plastic and make it worse.
Just don’t touch the surface and allow it to dry for a few hours. You can sand it down later if it’s rough, or, it will simply disappear by the time the model is coated with the decals and dulling spray.
When the sub assemblies are done and dry, you can begin to trim the joints. Several methods work, depending on the surface. You can carve the joint down with your hobby knife…
You can also use the edge of the blade as a scraper to remove the flash…
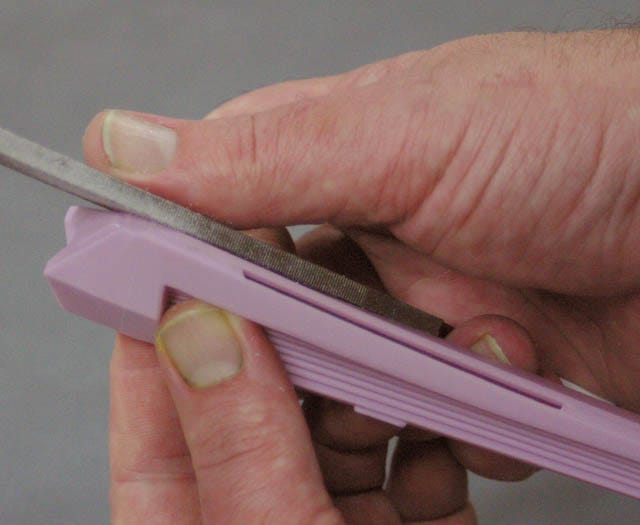
…or you can use a flat mill file…
Finish up with wet sandpaper or foam sanding blocks or even a fine emery board.
Wet sanding keeps the paper from clogging and produces a smoother finish. When these techniques are used, the joints will practically disappear and be quite presentable without puttying or painting!
Painting.
Normally, spraying the entire model with a base coat of paint in the correct colour is necessary. But because this kit is already moulded in the right Mauve colour, you don’t have to paint the whole thing, just a few detail areas, which can be done nicely with a standard bottle and brush. For this build, you’ll only need some black and purplish-blue paint as indicated in the instructions.
Another really nice thing about detail painting a model when the overall colour is already done for you is that mistakes and sloppiness as shown below are very easily corrected.
For this reason I highly recommend the use of acrylic based paints, such as the excellent Tamiya brand or Testor’s Model Master Acryl instead of enamels or lacquers. Acrylic paints can be very easily wiped off with a rag or Q-tip dampened with Methyl Hydrate or ordinary rubbing alcohol as shown next, which does not damage plastic. Because the main colour is the plastic itself, you don’t have to worry about rubbing off the base colour! For this type of work, however, craft paints are not recommended.
You can also use the tip of your knife blade to GENTLY scrape away paint from the edges of some of the harder-to-get-at areas.
The only sections you have to paint are shown in the photo below. I hand painted the black and sprayed the blue in this case, but you can hand paint the blue too with equally good results. The rest of the decoration is done with the extensive decals supplied with the kit.
Now you need to make a decision based on your comfort level. You can now decal the model as per the instructions while it is still in sub-assembly state, or you can assemble the model completely and then put the decals on. I did the latter, as I find it easier to handle the model as a whole when applying decals than to risk damaging the applied decal work while gluing the rest of the model together. This makes it a bit tougher to put the decals on the insides of the nacelles, but it’s not that hard to do. Do whatever you feel is comfortable
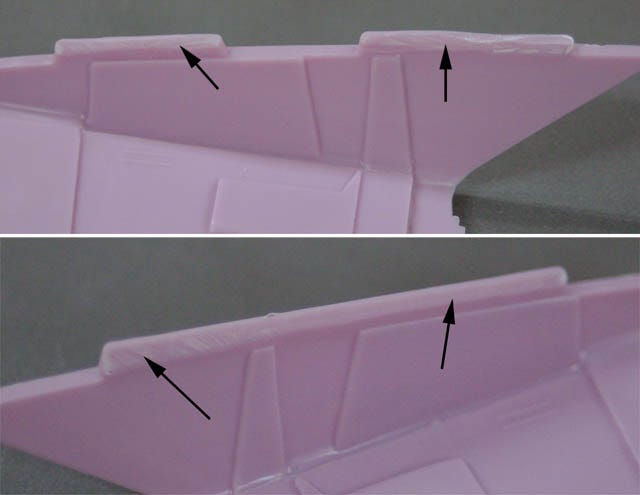
Either way, you will have a slight oversight to correct before gluing the warp engine nacelles to the sled or applying any decals. The new re-tooling of the improved and correctly deeper nacelle grilles increased some of the “meat” under the slots where the sled’s locating tabs insert, blocking proper clearance. These tabs need to be trimmed down a bit to fit properly. Use a file, sanding block or your knife to trim away the inside surfaces as shown until the nacelles fit correctly against the sled. Test fit constantly and look from the rear of the ship to make sure they line up straight and don’t cant over sideways.
Decal application
Now, you can begin to apply the decals. This is the most time-consuming process of doing the model, but extreme patience here will really pay off.
All decals stick best to highly polished or glossy surfaces, very poorly to flat or matte finishes. Therefore it’s important to apply a clear gloss coat to areas of the model that were sanded or filed down, or you can use plastic polish to buff the surfaces to a nice sheen. Either way will work, as long as the surfaces are as glossy as possible where the decals will go, and in the case of this kit, it’s almost the whole model!
Any good acrylic clear will work, such as Microscale Industries’ Micro Gloss or Model Master Gloss Clear Acryl # FM02017
Another trick that is even easier is to use “Future” brand floor polish (now called “Pledge”)
When you have soaked the decal and it can slide on the backing, you brush the Future onto the model just in the area to be decalled and immediately apply it so that a layer of future is between the decal and the model. Then blot out the excess future and water that squeezes out. This will provide an extra layer of glue under the decal to prevent what’s known as silvering when microscopic air bubbles can get trapped under the decals. However, I do NOT recommend using the setting solution on a “futured” decal, as this can cause it to “haze”.
Final finishing:
When applying decals, be careful! Working on a separate area that you can keep dry, cut out decals only one at a time as you need them. Be very careful not to get the uncut decals wet. If you do, you must cut out and use that decal immediately. If the decal paper gets wet or damp and allowed to dry, the decal will not be able to be later removed from the sheet. So be very careful not to let the main sheet get any water (or anything else!) splashed on it.
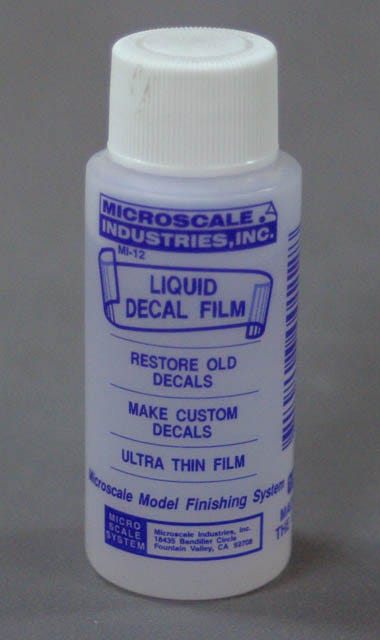
Before cutting out or applying decals I recommend the following: Do yourself a huge favour and buy yourself some Microscale Industries’ Liquid Decal Film.
This stuff is like magic for decal work. It restores old decals as well as prepares new decals for application. With a clean brush, carefully apply liberal amounts, like paint, of the product to the top surface of decals that you anticipate may be troublesome, like larger decals that could fracture, and allow to dry completely. The decal film strengthens the decals so they don’t fracture as easily. When dry, it becomes completely invisible. You could apply the decal film to the entire sheet, but keep in mind that the decals will no longer “automatically separate” from each other, and you will need to trim the decals right up to the edge of the image, which, by the way, is a good practice anyway. Never try to apply more than one decal at a time.
Also, it’s a good idea to have some decal setting solution handy. I recommend Walthers Solvaset brand as it’s the most potent, but there are many others that do the job. The others tend to smell like vinegar, but I suspect it’s some other chemical.
Setting solution softens the decal and allows them to more easily conform to compound curves and helps them snuggle down into detailed areas. Apply the decals as per the decal’s instructions, blot out excess water, then apply the decal setting solution to the top and allow it to work. It’s important not to disturb the decal once the setting solution is applied so make sure the decal is in the right position before applying the setting solution! If the decal somehow gets moved before the setting solution is applied, quickly but carefully use the tip of your tweezers (an essential tool for applying small decals) to move it back into place. If it doesn’t move easily, apply more water to the area to re-float the decal. Move it back into place and soak up the water with a damp paper towel. Now apply the setting solution. The decals will also wrinkle alarmingly after a few minutes but don’t panic, that’s normal.
Allow the decal to air-dry and they will lay down flat again. If the edge of the decal lifts up after it’s dry, just dab a bit of clear coat in between and use it as glue to stick it down.
Once all the decals have been applied and the warp engines are glued on, the finishing touch is to apply a nice flat finish over the entire model. Doing this will get rid of the high gloss we needed for decal application and, more importantly, will hide a lot of sins! Dulling the surface will blend the decals into the surface, hide those glue marks and generally finish off the model.
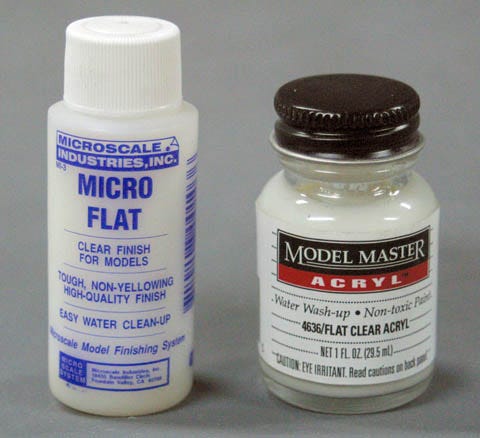
There are several types of matte finishes out there, Microscale’s “Micro Flat” works well, as does Model Master Flat Clear Acryl # 4636
You can brush paint these on with good results if you don’t want to do any spraying. Just take your time and do it in logical sections, using a wide (about ¼” to ½”) good quality soft bristled brush. Don’t try to do the whole model at once.
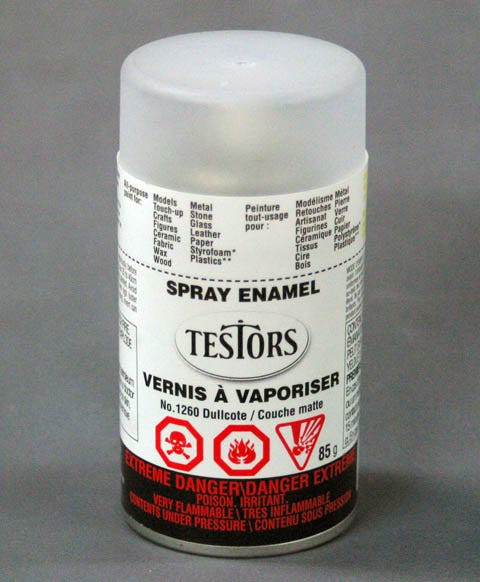
The easiest and most common standby is good ol’ Testors No. 1260 Dullcote in the small spray can (Fig. 21). The biggest problem with this stuff is the really vile odour it has. It works very well, but man, does that stuff ever STINK! So make sure you use it in a very well ventilated room …or make sure the wife and kids are gone until the smell clears! If you’re worried about inhaling chemical fumes, use a charcoal filtered respirator (dust/cloth/surgical masks won’t protect against fumes any more than they do against a virus).
Shake the can well, shoot a one second burst at an old newspaper or something to clear the nozzle of any unmixed chemicals that may be present in the nozzle and feed tube, then apply the Dullcote in short sweeping bursts all over the model on the top. Do not saturate the model. A very light coat is all that’s needed. Allow it to dry, then flip the model over and do the other side. Do the crew module and the sled separately. Allow to dry and examine for any spots that are still shiny. If you find any, give those areas another quick shot of Dullcote.
Other matte clear coat products are often more easily available in hardware stores too, such as Rust-Oleum’s “Frosted Glass” N1903830 (recommended) or their “Matte Clear” 268390
Congratulations! You’re done! Wasn’t that easy and fun?
Mount the model on the stand and display it proudly, take some snaps and email them to all your friends as you tell them you hardly needed to paint anything to make the model look so wonderful!
E. James Small,
http://www.smallartworks.ca













Spock’s shuttle! You know. Ve your work and projects Jim.
Another excellent build. I greatly enjoy your posts!!