The Oldest Model Kit I Have Ever Built
Darn thing's even older than I am.
A client has recently asked me to build this old model for him and wanted it to be, as I understand it, to be a nostalgia piece. In other words, not to be strictly realistic, but to harken back to the old days of early model kit production during the onset of the “space race”. It’s the 1958 (as stamped on the tool) 1/96th scale Revell offering of a fictional spacecraft thought to be a plausible idea for what we now know as the Space Shuttle. And actually, it’s not really that far off! Booster rockets carrying into space a vehicle capable of orbital flight and returning to Earth as a conventional aircraft. It’s called the “XSL-01 Space Ship” (in case you haven’t seen the pictures with its name emblazoned upon it at every imaginable angle).
Interestingly, it seems that, according to Scale Mates, the people who track the history of model kits, indicate that this version of the model complete with boosters was only release once (or twice???)! After the initial release, it appears that the shuttle section alone was released as its own kit several times afterwards, omitting the boosters and launch pad which makes this kit a rarity indeed! The most recent release is by Atlantis which is currently available as of this writing.
Have a look here to see for yourself:
Not sure what the “new tool” is past 1957, but it seems the history of this kit is fairly sketchy at best as dates shown are not concrete. Nevertheless, an interesting part of model kit antiquity.
Now the thing is, when my client sent me the kit, it was in a Star Trek box with a low rez photocopy/print of the original box art at very low resolution pasted on top making it even more obscure. The instructions were scans or photocopies, not the originals that came with the kit. Also, as I began to assemble it I discovered that a couple of parts were missing!
Obviously this kit had traded hands a few times and apparently whoever sold it to my client did their best to cover those tracks… and failed miserably.
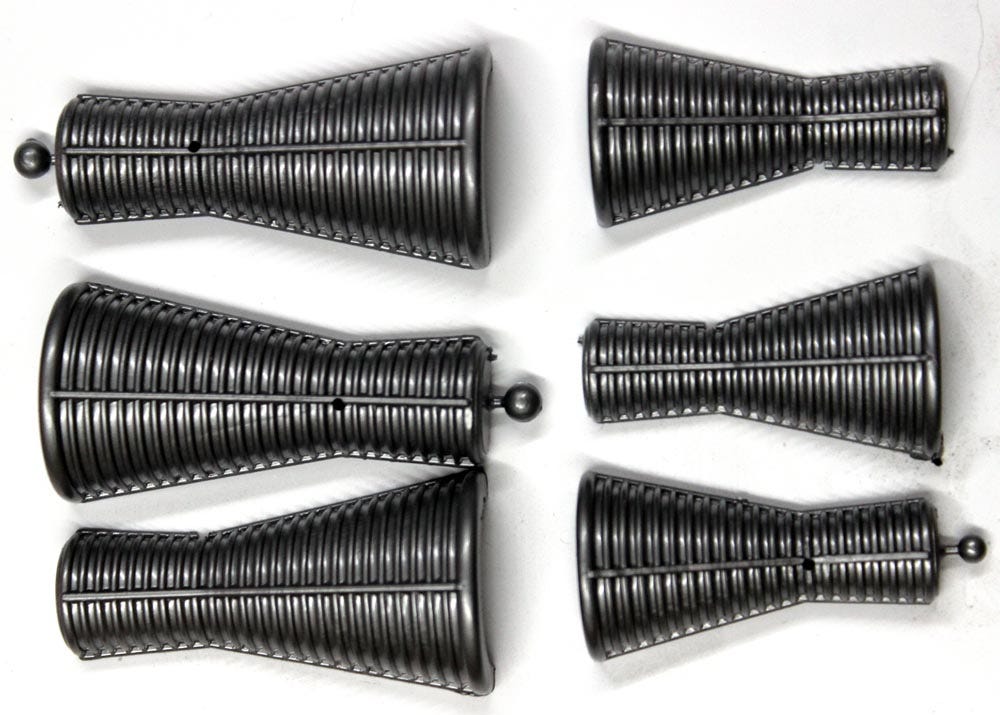
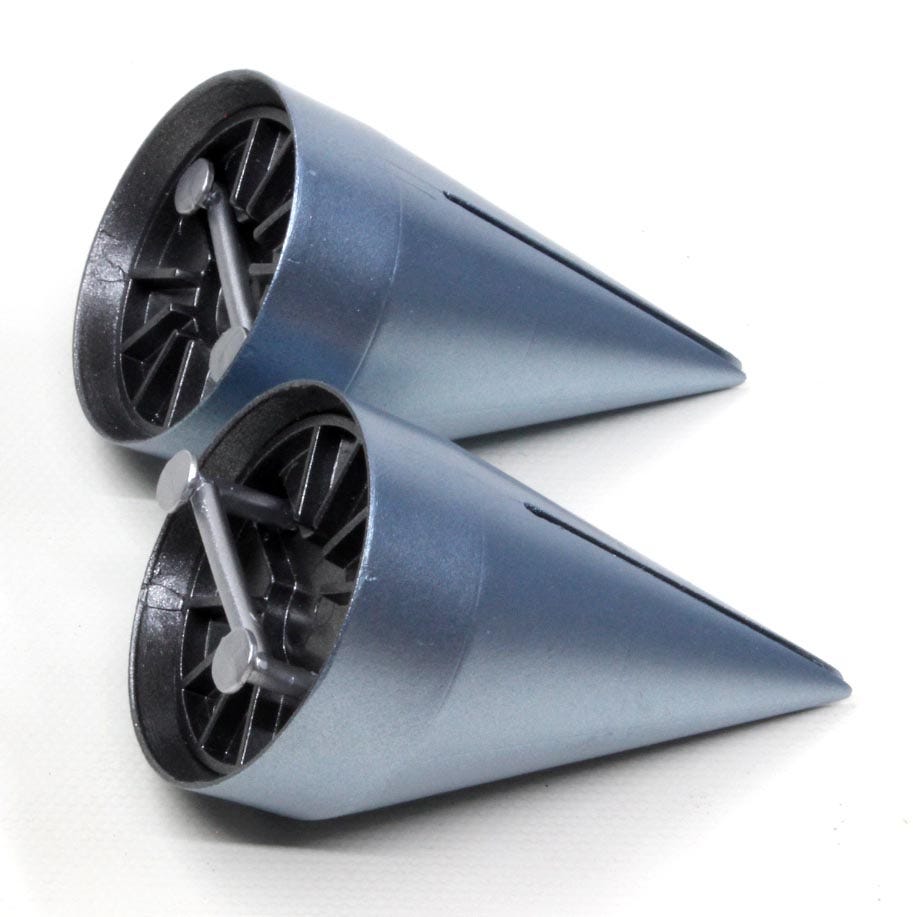
The picture below shows the original engine bell parts that were in the kit I received. There are four main bells in two different sizes, each bell divided in half.
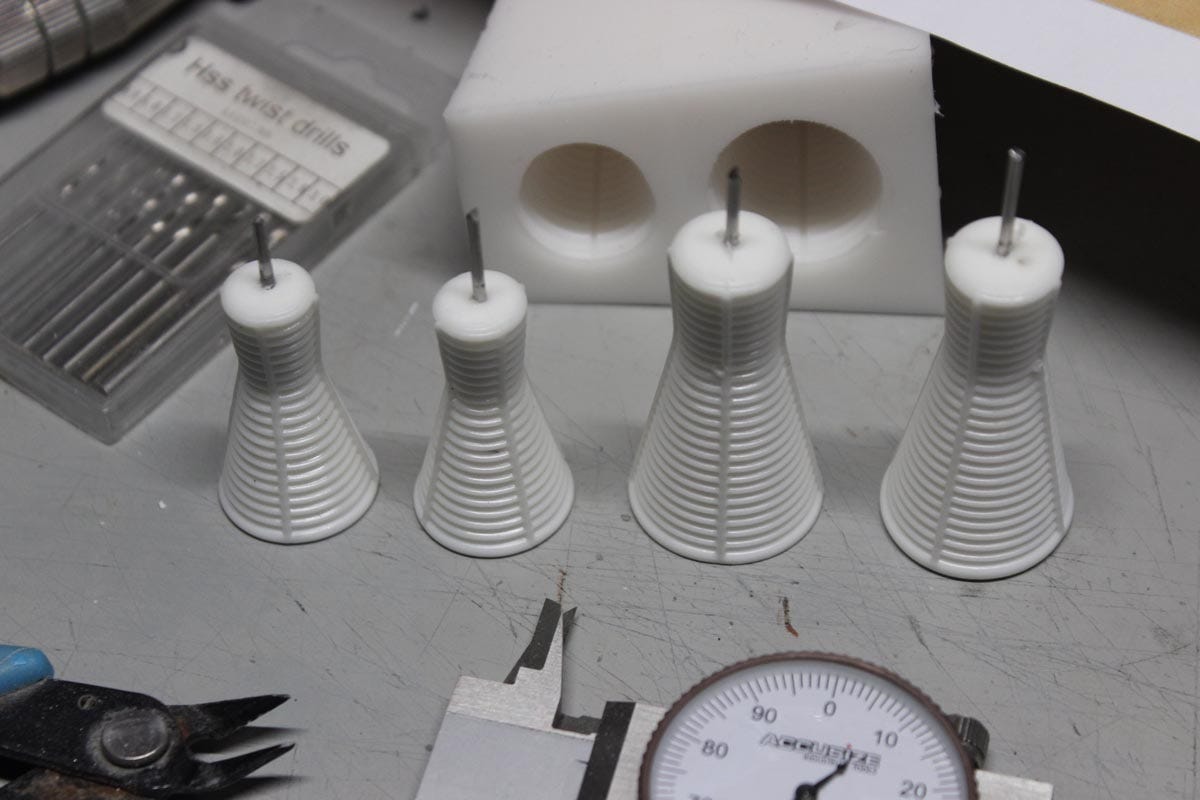
Doing simple math, you would note that there should be eight halves. There were only six! How do we remedy this problem on such a rare kit? Buying a new example from Ebay would have cost many hundreds of dollars (I looked it up). But since I could assemble just one of each size engine, the obvious choice was to mold and cast a new set using silicone rubber for the mold and urethane resin for the copies. Here is a picture of the mold and copies I made:
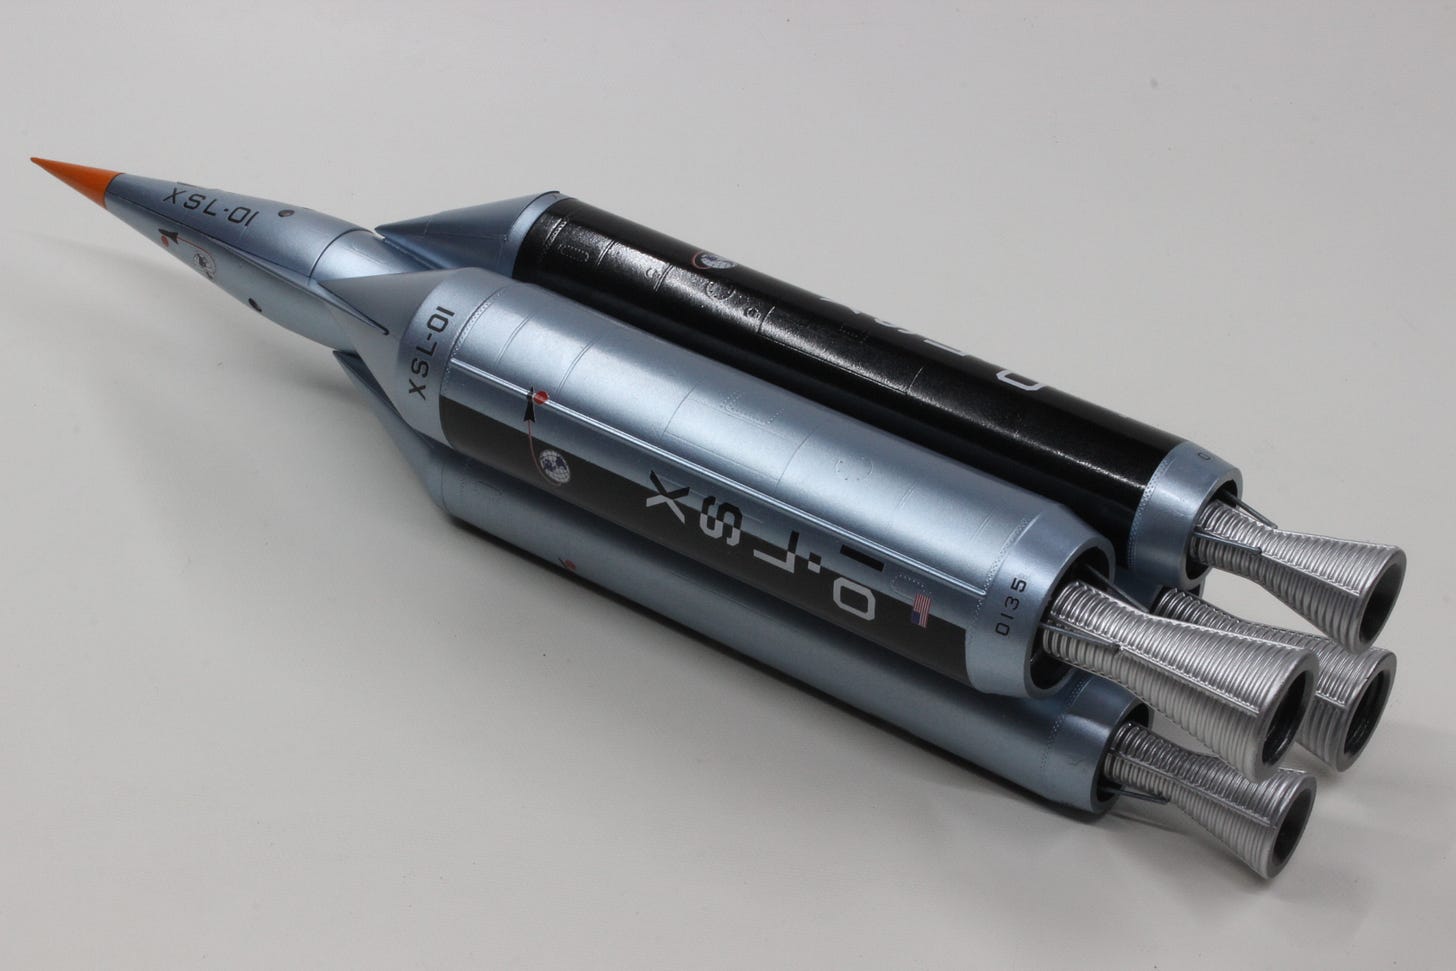
You can see the mold behind the white-cast resin bells. I placed some aluminum pins cut from welding wire into the bases to allow them to be mounted. The originals had very brittle and tiny posts with ball joints attached which would never have survived handling (indeed they were broken during the molding process!) so these aluminum alternatives were the only way to go. It just required drilling out the bases of the booster rockets that the pins would plug into. Now, some of you are saying at this point that I could have made a two-piece mold of each half so they would be built as per the original. Yeah, I could have but that would have taken too much time and materials and the “interior” of the original bells was something you wouldn’t want to see anyway with the overly hollowed out shell and locator pins visible. It was better to mold the finished bells as one piece and then just chuck the cast parts in a lathe and drill out the interiors. And that’s just what I did. I used a step drill for the larger bells and a large centre drill for the smaller ones. This yielded satisfactory results, especially when given a shot of paint. Here’s a picture of the newly made engines installed onto the finished model:
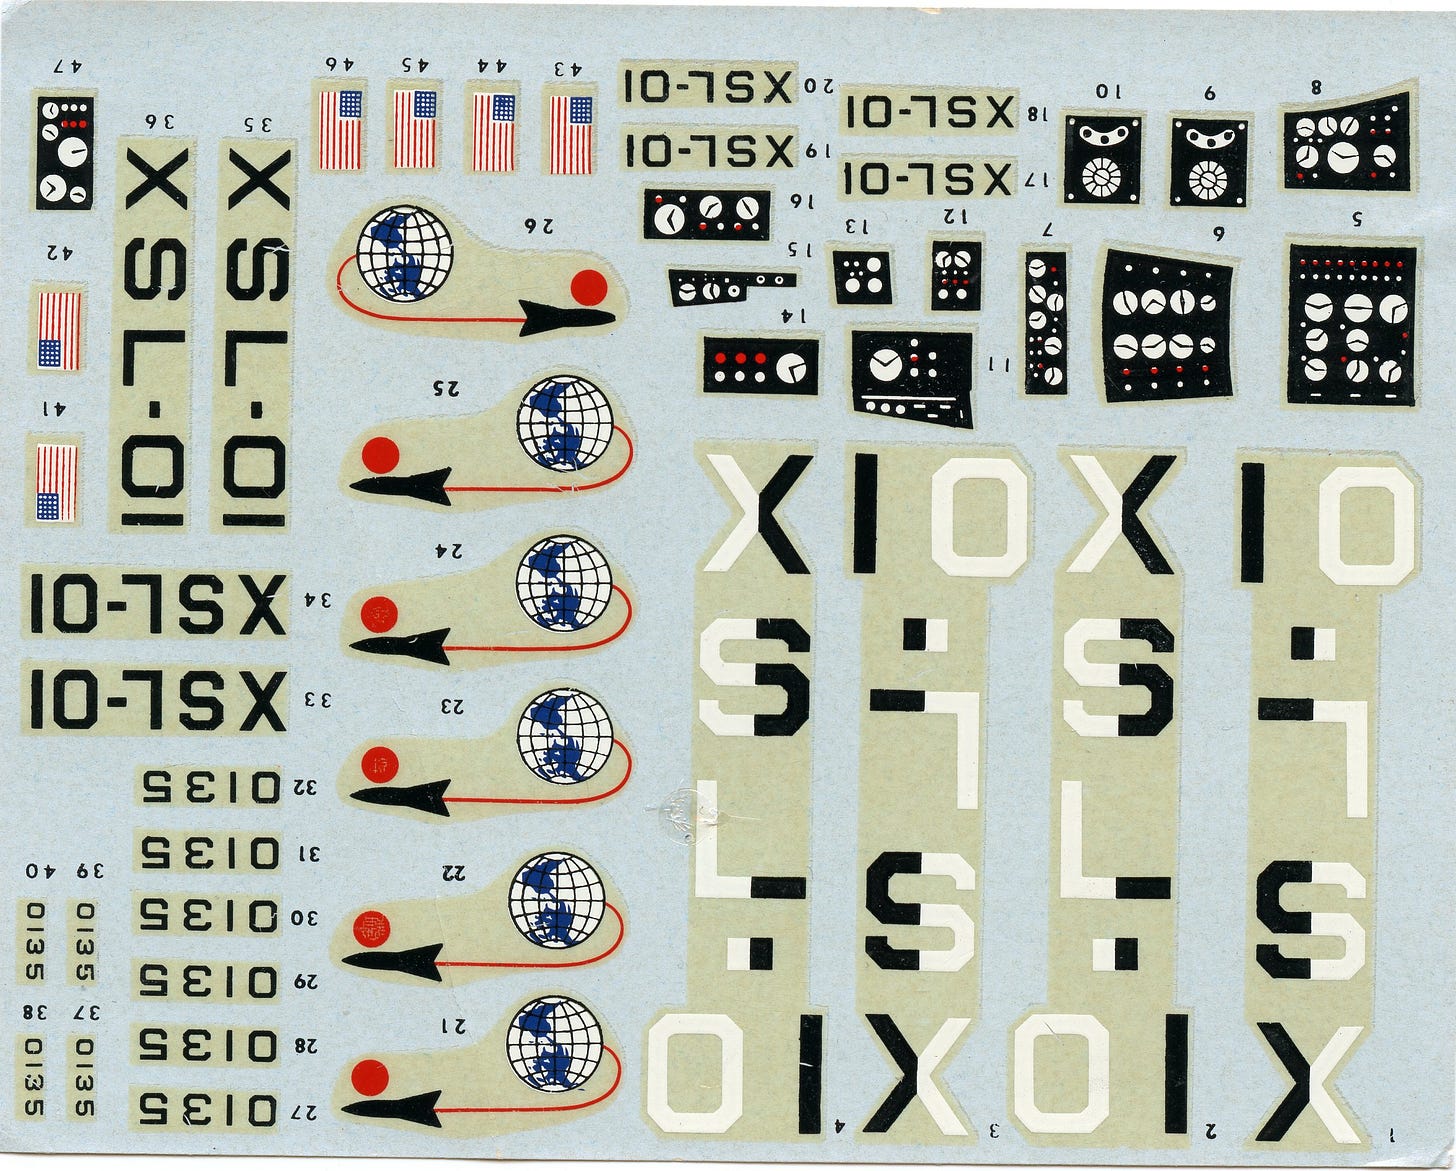
With that problem solved, the next step was to deal with the 66 year old decals. Needless to say, the decals were pretty much unusable. Here’s what they looked like:
They had yellowed like crazy and it was unlikely that they would even work. After I took this 600DPI scan I tested one of the decals to see if they would still be useable. No dice. So I contacted V-1 Decals in British Columbia to see what could be done. I cleaned up the artwork in Photoshop, divided it into the needed layers and had V-1 print me a new set. V-1 is an excellent decal printing company who has a special laser printer which can print white and opaque colours which was absolutely necessary for this project. In the past, an ALPS printer was needed for this work but Ben at V-1 has the ability to do this work using a special laser printer and his work is perfection. I use V-1 for ALL my decal printing needs now. It’s a lot easier than my having to fight with the bubble jet printed stuff I did in the past. Ben at V-1 is great to work with and I pray to God he never goes out of business!
NOTE: Although V-1 specializes in airliner decals, he can print whatever you want as long as you provide suitable artwork. I you have decal printing needs, contact him for details. He’s very good to work with.
Anyway, I assembled the model as per the instructions and painted it as per the customer’s requests. Two things to note: He wanted it to be painted similar to the colours it was molded in (the metallic blue specifically with the hints of orange and silver to match the “flavour” of the 1950s aura) and have it pristine and shiny. In other words, NO WEATHERING!
Weathering normally hides a lot of sins and pristine models usually look like toys, but I aim to please so I did my best to blend it all together without any weathering “cheats”. The results are seen in the following photographs. I used floor polish (“Future” is well known to experienced modelers nowadays but that product is no longer produced, so an equivalent called “Quick Shine” works just as well) to blend the decals into the surfaces and avoid what is known as “silvering” (air bubbles under the clear film). The nice thing about these floor polishes is that they are self-leveling, so you can use a paint brush to apply them and as long as you don’t apply too much, it provides a glossy and smooth surface to the model and preserves the metallic look.
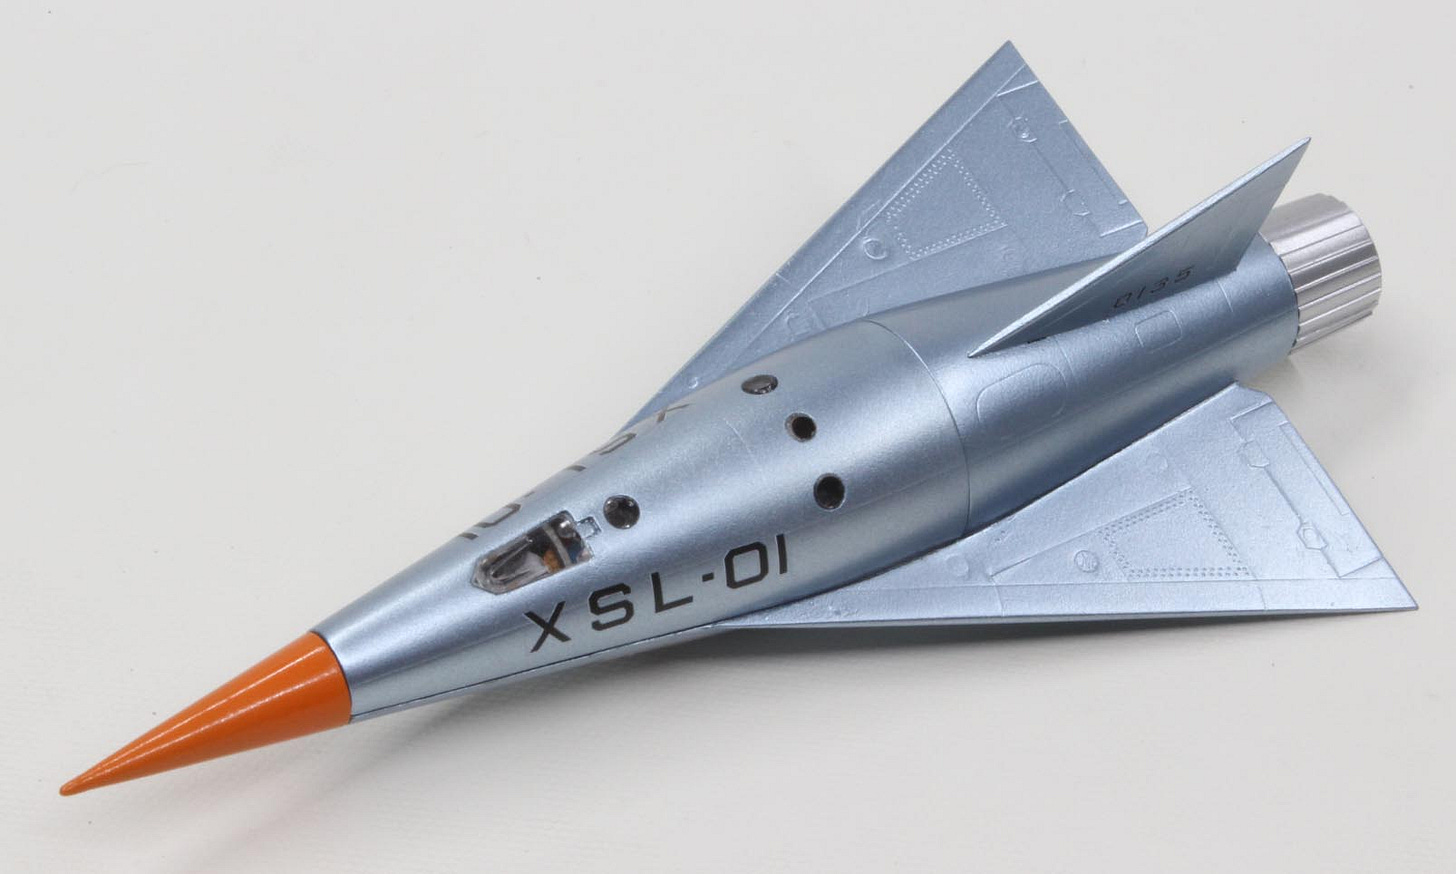
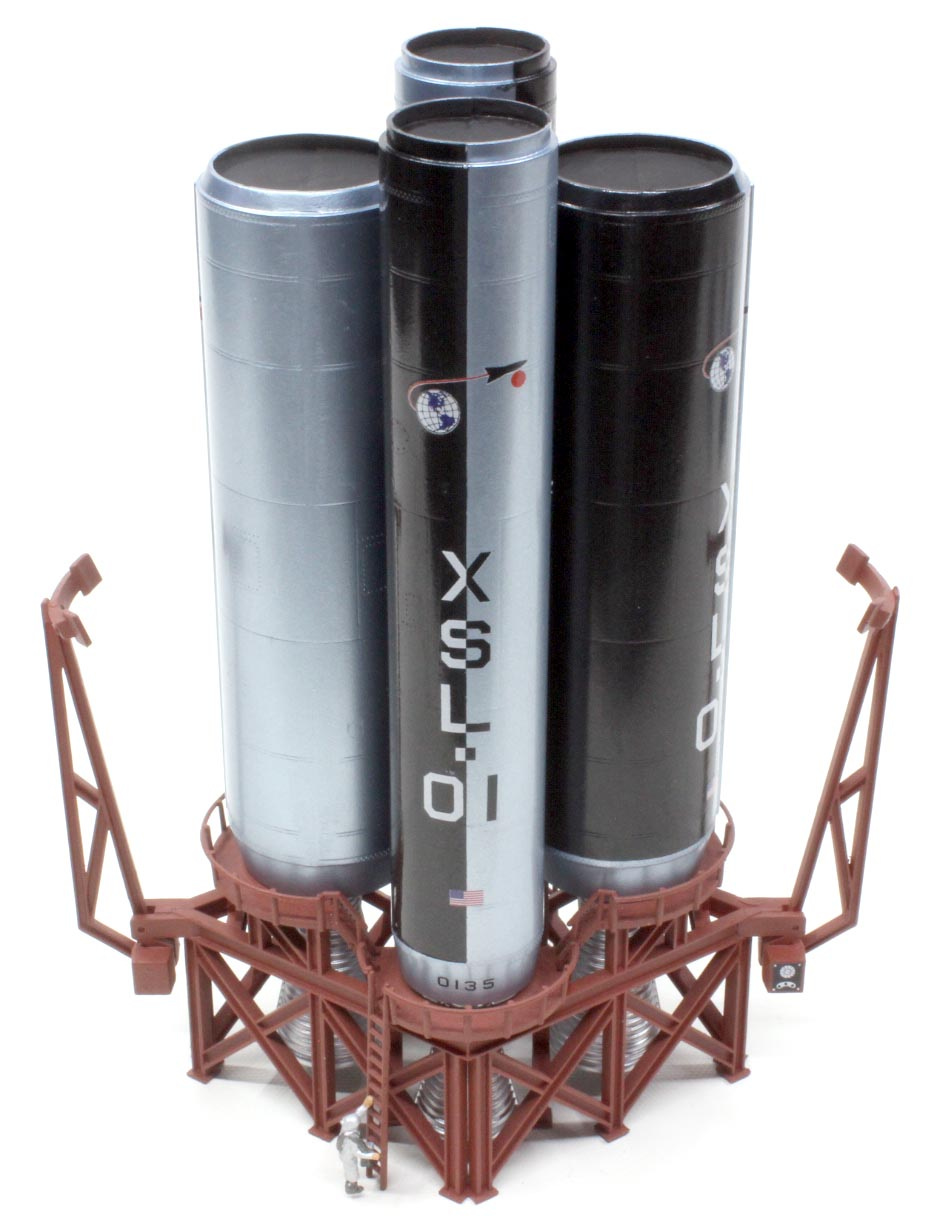
Here is a picture of the finished model sans launch p[ad to show you what the whole thing looks like fully finished and assembled.
Here is the shuttle alone shown with cover in place.
This next picture shows how the (rather improbable!) “landing skid” can be deployed.
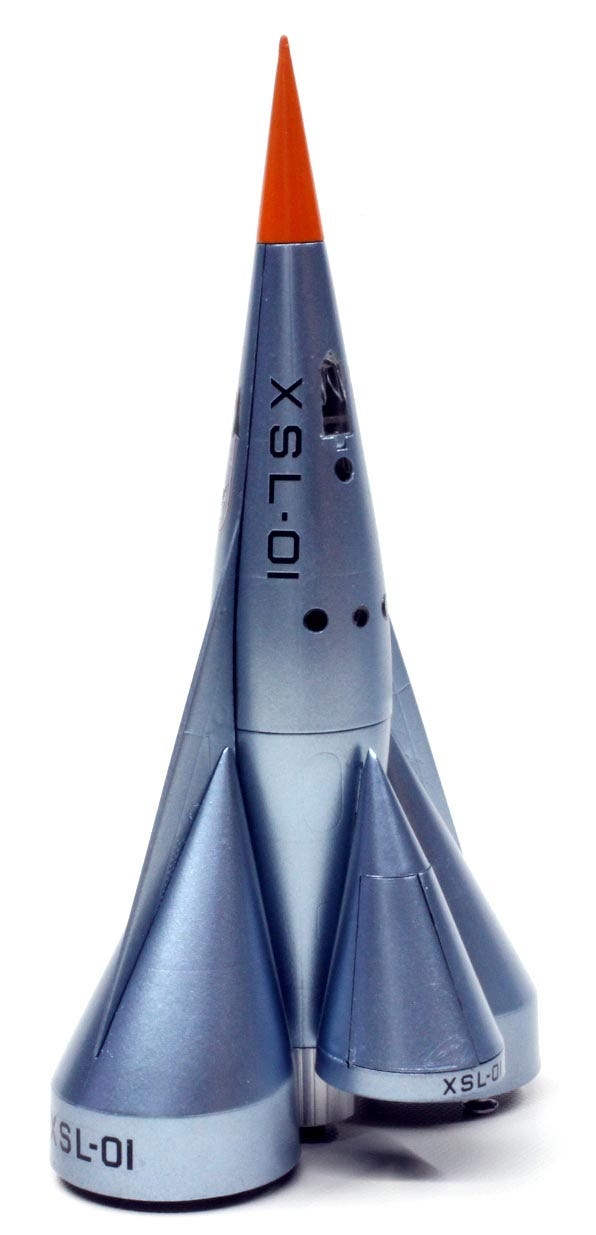
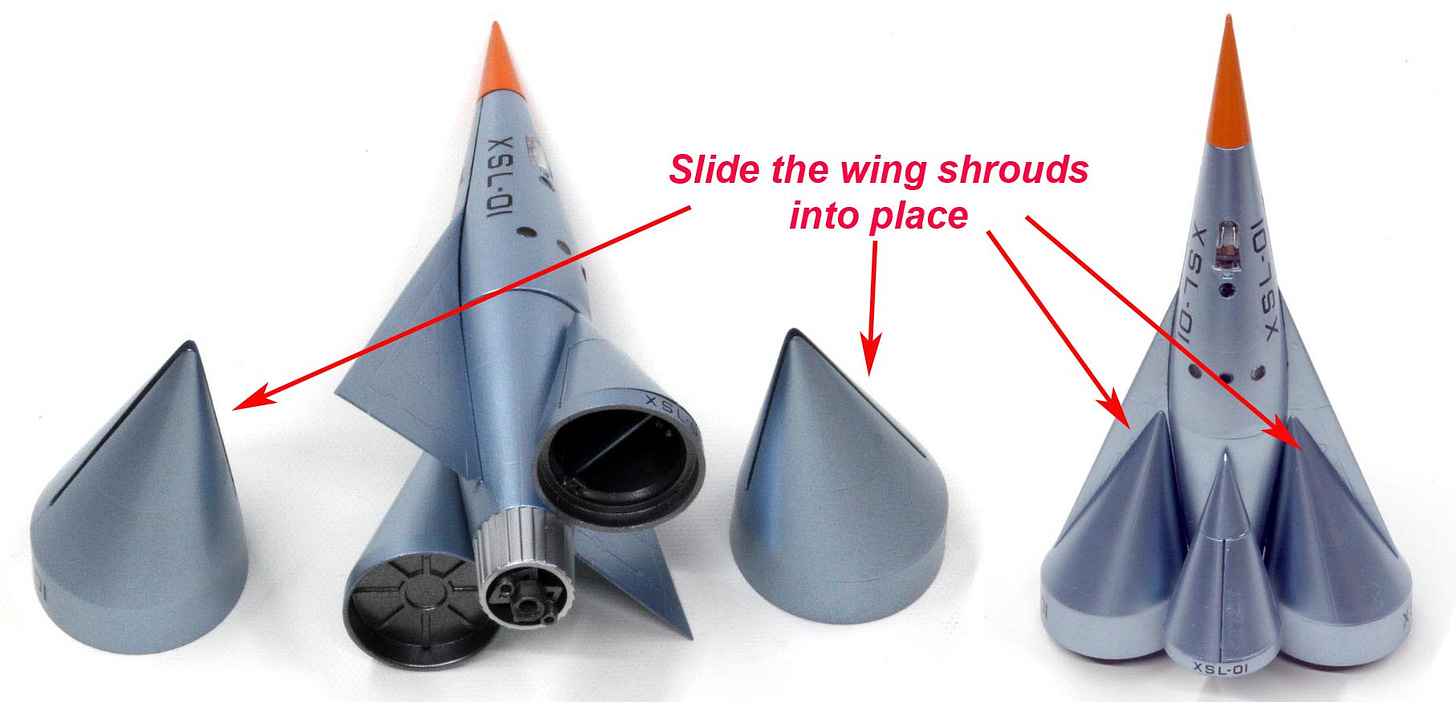
The wing shrouds allow the shuttle to be landed (with extractable landing feet) vertically…
…Like this:
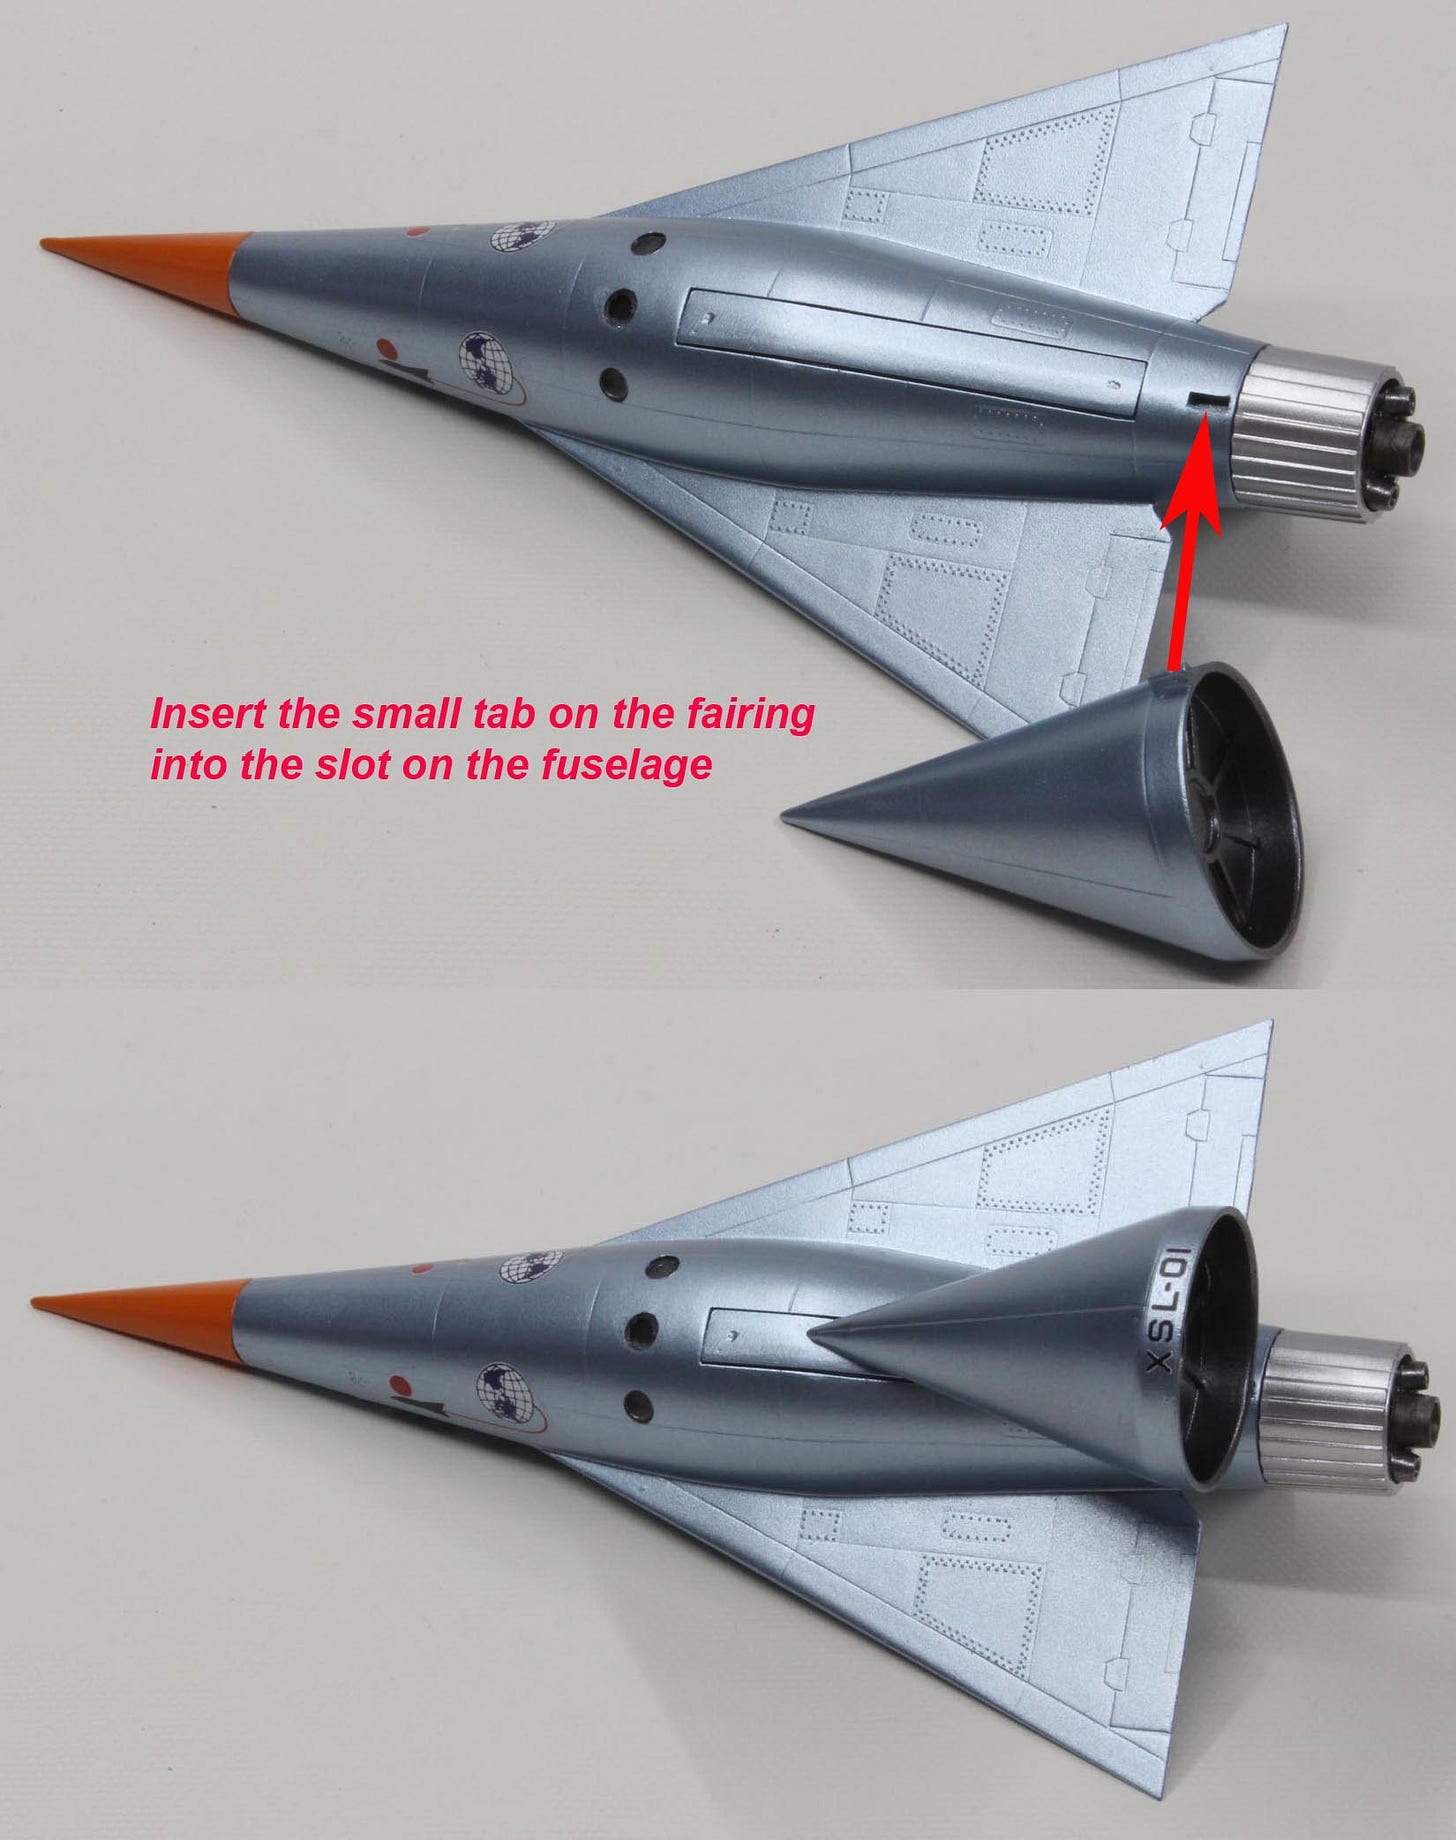
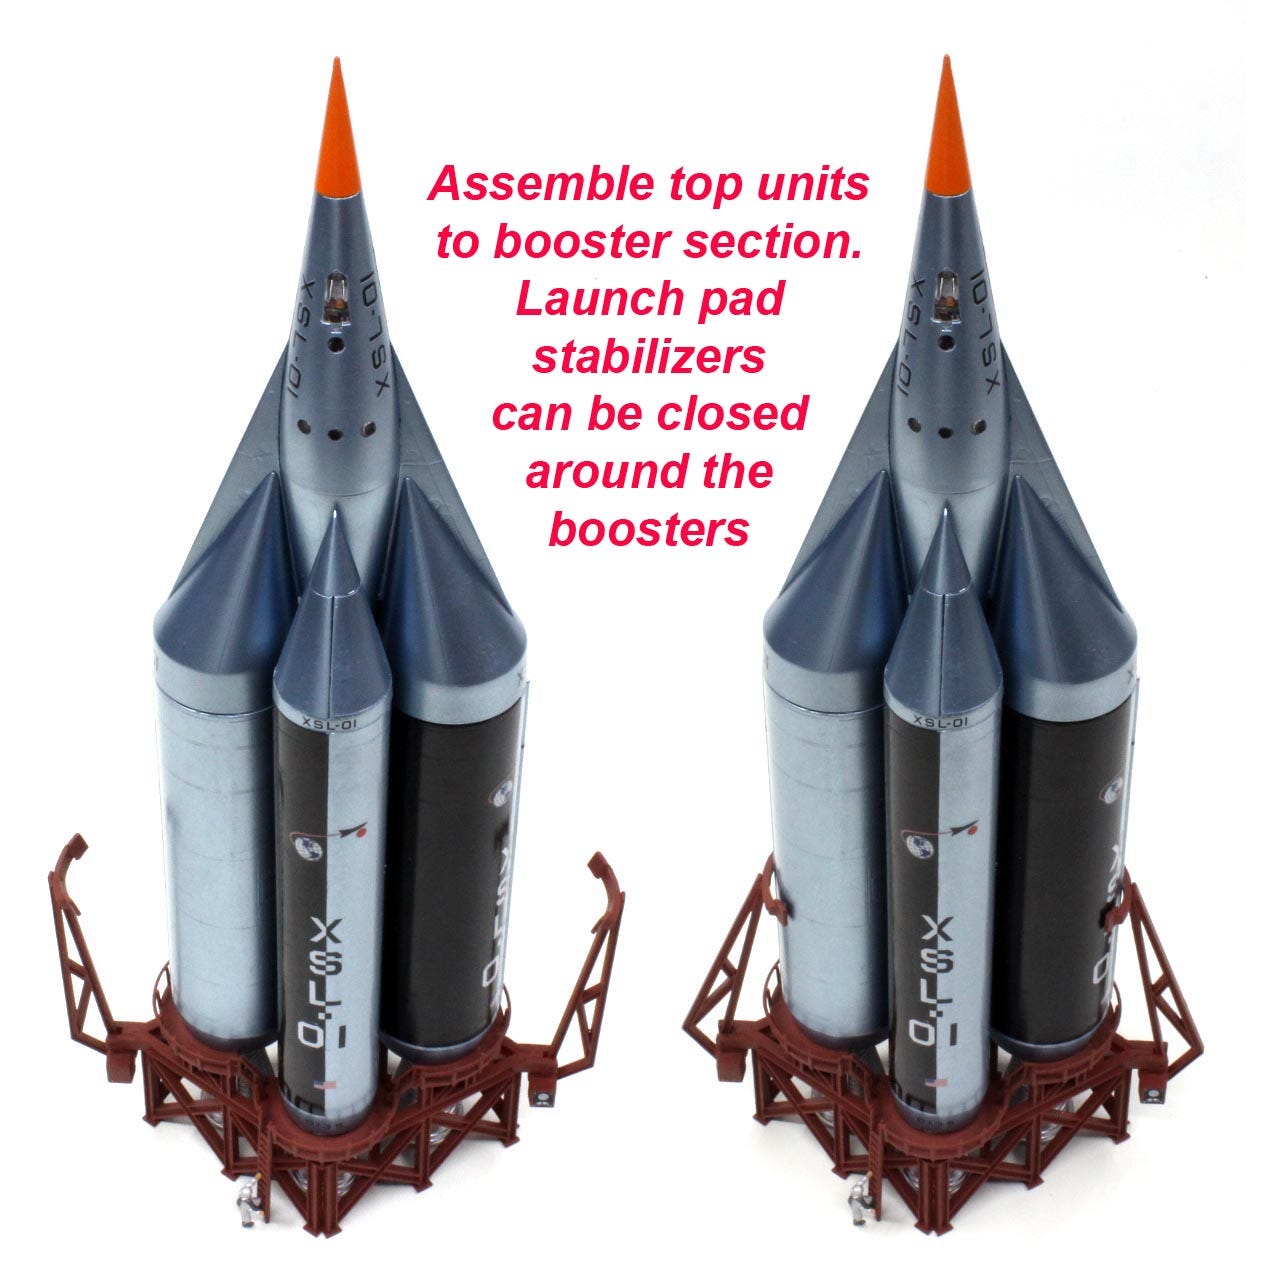
Now, what follows is an “instruction diagram” on how to assemble the finished model, as it was designed to be disassembled and reassembled to display how the ship would have been able to come apart should it have been “real”. First, here are the main parts before assembly and the names of the parts:
When assembling the model, first put the booster assembly onto the launch pad.
Anyhow, that’s about it. I hope you all enjoyed this little trip down Nostalgia Avenue as far as old style spaceship model kits go. I was happy to build this for my client as I am happy to build all kinds of models for anyone who wants them done. Please visit www.smallartworks.ca and I hope you will subscribe to this newsletter.







It is a very beautiful model... Purely and refine... (No close up of the cockpit ?) ;-)