Where No Small Has Gone Before...
Entering the 3-D Printing World... Carefully, with a simple Tintin Rocket.
I have always criticized 3-D printing as “cheating” and still do to an extent. But I can nevertheless see the benefits of the process. Indeed, the kits I have helped to produce with the guys at Round 2 have all been 3-D printed by their Chinese factory to make prototypes for their new releases. Also, I was seriously impressed by some of the work produced by a local guy here in Truro, NS named Eric Amirault who makes incredibly detailed tiny models of scale railroad scenery and vehicles using 3-D printing. Most 3-D printed stuff I have seen made by both amateurs and professionals alike are plagued with what I call “scan lines” which look terrible and destroy fine details with the low-resolution models most people make in the blogosphere etc. I really HATE that look! But it is apparently possible to make very clean prints with no scan lines visible! The first time I saw that was when Eric showed me some examples of the models he produced. I was exceptionally impressed!
Well, this led, over time, to my wanting a new model of something I had made completely by hand many years before… a replica of the Tintin rocket as seen in the famous comic books “Destination Moon” and “Explorers on the Moon”. The Tintin rocket is available for sale from various legitimate sources, but to me they all looked sloppy and poorly made. I wanted one that looked more like the one seen in the comic. I needed to refine it.
Sometime back in the late 1980s (I don’t remember exactly when!) I had whittled out a wooden model on my father’s ShopSmith lathe that was based on the blueprint drawing that was seen in the comic itself. I think what I did was scale it up to double the size and used that as a guide to make my model out of wood. It was pretty good for what I did back then. Some years later, sometime in the late 1990s I used that model to make vac-forming bucks to duplicate the model which I gave to a friend in England. The wooden model and therefore the bucks I used have long since been lost.
This brings me up to a couple of months ago as of this writing.
I decided I wanted to have a model of the Tintin rocket (I was a bigtime fan of the Tintin comics since I was a kitten) but I just didn’t have the time to spend carving it out from wood again. Besides, I wanted something a little better than a wooden model, and possibly have the ability to duplicate it in case anyone else wanted one. Yes, I could have made vacuform bucks as before but I just thought about Eric’s services which, of course, didn’t exist at the time.
Now it’s important to note that I really did dabble in 3-D modeling, using ‘3-D Studio Max’ back in 1996-’97 in a college course in Sydney, NS. at McKenzie College. I was very interested at the time. But when I started to learn it I became painfully aware that I absolutely HATED building models in the computer. It was exceptionally non-intuitive to me as a physical model maker and I decided I’d never do that kind of crap again. Ugh. Nothing worse than telling a computer to do something and the computer just says “No!”
I’m a hands-on kinda guy who does not like fighting with software. I’d rather fight with a block of wood on a lathe. That, I can understand.
I get it. Computers are useful. This article, of course, is a result of my using the damned things. But gawd, do I ever hate dealing with them!
Anyway, fast-forward to now. I do know how to draw. (I was a technical illustrator of the hands-on type back in the day when pen and paper were used), and thanks to Jamie Hood of Round 2, I learned fairly quickly how to do simple drawings in Adobe Illustrator. I, in fact, have created many decals for them using that program.)
So the first step in building the rocket was deciding how it should look.
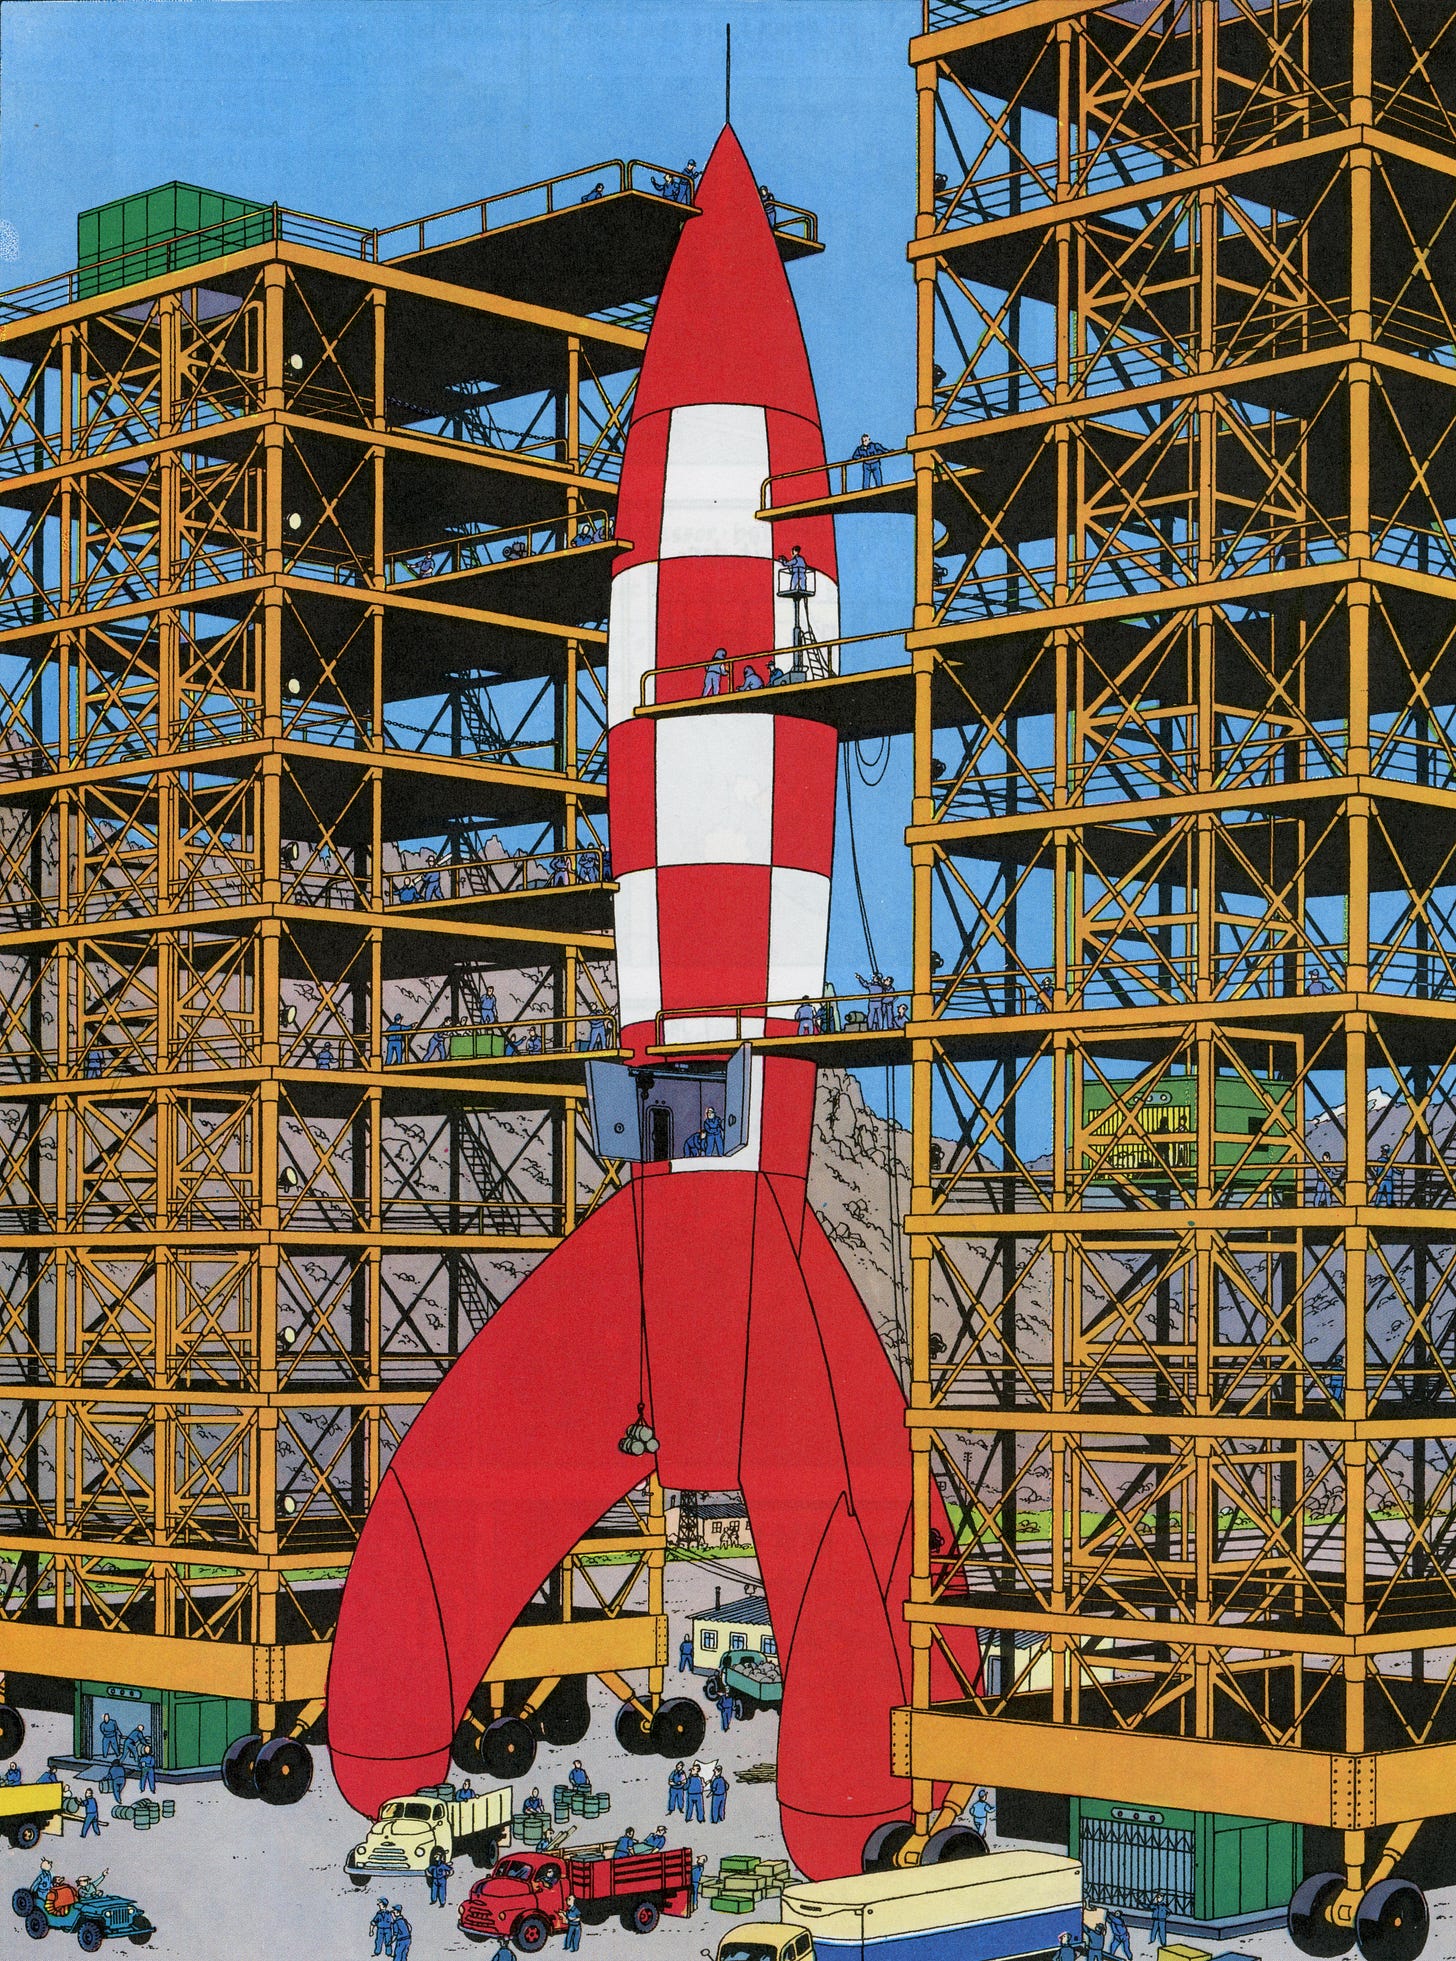
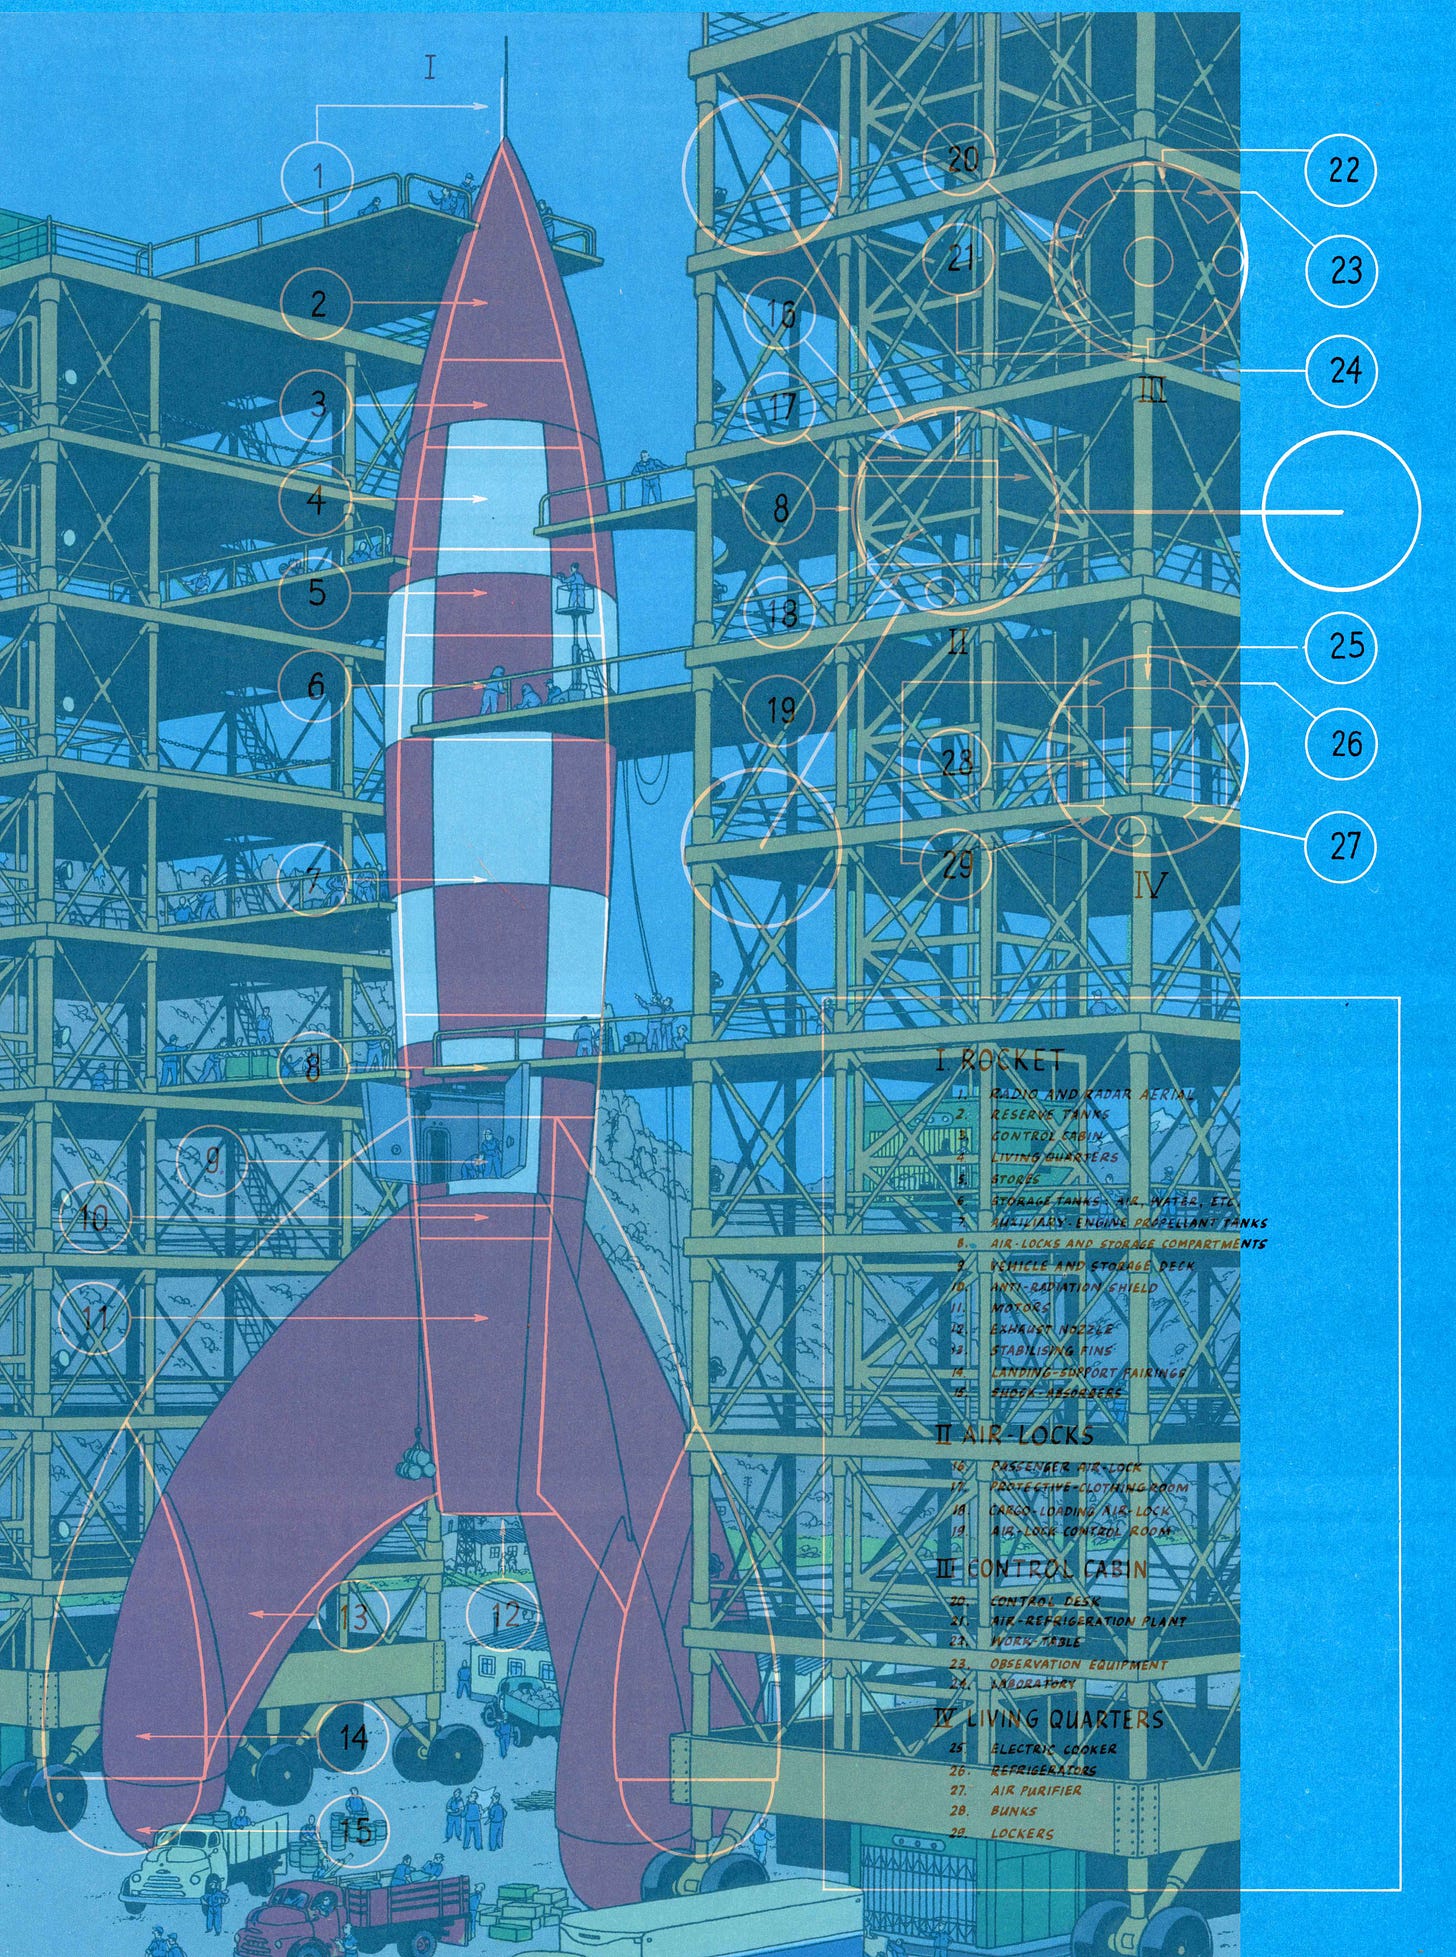
The rocket, it should be known, as it’s based on a comic book, naturally varies considerably from drawing to drawing. So I had to decide on what drawings in the publication looked best. The first episode, “Destination Moon”, showed a full page as a “blueprint” of the rocket as shown here:
The above blueprint is what I based my original wooden rocket on which is shown below in this composite I made from the vacuformed version of the bucks I salvaged from the model:
But as readers of the publication may have figured out, the proportions changed significantly. The “real” rocket as shown in the comic varied significantly from the “official” blueprint that the Herge crew made. Here is the first reveal of the rocket as seen in the comic
I was confronted with a dilemma. Do I follow the blueprint or the “finished” comic look as shown in the “hero” reveal above?
I came up with a compromise. Using Photoshop, I composited the two images together and studied them:
As you can see, the two varied significantly. And every illustration of the rocket was of course inconsistent.
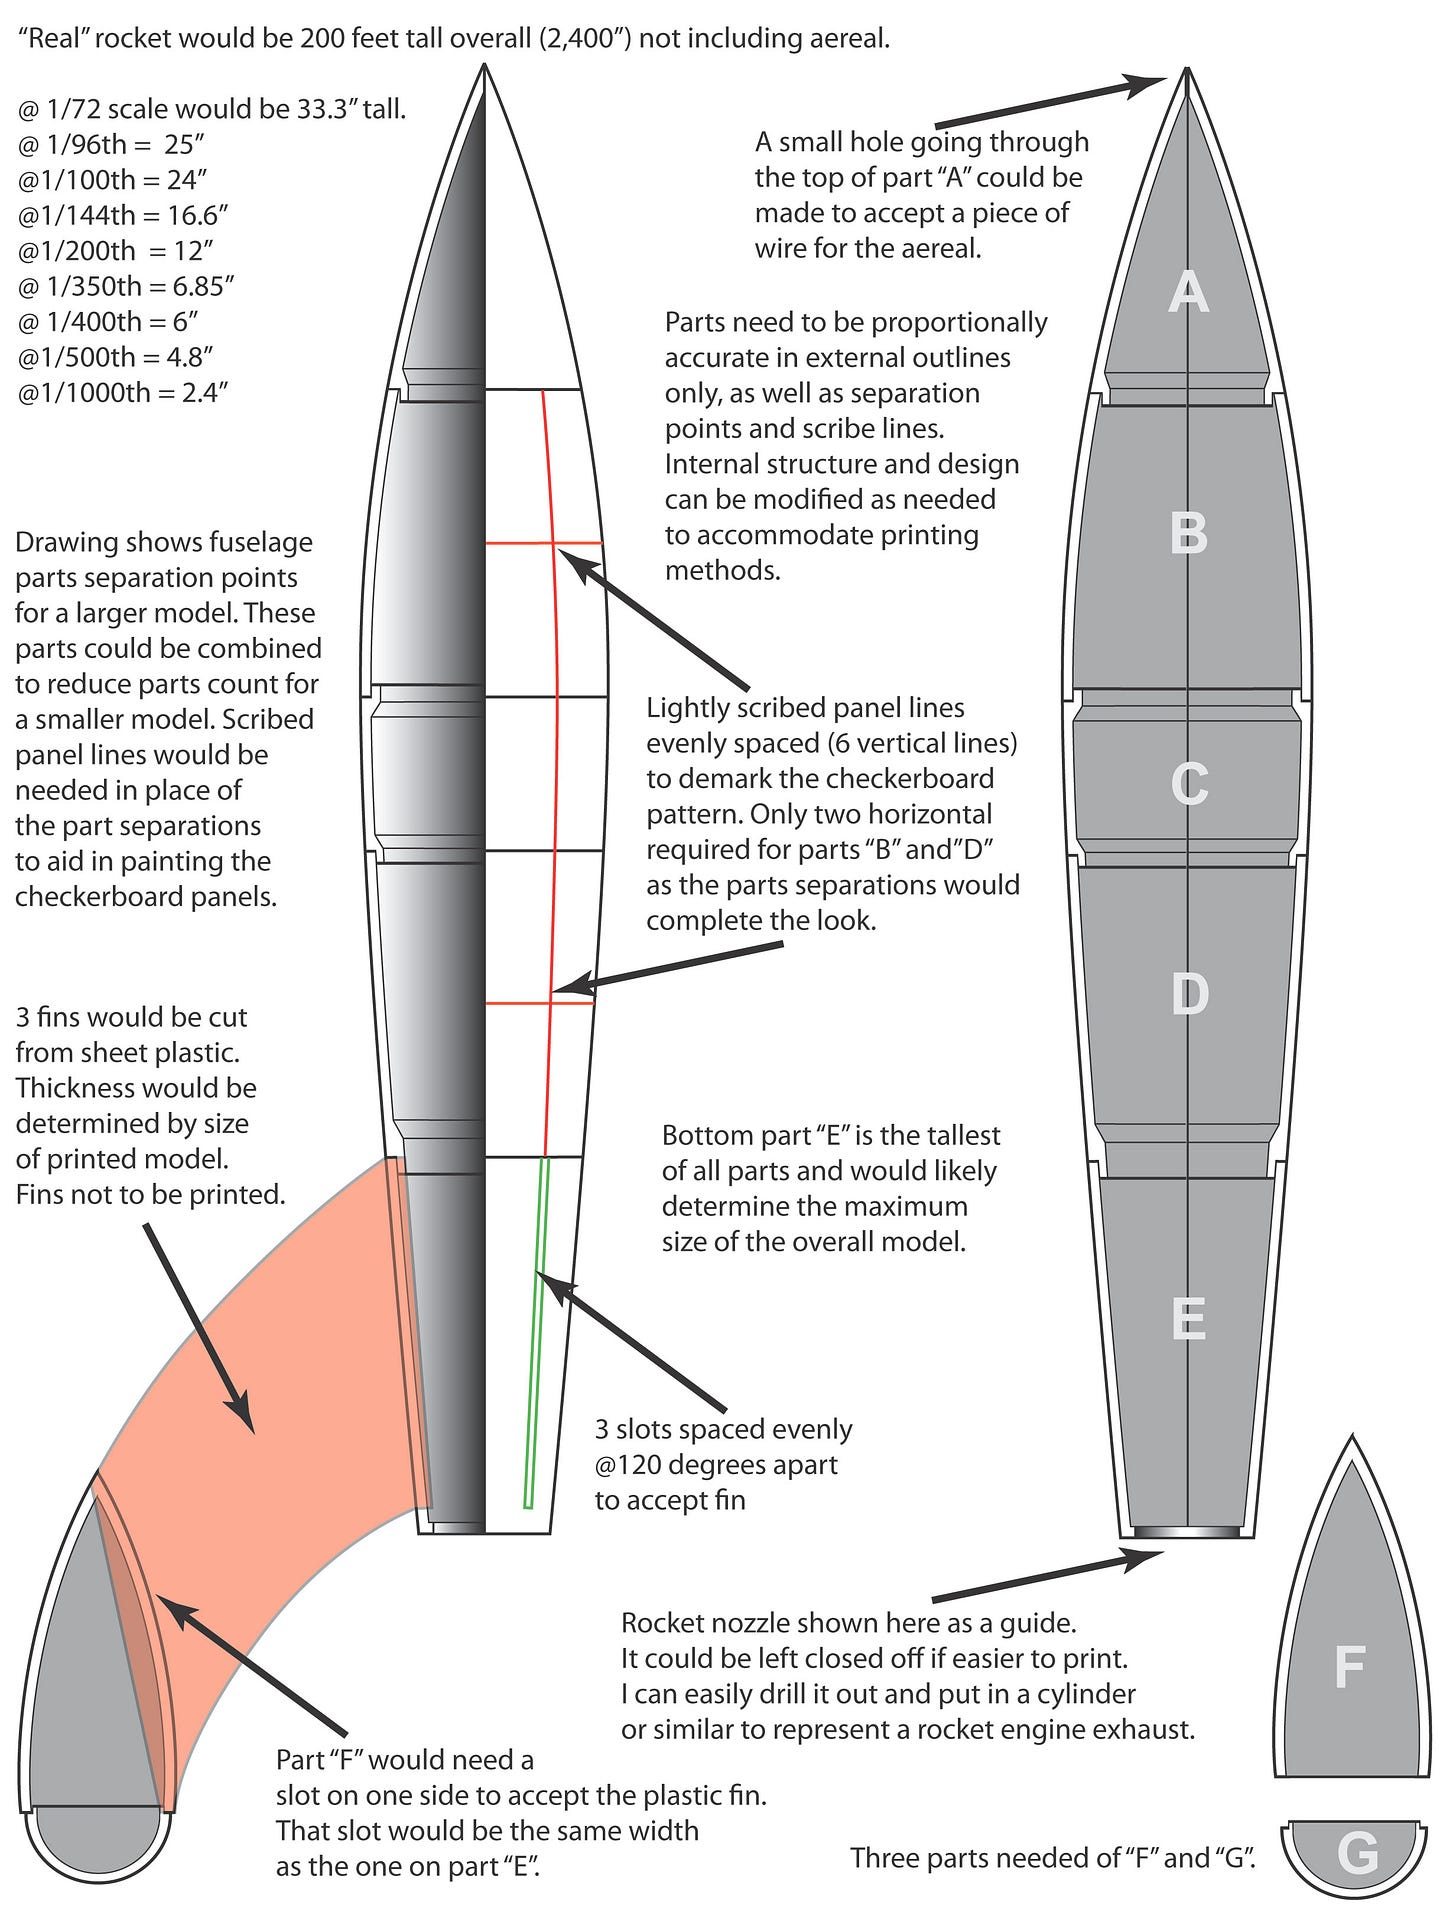
I decided to go “halfway” and did an average to make the rocket look like an “ideal” as if I had to build a physical model for maybe a live-action film version or something. I ended up with this Adobe Illustrator-produced plan which I made to explain how Eric was to make the 3-D model to print. I took into consideration that it would need to be printed in sections as the printer is limited in the size of parts that can be made, so I divided the model up as such, and also thought of the various scales it could be made and produced notes for guidance:
Yes. I know. I spelled “aerial” wrong above. Sue me. Even grammar nazis like me make mistakes. :-P
Anyway, I decided, based on the price, that I would hire Eric to make the 1/144th scale version. He produced the following parts as an STL file.
To accommodate the 3-D printing process (which I know very little about) Eric had to re-configure the way the parts fit together. That was expected. My drawing was only meant as a guide and as long as the exterior proportions remained correct, whatever he did with the rest would be OK.
Here are the parts that resulted…
In the picture above, it shows the limitations of 3-D printing. The curves come out heavily faceted, so I had to sand the crap out of them to maintain a more even curvature. The two parts of the landing gear cones and shocks at the right have been heavily sanded down. The other pair show what they look like before sanding.
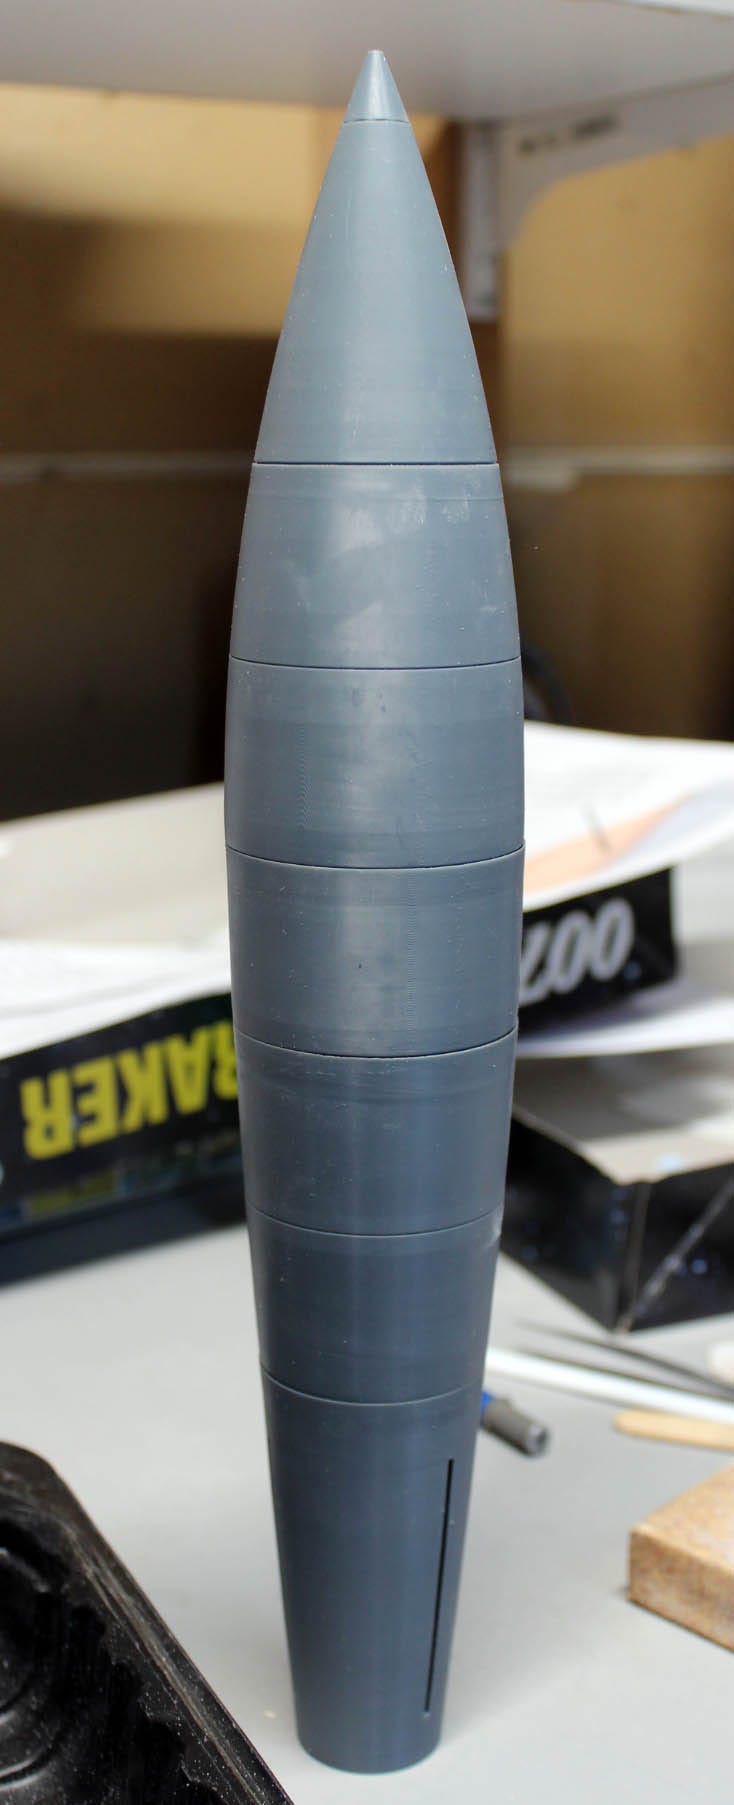
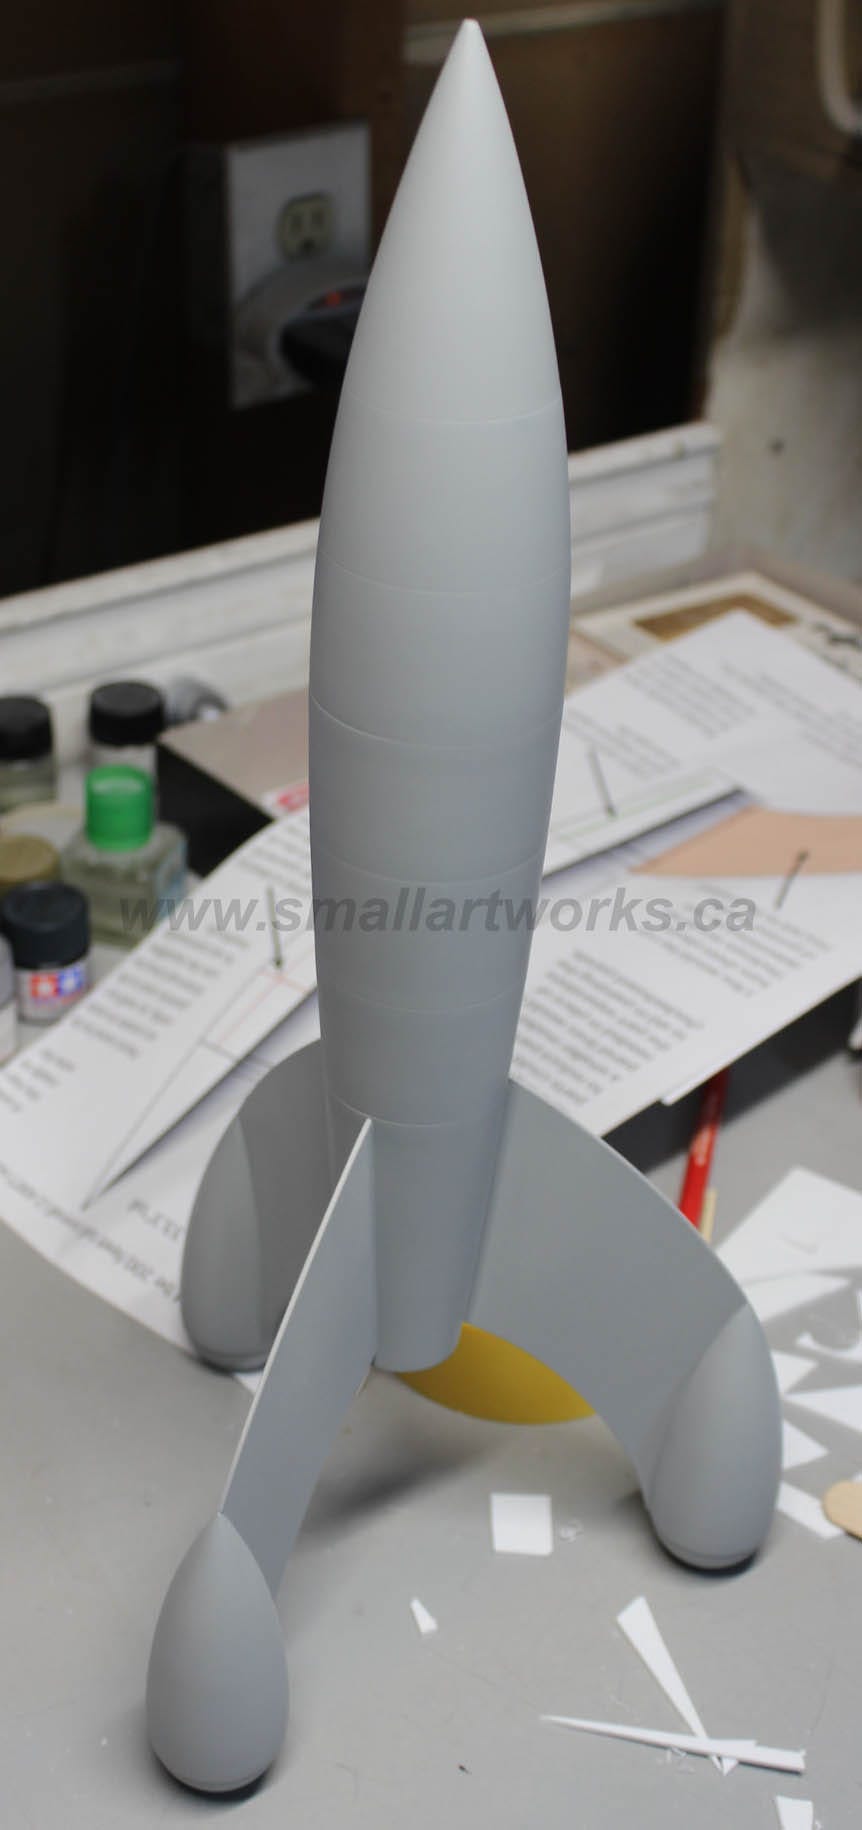
Below, you can see the body being assembled. A lot of sanding and a little puttying was needed to conceal the digital-looking facets…
The slots in the lower engine section fit perfectly with the specified styrene sheeting I had called out for the fins. I cut the sheets using a template made from the plans I printed to the actual size. Since the fins were easy to make from sheet plastic, I did not have them printed. Besides, the printed resin is exceptionally brittle. so the fins would have been easily broken if printed. The fins are thin so do have some flex, but are more than strong enough to support the model and hold their position.
Here is the finished model, sans aerial and final paint.
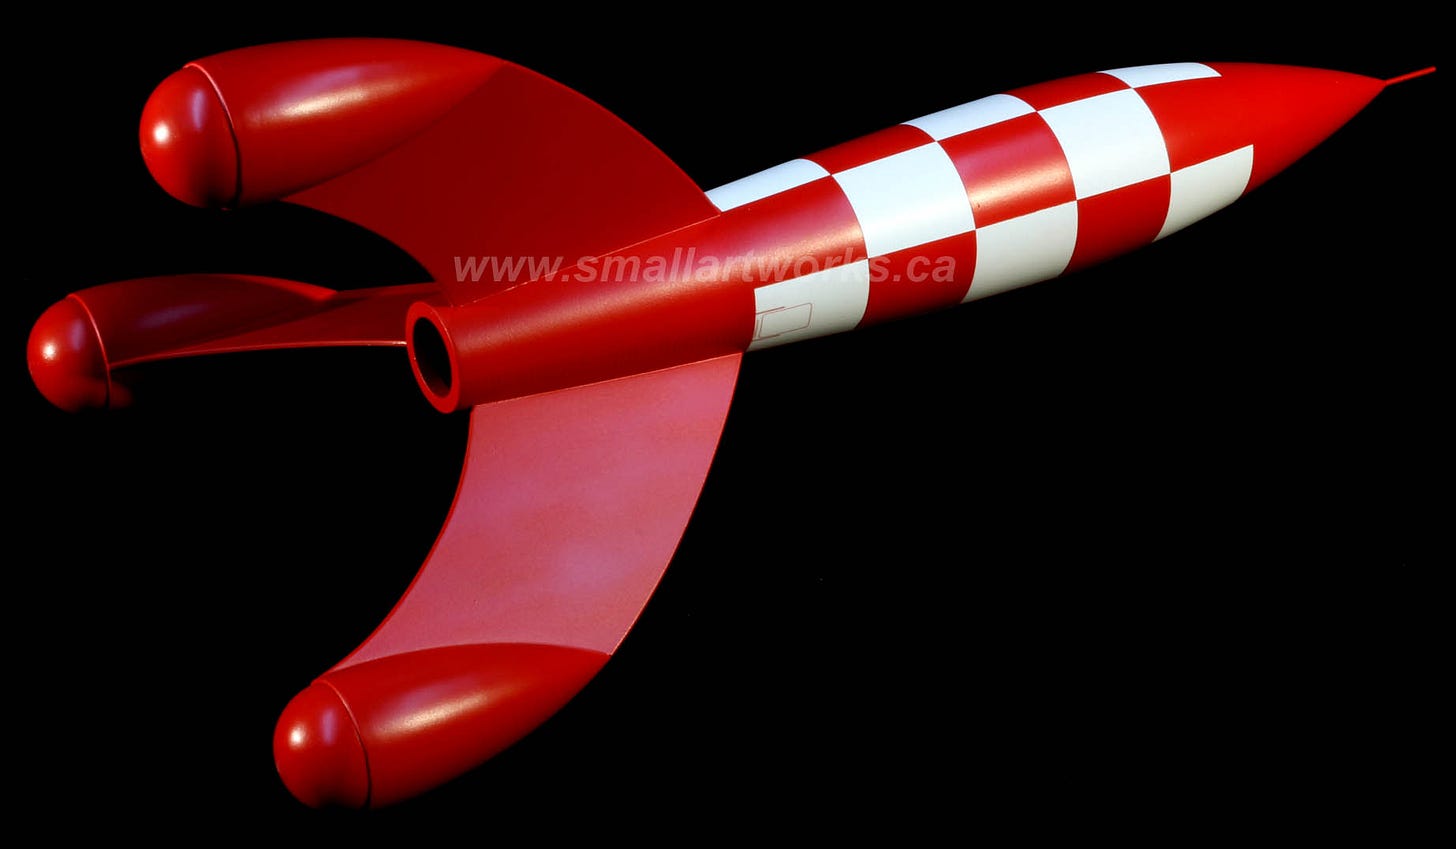
And we now have the finished model which measures about 17” tall with the aerial. The model was sprayed with pure white, and when dry, the white panels were masked off and the whole model was sprayed “Banner Red”. I printed some decals for the door and retractable ladder (hard to see in the pictures)
Do you want one of these models for yourself? Let me know. They can be made to different scales too. Send an email to “jim@smallartworks.ca”. I can make you one if you like.


