


You've Been Modified, Mr. Spock!
Snakes alive! What has become of you?

A client recently asked me to build this re-issued model kit of “Mr. Spock” from AMT/Round 2. There’s a little bit of weird history behind this one.

Originally released in 1968, the AMT kit was reissued a few times including by Aurora in 1972 before being re-acquired by AMT for subsequent releases. The most significant difference was made in 1979 when it was heavily modified as “Star Trek The Motion Picture” came out. Here is the boxtop artwork used for that release…
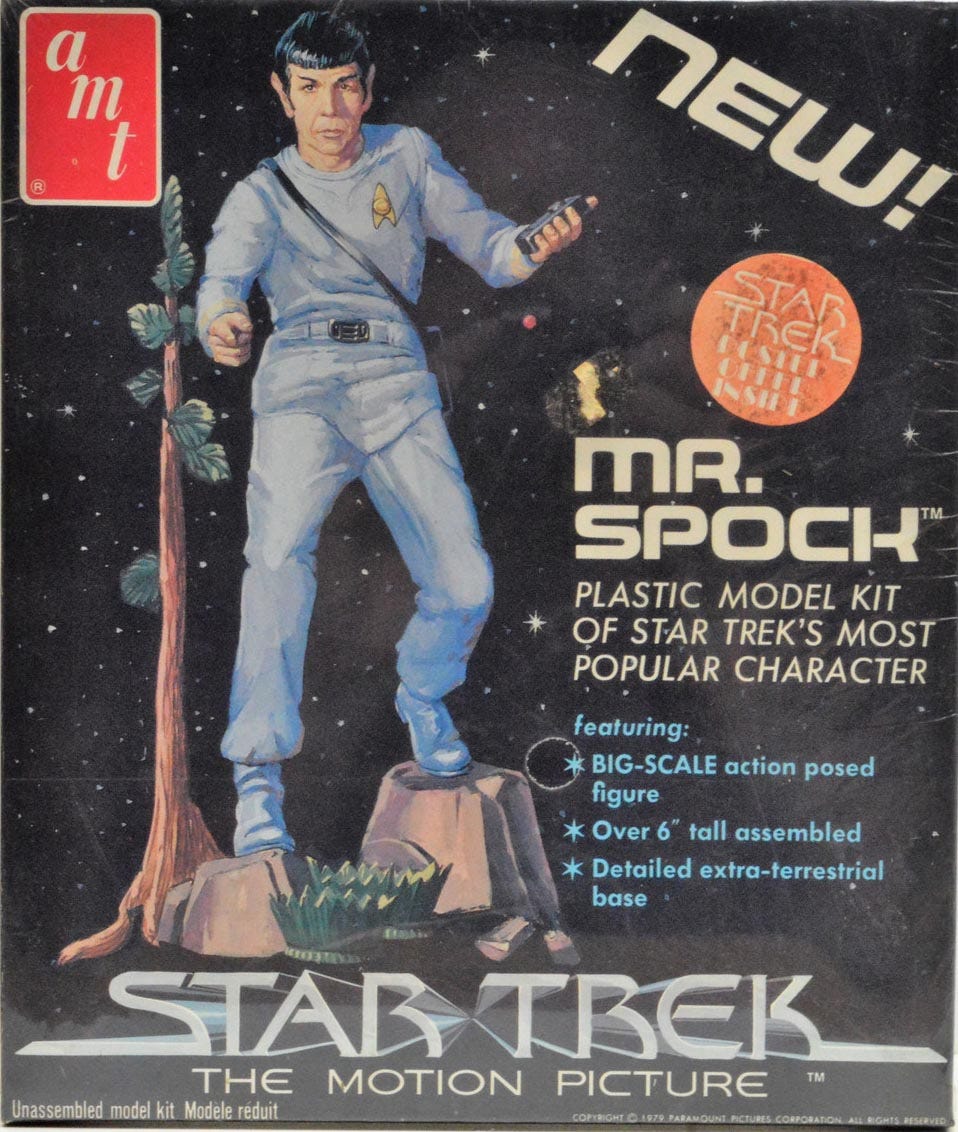
The “new” announcement was a great example of shady salesmanship in this case!
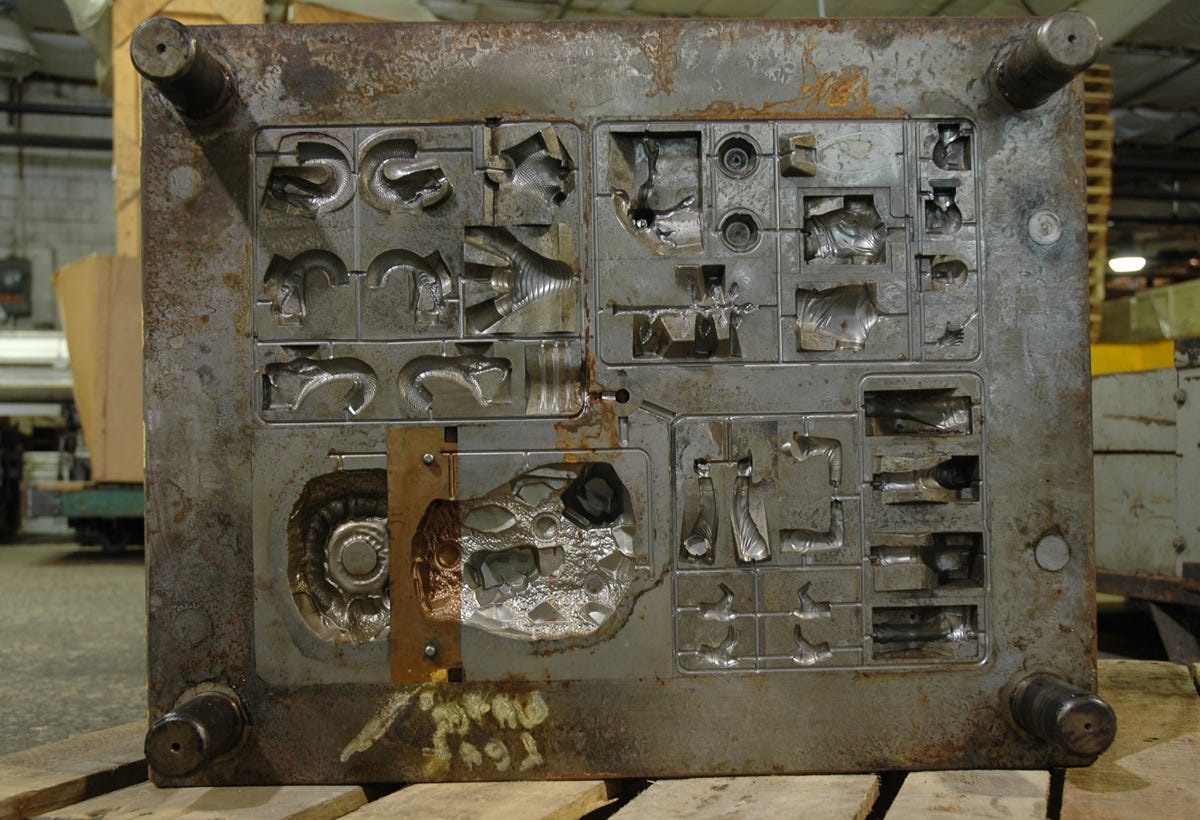
To modify Spock, AMT had taken the phaser out of his hand and just had him point his finger for some reason, and completely omitted the entire base section that had the snake heads emerging from a pit. Here is a picture of the tool (the correct term given to a steel mold for injection casting) showing how the modification of the base was done. An insert was put in place (shown as a bronze coloured section in the lower left quarter of the picture) that effectively destroyed the original version. The top left quarter of the tool, which contained the snake heads, was simply blocked off (picture courtesy of Jamie Hood at Round 2).
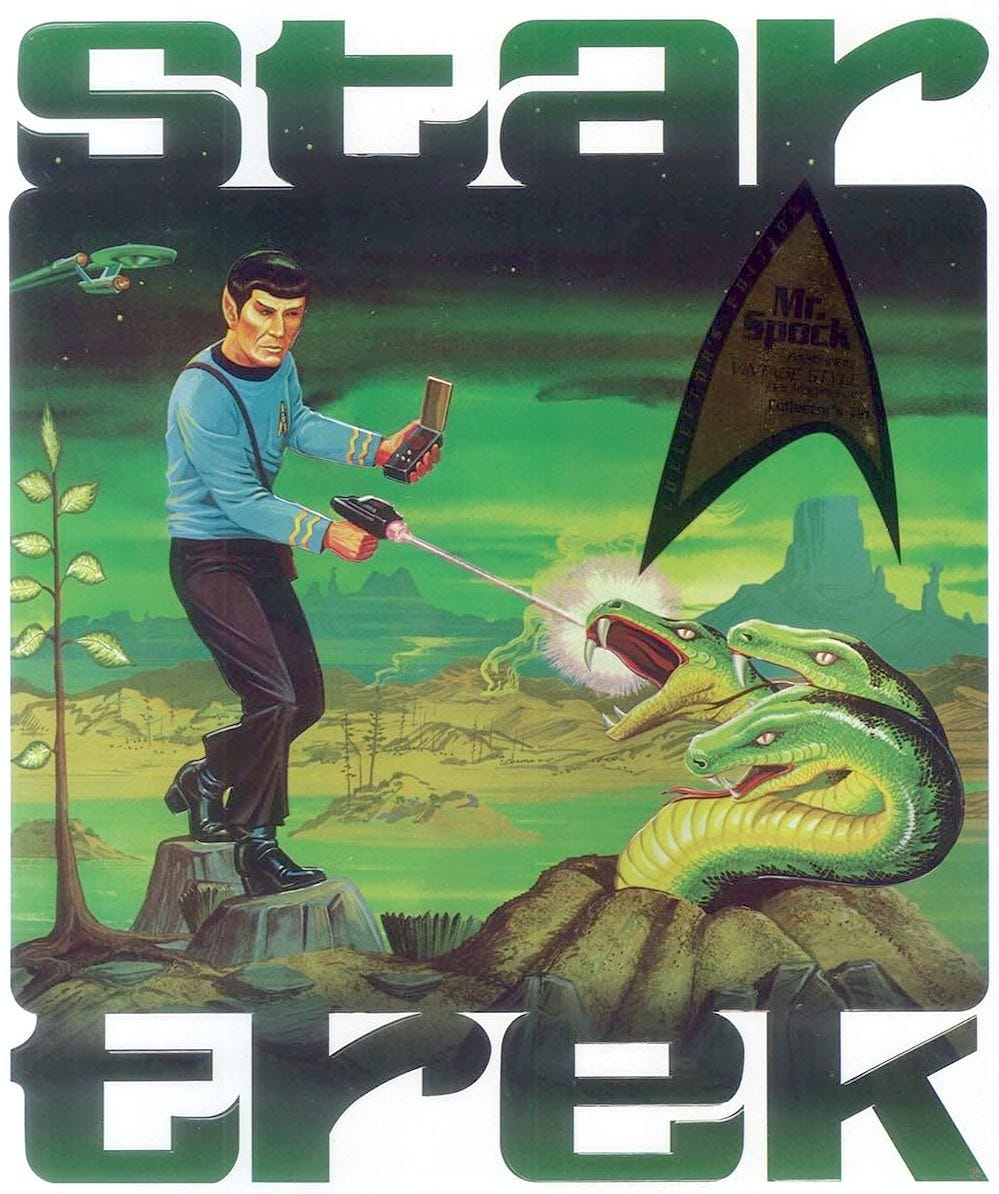
But a few years ago, after Round 2 had acquired AMT, they decided to restore the kit to its original condition, re-tooling the missing section that the 1979 insert occupied. The result is that you can now buy the kit as it was originally released. That is what my client did and is the kit you see in the pictures featured here. My client had asked me to try and replicate the original box art as closely as possible. Here is the art I followed as a guide.
Obviously, not all details are visible so I just used artistic license to flesh out the rest of the diorama. Here are a couple of pictures that show the model being painted.
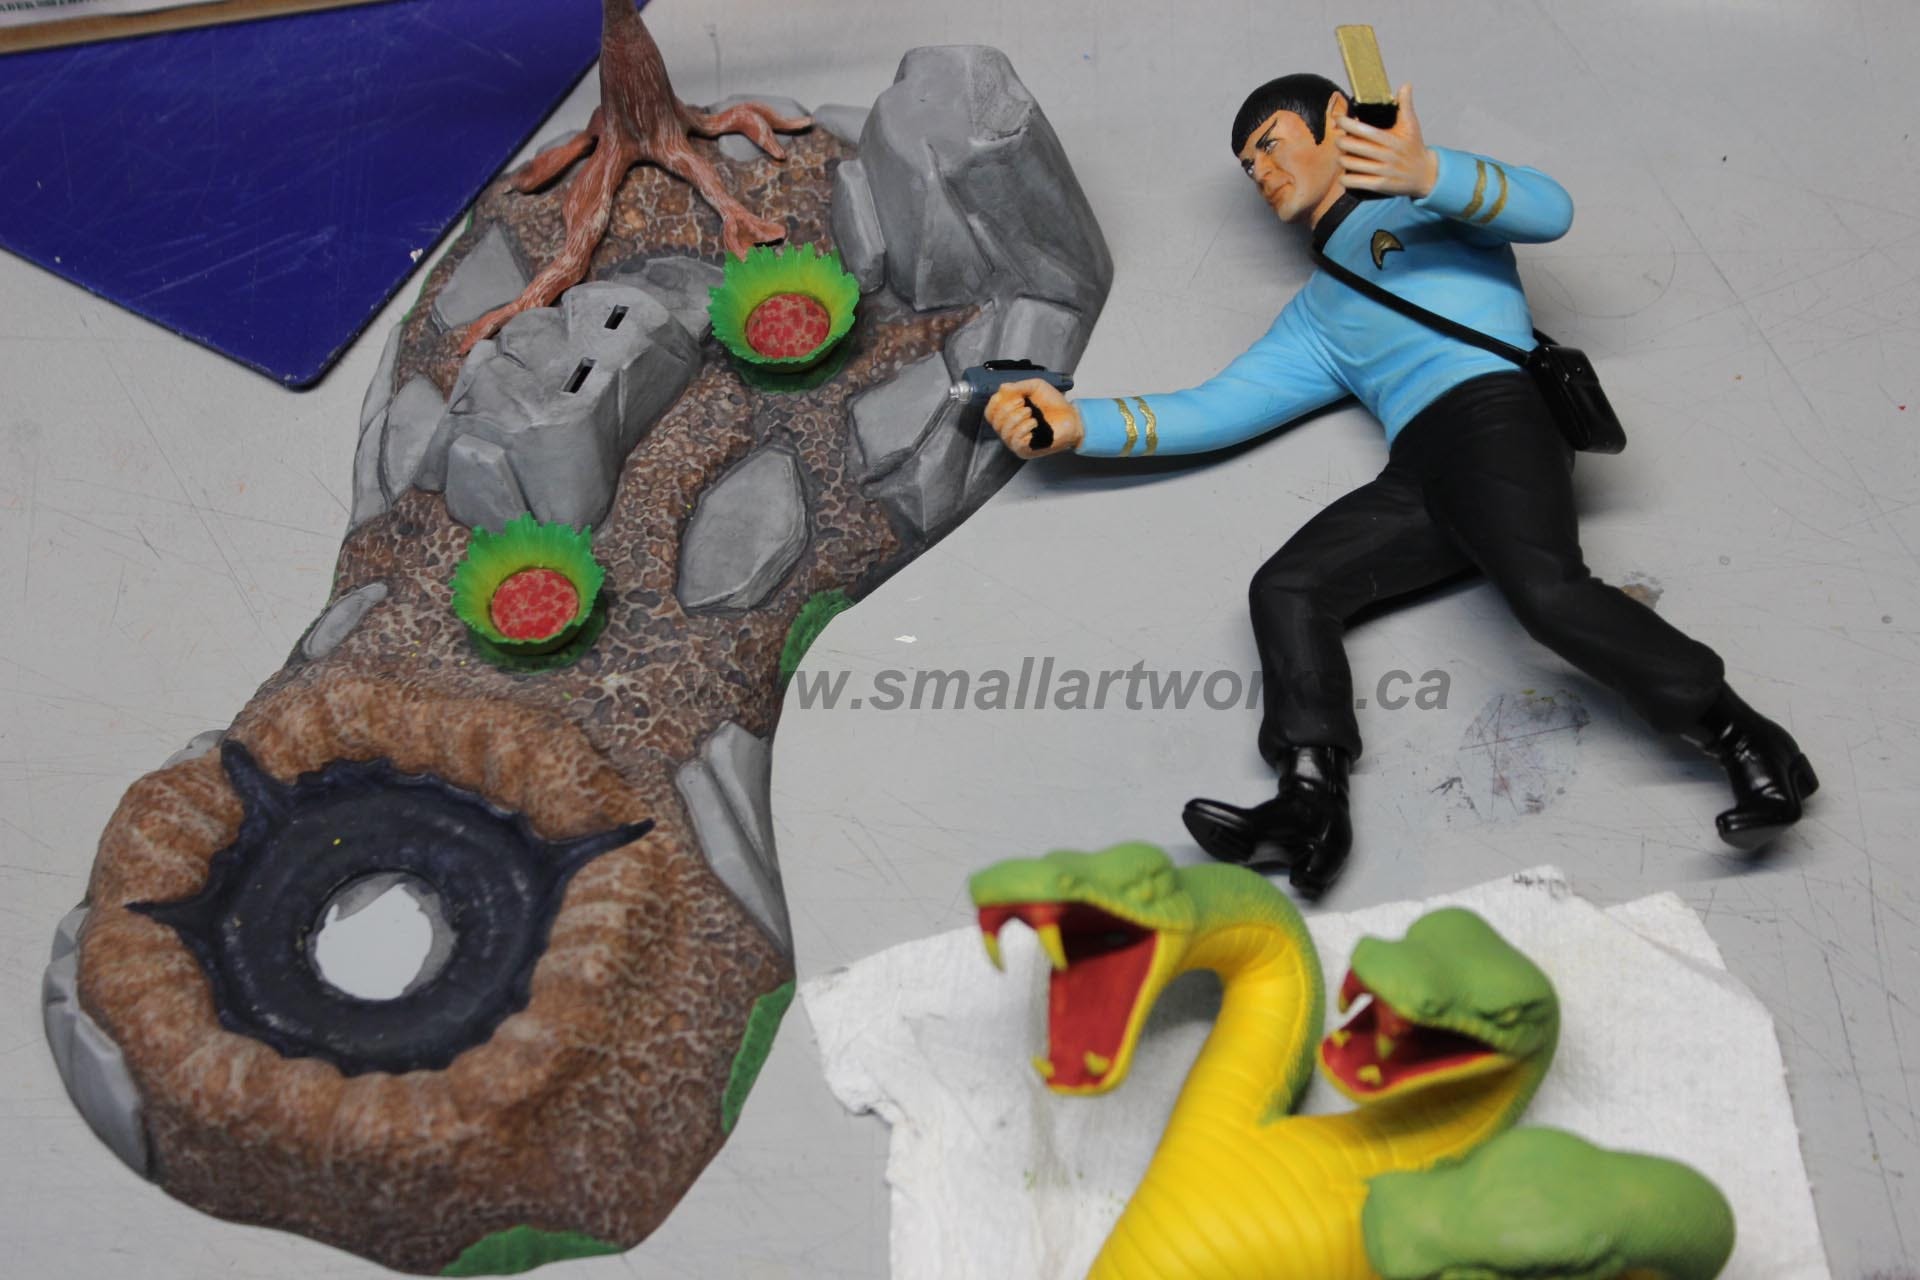
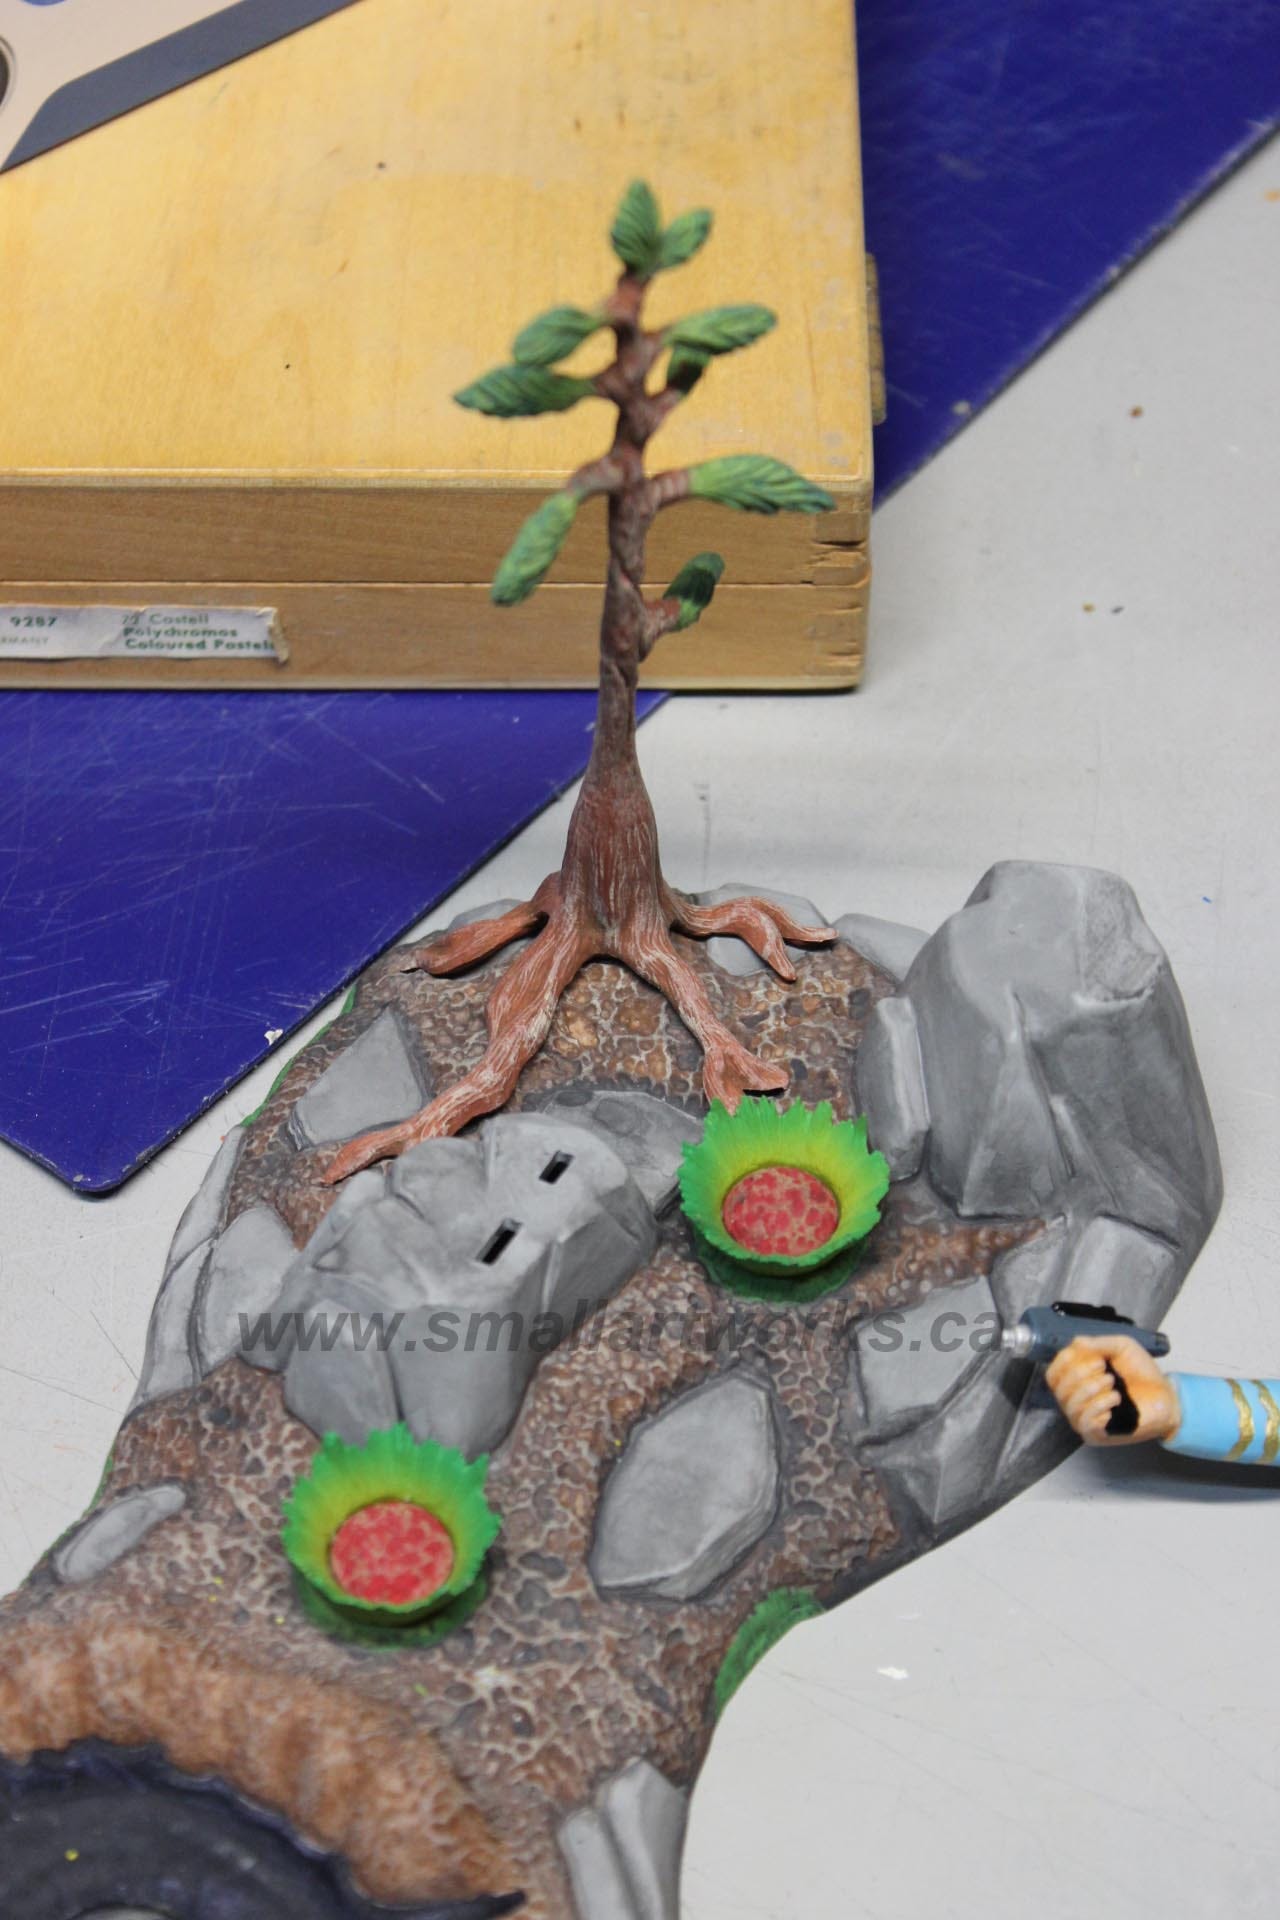
I used all kinds of painting techniques from rattle cans and airbrushing to washes and dry brushing, using chalks to create shadows and craft paints for some areas. Pretty much all the techniques I know how to use went into finishing this model, as the paint work is far more labour intensive than the simple assembly which mostly just required a clean up of seams and joints.
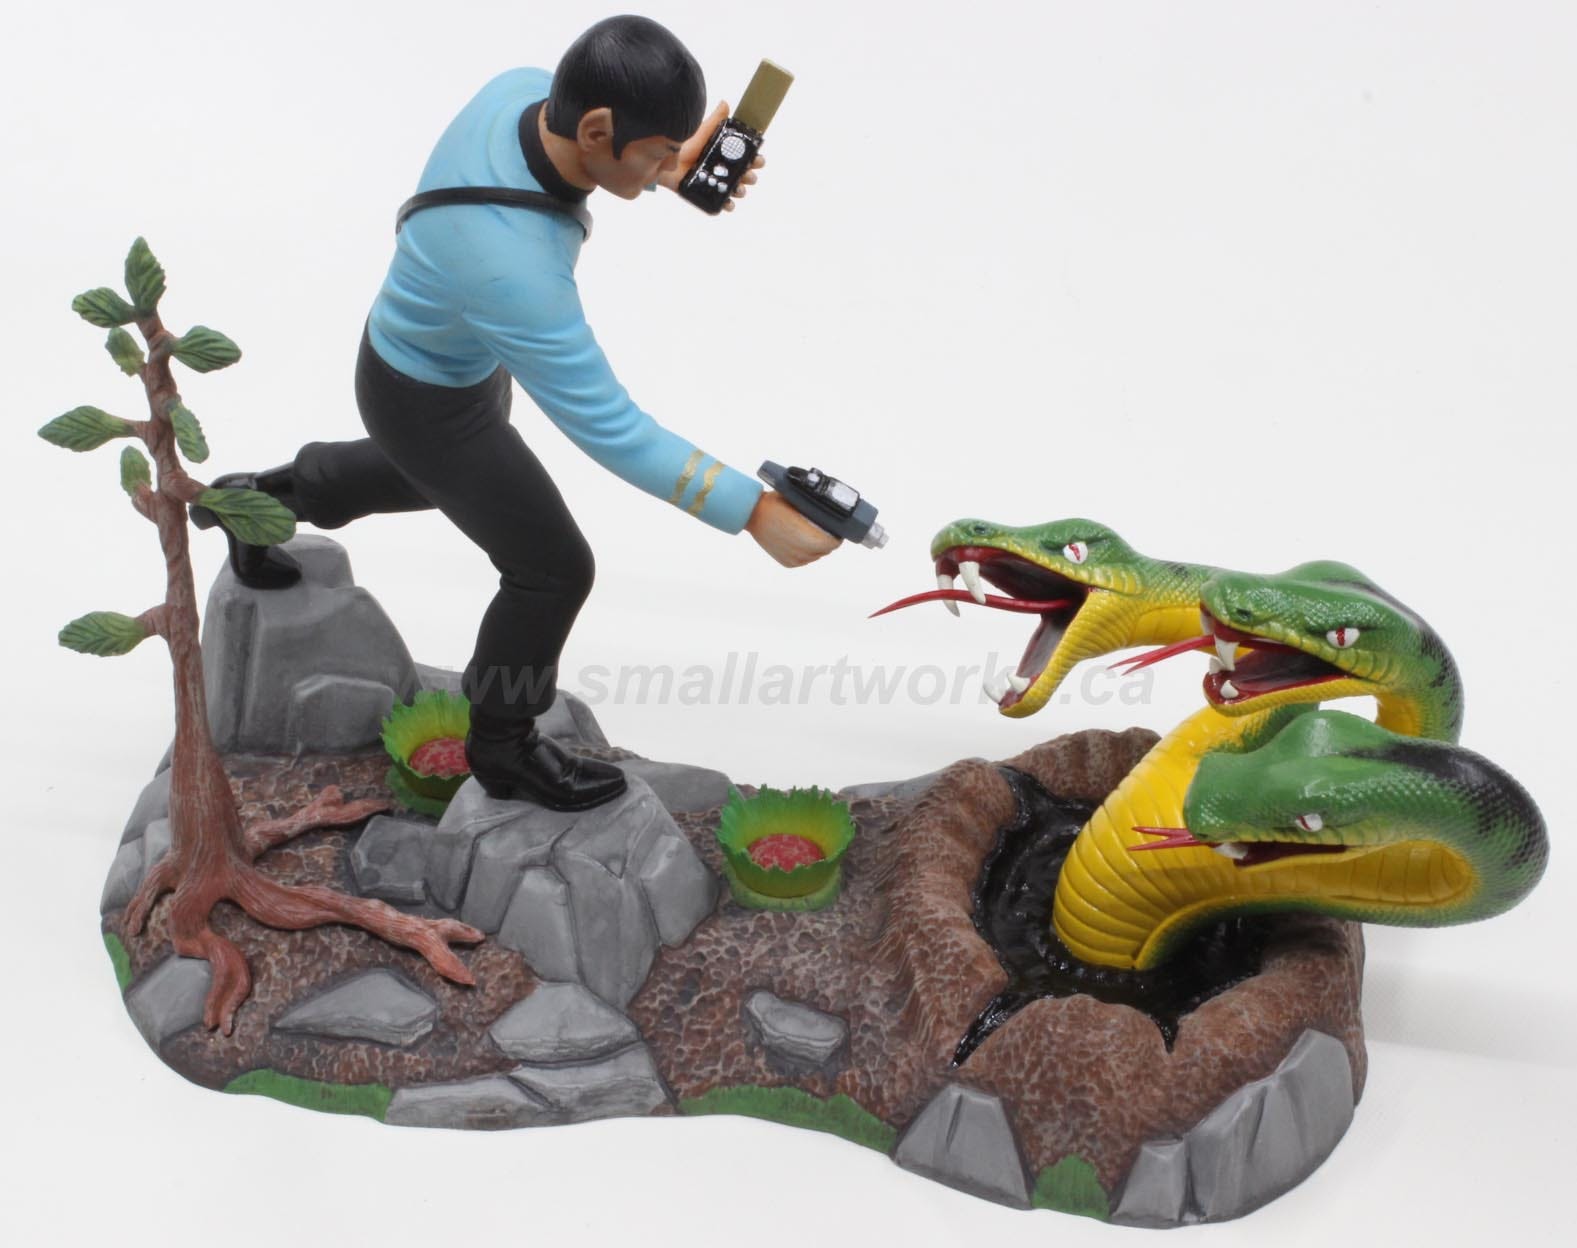
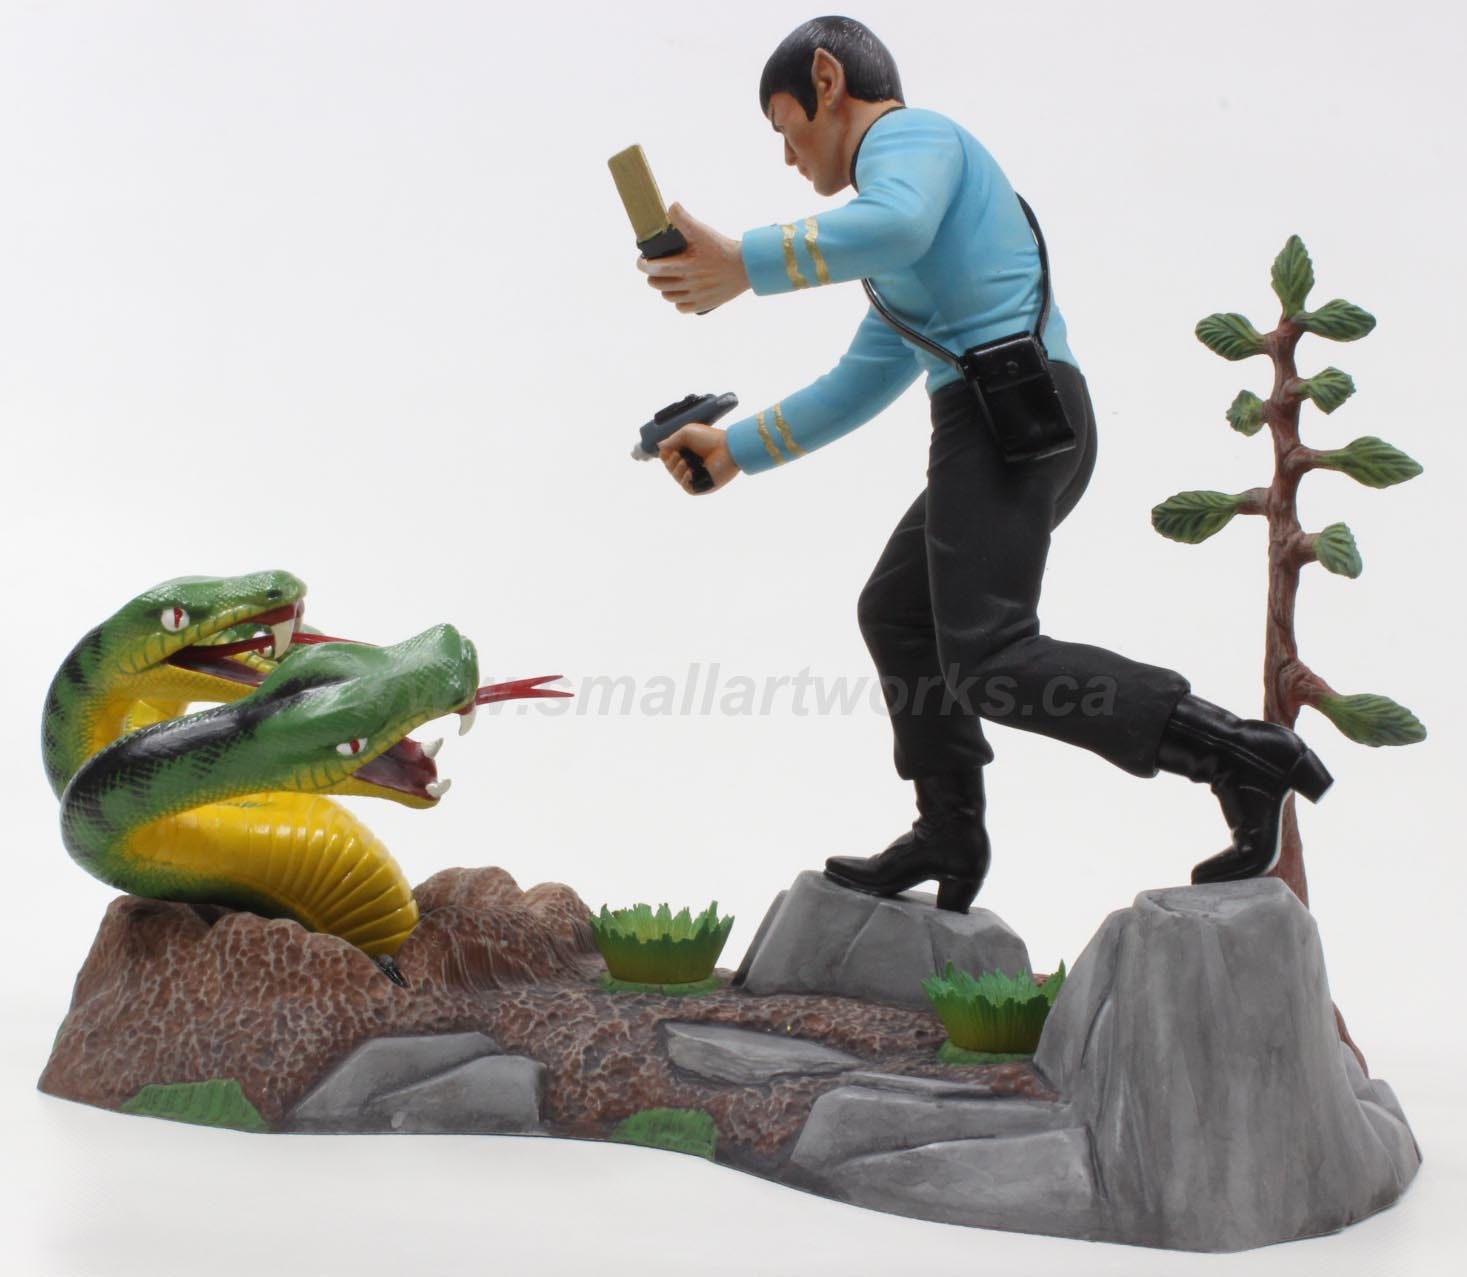

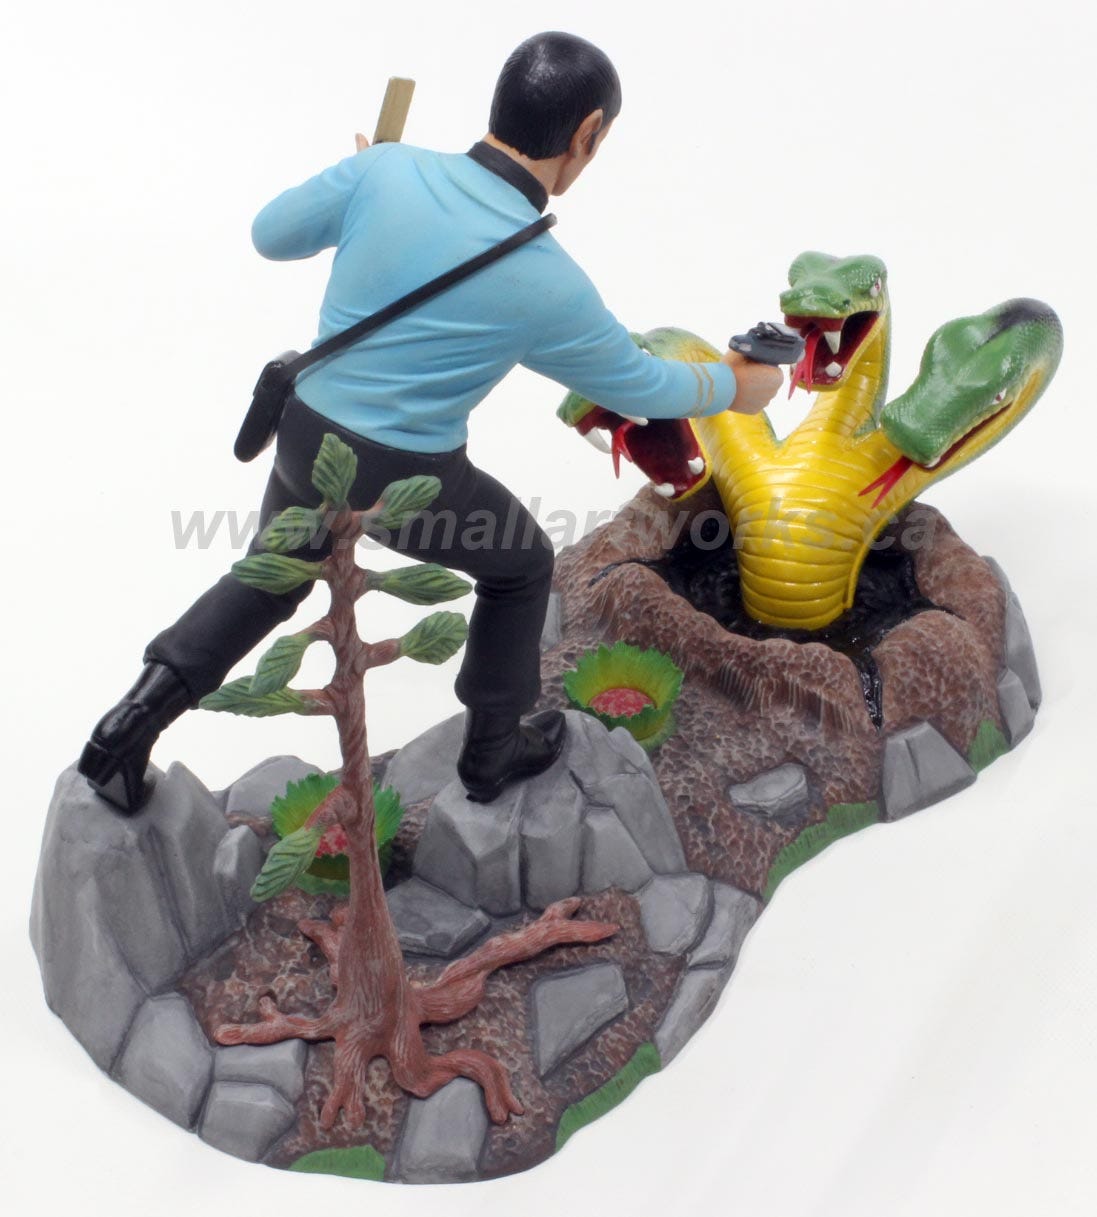
This model was a lot of fun to build and paint, and I hope you think I did the kit some justice.
Please subscribe to this Substack page if you’d like to be notified of new entries into this Small Art Works newsletter. Feel free to leave comments and ask questions in the comments section below.
This is really interesting. I especially enjoyed reading about the paint techniques and the history of the model.